


 Phan Van Hoang
- 03/08/2026
- 144
When evaluating an industrial bag sewing thread, many people only focus on breaking strength, elongation, or thread size. However, a thread spool with high breaking strength can still continuously produce lint, skip stitches, or break near the needle if its friction characteristics are not suitable for the thread path and machine configuration.
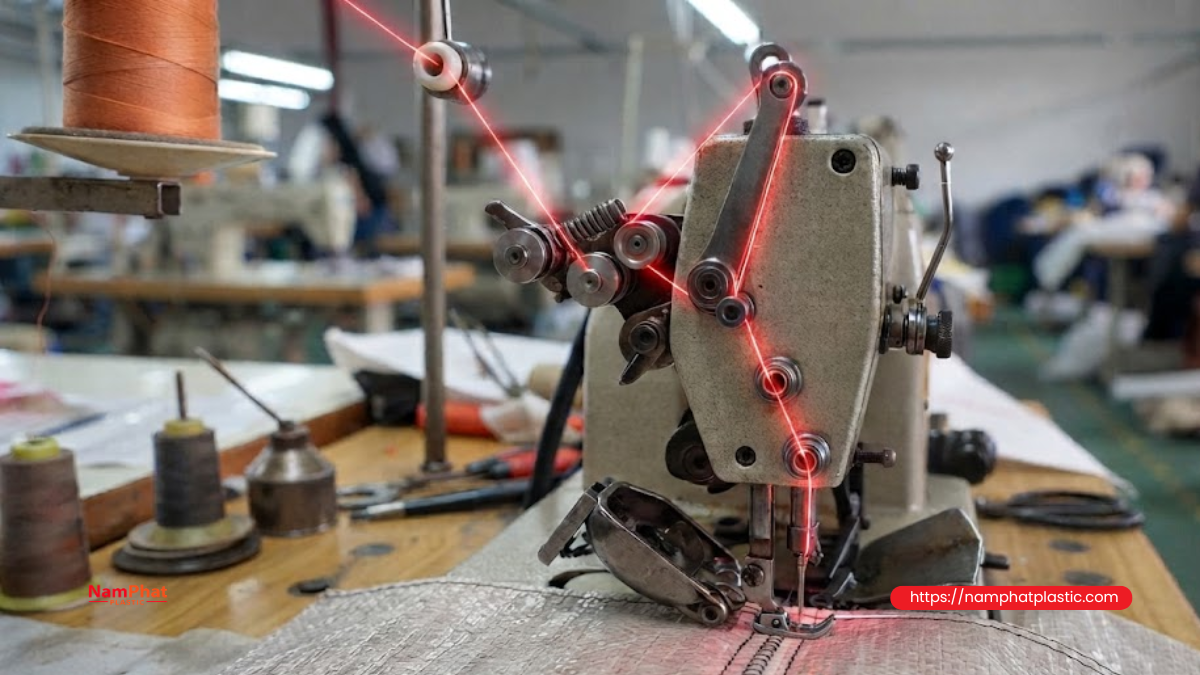
During sewing, the thread does not travel directly from the spool to the needle. It must unwind from the cone, pass through multiple thread guides, tension devices, tension discs, take-up lever, guide bars, and finally through the needle groove and eye. Each contact point creates a certain amount of resistance. If these resistances are too high or fluctuate unpredictably, dynamic thread tension can rise suddenly, significantly reducing machine runnability.
Machine runnability is therefore not simply a matter of whether the thread is “strong enough.” It is also the ability of the thread to pass through the entire machine mechanism with stable tension, low wear, and correct loop formation at the right time. Coats considers surface smoothness, abrasion resistance, uniformity, and stable stitch formation to be important components of sewability.
Table of Contents [Hide]
1. What are thread–needle friction and thread–guide friction?
1.1. Thread–needle friction
Thread–needle friction occurs mainly in two areas:
- The needle eye, where the thread continuously changes direction and slides along the edge of the eye.
- The long groove of the needle, which protects the thread as the needle passes through the material.
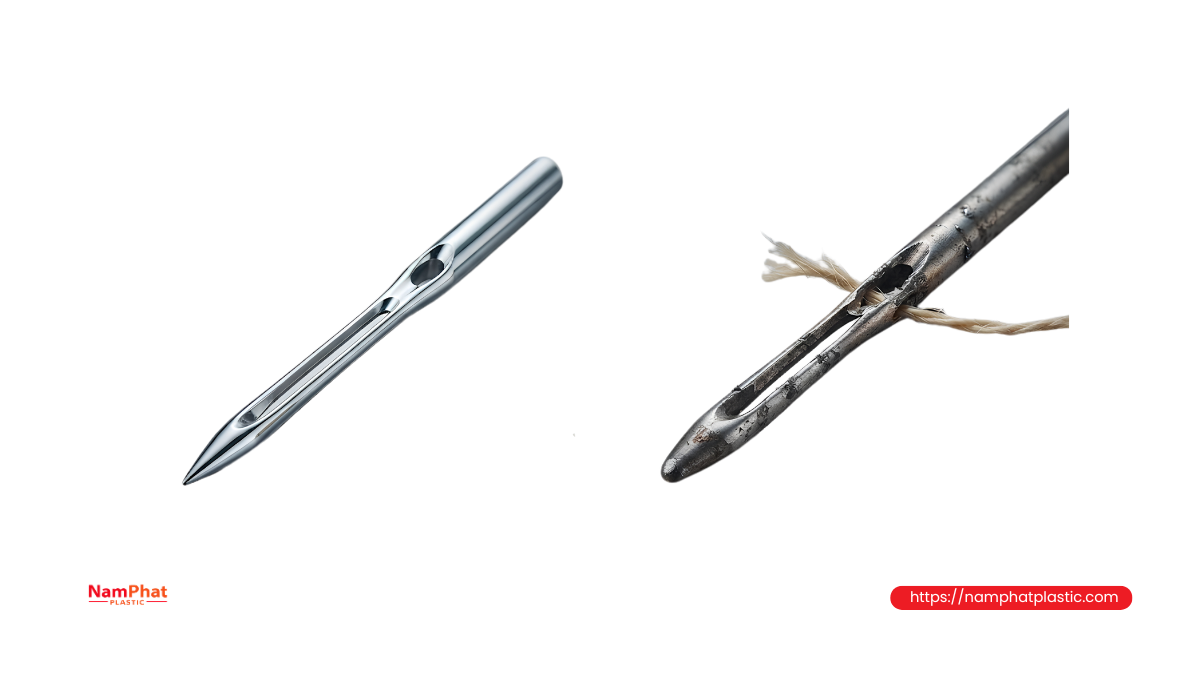
The long groove provides a “protective path” for the thread. When the needle is the correct size, most of the thread body remains inside the groove as the needle penetrates the bag. If the needle is too small for the thread, the thread cannot fit properly inside the groove and may become trapped between the needle and the material, significantly increasing friction.
An eye that is too narrow, has a sharp edge, is worn, or contains melted plastic residue can also scrape the thread surface with every sewing cycle. Coats notes that the needle is an area exposed to significant friction and heat when penetrating the material; the needle eye and groove should also be checked for roughness or melted fiber residue.
It should be distinguished that needle heat is primarily generated by friction between the needle and the material being sewn, not simply because the thread rubs against the needle. However, once the needle becomes hot, the thread passing through the eye absorbs heat while continuing to experience mechanical friction. These combined effects can weaken the thread, cause linting, open the plies, or produce melting at one point.
1.2. Thread–guide friction
Thread–guide friction occurs throughout the thread path before the thread reaches the needle, including:
- Rings on the thread stand.
- Upper guide bars above the cone.
- Pre-tension device.
- Thread tension discs.
- Thread control spring.
- Take-up lever.
- Guides on the machine head.
- Tubes, hooks or guide rings near the needle bar.
A guide that still looks smooth on the outside may have developed a very small groove from prolonged thread movement. The edges of this groove can catch fibers, scrape the thread, or create different resistance depending on the pulling angle.
Besides surface roughness, friction also depends on the thread wrap angle around the guide. The more the thread bends or wraps around a component, the higher the tension after that point can become.
2. Why can multiple small friction points create very high thread tension?
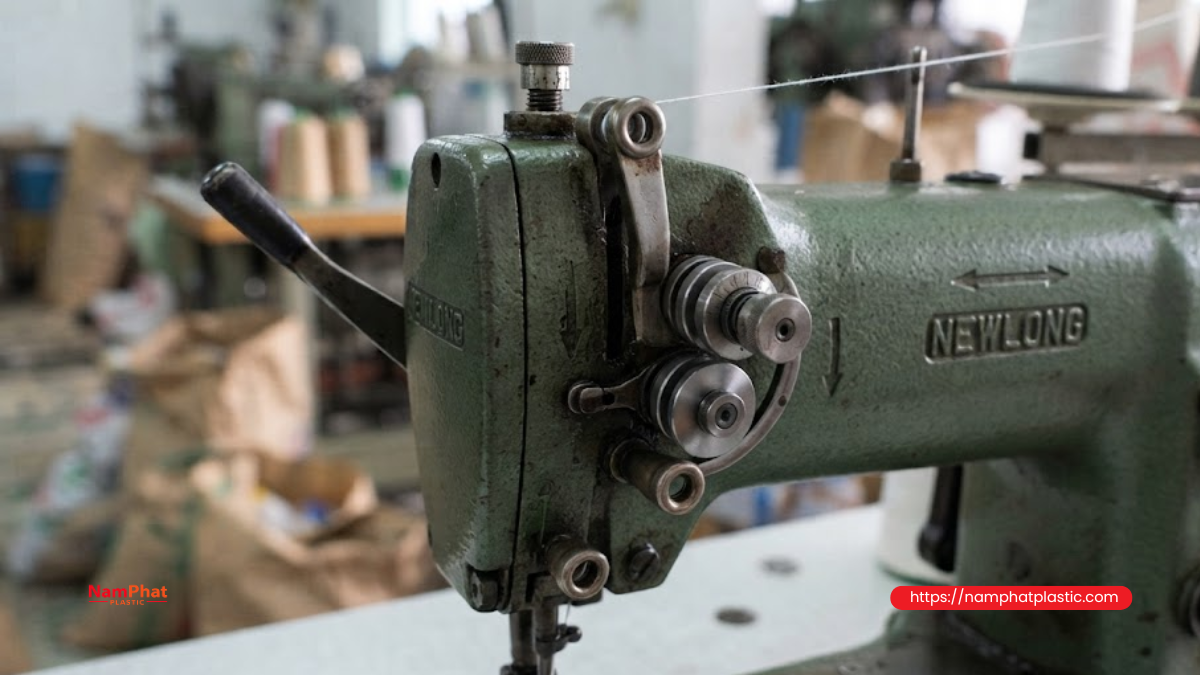
The relationship between tension before and after a curved surface can be approximately described by the capstan equation:
T₂ = T₁ × e^(μθ)
Where:
- T₁ is the tension before the contact point.
- T₂ is the tension after the contact point.
- μ is the friction coefficient between the thread and the guide surface.
- θ is the total wrap angle in radians.
The important point is that tension does not simply increase through ordinary addition. It can increase exponentially when the friction coefficient or wrap angle increases.
For example, a slightly dirty guide ring may only increase tension slightly. But if the thread also passes incorrectly through three or four guides, wraps an additional turn around a tension post, and encounters a needle eye that is too small, the total resistance can increase substantially.
Research on dynamic tension in industrial sewing machines shows that the position of guides and the amount of thread released through the tension device can significantly alter tension peaks during each sewing cycle. This explains why two machines using the same thread spool can have completely different running performance.
3. How does friction affect machine runnability?
3.1. Increasing dynamic thread tension
The thread tension adjusted at the tension discs is only one part of the actual tension. During operation, the thread is also affected by:
- Inertia as the cone unwinds.
- Friction at each guide.
- Movement of the take-up lever.
- Pulling force through the material.
- Friction at the needle eye.
- Hook or looper forces during stitch formation.
If friction at one point is unstable, tension does not simply increase evenly. Short tension peaks can appear. A thread with sufficiently high static breaking strength can still break because of repeated tension peaks occurring thousands of times.
Therefore, in production, tension stability can be just as important as average tension.
3.2. Causing lint and damaging thread structure
For spun polyester threads such as types commonly referred to as PE 20/6, PE 20/8 or PE 20/9, the thread surface consists of many short fibers. When passing over a rough surface, these fibers can be pulled outward, creating lint.
Friction continues to increase once the thread becomes hairy because the contact area becomes larger and fibers can catch on the guide. This creates a cycle:
Higher friction → more lint → higher resistance → further linting and weakening.
If twist or ply bonding is unsuitable, the plies may open around the needle eye. The broken end may appear frayed, untwisted or separated into multiple strands. A&E notes that fiber separation at the thread end can be associated with reduced ply cohesion and is influenced by thread construction, twist, uniformity, finish and friction characteristics.
3.3. Reducing thread loop size
As the needle descends and begins to rise, a thread loop must form behind the needle so that the hook or looper can enter it. The size and timing of this loop depend on elongation, twist, initial stiffness and thread tension.
If resistance along the thread path is too high, the thread remains under tension as the needle begins to rise. The loop may form too small, too late, or inconsistently. The hook may:
- Fail to catch the loop, causing a skipped stitch.
- Strike the thread instead of entering the loop.
- Scrape or cut the thread.
- Catch the loop inconsistently, producing alternating tight and loose stitches.
Suitable friction characteristics are therefore necessary for stable loop formation and balanced stitch formation.
3.4. Heating the needle and causing thermal damage
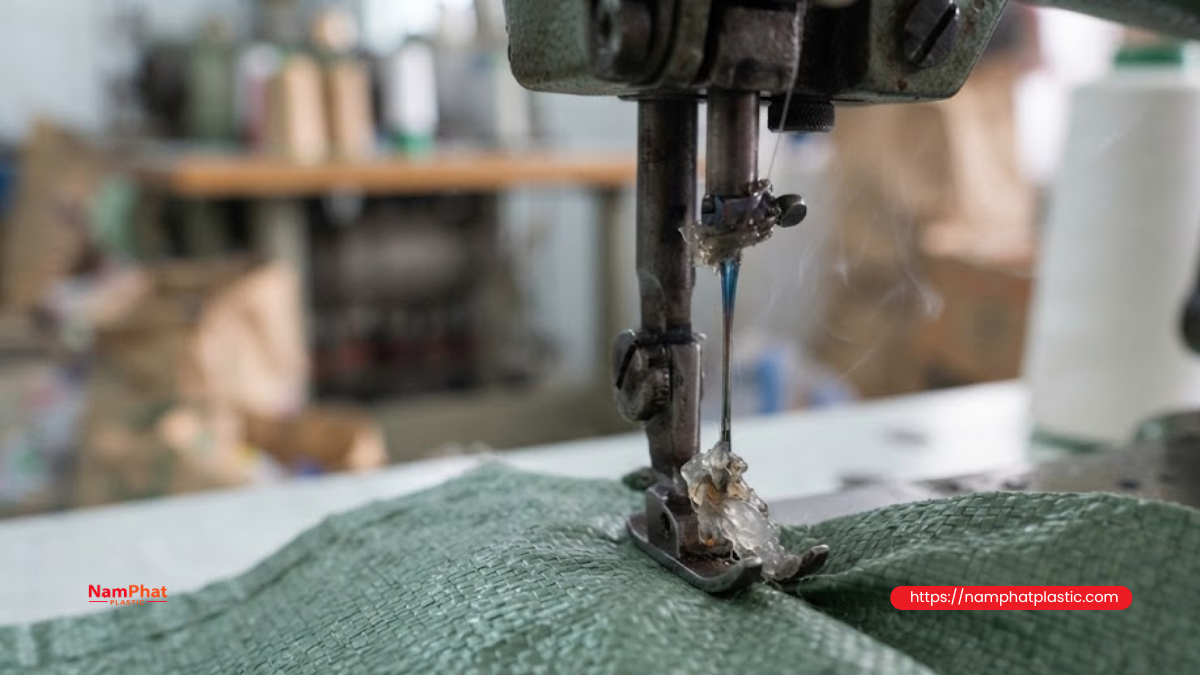
At high speed, the needle penetrates the material thousands of times per minute. Friction between the needle and the material is converted into heat. Synthetic thread passing through a hot needle eye may soften, lose strength or melt.
Thermal thread breakage may show several characteristic signs:
- The machine runs relatively well but the thread breaks when stopping or restarting.
- The thread end has a hard or shiny spot caused by melted material that later solidified.
- The needle eye or groove contains plastic residue, dye or burnt fibers.
- The machine runs at low speed but begins breaking thread when speed increases.
A&E states that thread lubrication has two main roles: helping the thread pass through guides with consistent tension and protecting the thread from needle heat.
3.5. Causing uneven seams
Unstable friction can cause the amount of thread delivered for each stitch to vary. Consequences include:
- Stitches that alternate between tight and loose.
- Wrinkled or puckered seams.
- Uneven loops on the underside of the bag.
- Abnormal thread appearance on one side.
- Changes in thread consumption per bag.
- Seams that are easier to pull back or open under load.
In many cases, operators try to solve the problem by tightening the tension. This may make the seam look tighter at low speed but can increase tension peaks and cause more thread breakage at production speed.
4. Does lower friction always mean better performance?
Not necessarily.
At ordinary guides, the goal should be low friction, smooth surfaces and stable resistance. However, the machine still requires a controlled amount of resistance at the tension discs to:
- Take up excess thread.
- Form the stitch at the correct position.
- Prevent the loop from becoming too large.
- Produce a sufficiently tight seam.
Therefore, friction should not be created randomly by wrapping the thread several times around a guide or excessively tightening the tension discs. Braking force should be deliberately created by the tension mechanism, while unnecessary resistance elsewhere should be minimized.
Simply put:
Friction at the tension device is intentional friction; friction caused by worn guides, a small needle eye or an incorrect thread path is harmful friction.
5. Thread factors that determine friction characteristics
Material and thread construction
Spun thread, core-spun thread, smooth filament thread and twisted multifilament thread do not have the same contact surface.
- Spun thread contains many surface fibers and provides good grip but can lint when exposed to sharp edges.
- Multifilament thread has a relatively smooth surface, but individual fine filaments can be cut or separated when passing over a scratch.
- Bonded thread generally has better ply cohesion but requires uniform coating.
- Thread that is too soft may become flattened inside the tension discs; thread that is too stiff may have difficulty forming loops at the needle.
Thread diameter
The larger the thread, the greater the contact area with the needle eye and guides. If the same needle is used when changing from 20/6 to 20/9, the clearance at the needle eye may no longer be sufficient.
Within threads made from the same 20/1 raw material:
- 20/6 is generally smaller and lighter.
- 20/8 has a larger cross-section.
- 20/9 is generally the largest of the three.
Therefore, 20/9 should not automatically be operated with all the same settings used for 20/6. The needle, tension, disc opening and thread path should be checked again.
Twist and ply stability
Insufficient twist can cause the thread to open and lint easily. Excessive twist can make the thread stiff and lively, making loop formation difficult or causing twisting.
Besides the number of twists, twist direction must also be compatible with the motion of the stitch-forming mechanism. If machine movement tends to untwist the thread, the plies can gradually open before reaching the needle and friction can increase rapidly.
Uniformity
Sections with thick spots, joints, knots or diameter variations will not pass through the needle eye with the same resistance. A section thicker than average may become trapped even though the rest of the thread runs normally.
This is why random thread breakage should not be assessed only through average breaking strength. It is also necessary to check:
- Diameter variation.
- Joints.
- Unevenly twisted sections.
- Twist consistency.
- Finish distribution.
Finish and lubricant
Lubricant helps reduce dynamic friction, protect the thread surface and transfer some lubrication to the needle. However, insufficient lubricant or uneven distribution can cause tension variation.
Conversely, adding too much oil manually can cause:
- Dust accumulation.
- Tension-disc slippage.
- Oil staining on bags.
- Changes in stitch grip.
- Migration of finish into the seam.
- Difficulty maintaining consistency between spools.
Recent studies also indicate that lubricant quantity can significantly affect needle temperature and the remaining mechanical properties of the thread. Lubrication therefore needs to be optimized rather than simply increased.
Cone winding
A cone wound too tightly, too softly, with a deformed shoulder or uneven layers can create unstable unwinding force.
The guide ring on the thread stand should be positioned close to the cone centerline. If it is offset, the balloon formed during unwinding can contact the cone edge or holder, causing cyclic changes in pulling force. A&E recommends positioning the thread-stand guide directly above the center of the cone to reduce resistance during unwinding.
6. Machine factors that increase friction
Worn guides or burrs
After prolonged operation, thread can wear a groove into a metal guide. The bottom of the groove may appear smooth while the edges are sharp, especially when the thread runs to one side.
Check:
- The first guide ring on the thread stand.
- The edge of the pre-tension opening.
- Scratched or rusted tension discs.
- The hole in the take-up lever.
- Guides near the needle bar.
- The final guide before the needle.
- The needle eye and groove.
- Needle plate, hook or looper surfaces if the thread makes contact.
Dust and residue inside the tension discs
Thread fibers, bag dust and oil can become compressed into a hard layer between the tension discs. As the thread passes through, this residue can cause irregular disc opening and closing.
The machine may:
- Run loosely at low speed.
- Develop sudden tension increases at higher speed.
- Feel light when pulled by hand at one moment and stiff at another.
The same tension knob position does not necessarily produce the same result each time the thread is threaded.
Incorrect thread path
Common mistakes include:
- Threading the wrong side of a guide.
- Adding an extra wrap around a guide post.
- Skipping a guide and allowing excessive thread vibration.
- Allowing the thread to rub against the machine body or cover.
- Positioning the cone too far from the guide center.
- Allowing threads from two cones to cross.
- Trapping the thread beneath a spring or washer.
An incorrect path can increase tension without any change to the tension knob.
Incorrect needle
The needle must be correct in three respects:
- Correct needle system.
- Correct size.
- Correct point type.
A needle that is too small causes the thread to become compressed inside the eye and prevents it from sitting properly in the groove. A needle that is too large reduces thread friction but may create an oversized needle hole, damage the bag material or affect seam integrity.
Coats suggests a simple test: thread a loose needle and hold the thread nearly vertically. If the needle is too small, it will remain near the top; if it is too large, it will fall too quickly; a suitable needle will slide down the thread gradually.
Damaged needle
A needle may be bent, worn, contaminated or have a damaged eye even when the defect is not obvious to the naked eye. A small scratch inside the eye can repeatedly scrape the thread at high speed.
When thread–needle friction is suspected, replacing the needle is often a faster and cheaper test than repeatedly adjusting tension.
Machine speed too high
As speed increases:
- Thread sliding speed through guides increases.
- Inertia during cone unwinding increases.
- Tension peaks become higher and shorter.
- Needle heat accumulates more quickly.
- The cooling time between stitches decreases.
A system that runs well at low speed but breaks thread at production speed may have a dynamic friction, unwinding or needle-temperature problem rather than insufficient thread breaking strength.
7. Signs of abnormal friction
| Symptom | Suspected location | Inspection method |
| Thread becomes frayed and plies separate near the needle | Needle eye too small, rough needle or incorrect needle size | Replace with a new needle and check needle–thread compatibility |
| Thread end appears flat, as if cut | Burr on guide, needle, needle plate or looper | Check each location with a fine cotton strand |
| Thread end has a hard or shiny spot | Needle heat or plastic residue inside the needle eye | Inspect after a high-speed run |
| Thread becomes hairy at one fixed location | Worn guide or sharp groove | Slowly pull thread through each guide to find the sticking point |
| Thread breaks when the machine stops | Hot needle transferring heat to thread remaining in the eye | Reduce speed and check cooling and thread finish |
| Random skipped stitches without thread breakage | High dynamic tension, small thread loop | Reduce tension and check the thread path |
| Runs well at low speed but fails at high speed | Dynamic friction, uneven cone unwinding or needle heat | Increase speed step by step and record when the fault begins |
| Only one machine has the problem | Guide, needle or machine adjustment | Swap the same thread spool between a good machine and the faulty machine |
| Multiple machines have the same problem with one thread lot | Uniformity, lubrication, twist or cone winding | Compare with a reference lot that runs well |
A&E recommends distinguishing thread-related problems from machine-related problems by their distribution: if the problem occurs on only one or two machines, the cause is often machine-related; if one thread color or lot causes problems across multiple operations, the thread should be checked first.
8. How to check friction at the machine in about 15 minutes
.png "Vệ sinh bộ căng và khoen dẫn giúp giảm ma sát khi may bao")
Step 1: Switch to a thread spool that has been confirmed to run well
Keep the machine and all settings unchanged and replace only the cone. If the problem disappears, inspect the thread lot, cone winding or finish. If the problem remains, focus on the machine.
Step 2: Disconnect power and inspect the entire thread path
Do not inspect with your fingers while the machine is running. After switching off the machine, remove the thread and inspect each guide from the cone to the needle.
Look for:
- Wear grooves.
- Rust.
- Oil residue.
- Thread fibers.
- Chipped edges.
Check whether the thread is rubbing against any component outside the intended path.
Step 3: Use cotton or a fine material to detect burrs
Pass a small cotton strand, fine thread or very thin knitted fabric through the guide. If fibers become caught, that location may have a sharp edge even if it is not visible.
Do not simply sand and continue using a guide that has developed a deep wear groove. Proper polishing or replacement is usually more stable.
Step 4: Pull the thread by hand through each section
Separate the thread path into sections:
- Cone to the upper stand guide.
- Stand guide to pre-tension device.
- Pre-tension device to tension discs.
- Tension discs to take-up lever.
- Take-up lever to needle.
- Through the needle eye.
Pull at a consistent speed. Any point where you feel sticking, vibration or abnormal resistance should be inspected separately.
Step 5: Check needle–thread compatibility
Install a new needle of the correct system and perform the needle sliding test on the thread. Also observe whether the thread fits properly inside the needle groove.
When changing from 20/6 to 20/8 or 20/9, repeat this step rather than simply increasing tension.
Step 6: Clean the tension device
Loosen the tension mechanism and remove fibers and dust between the discs. Check:
- Whether the disc surfaces are flat.
- Whether the discs are scratched.
- Whether the spring moves freely.
- Whether the thread passes correctly between the discs.
Step 7: Adjust tension from low to high
Do not begin by tightening the tension. Reduce tension until the stitch is slightly loose, then increase it gradually until the seam becomes stable.
The principle is to use the lowest tension that still produces a stable stitch. This is also the approach recommended by A&E when setting needle tension.
Step 8: Increase speed step by step
A practical sequence is:
- Run slowly to observe stitch formation.
- Run at medium speed continuously.
- Run near production speed.
- Stop after an extended run and inspect the thread end, needle and needle eye.
This helps distinguish mechanical faults that occur immediately from thermal problems that appear after heat builds up.
9. How to control thread friction in the factory
Establish a reference thread spool
Select a spool that has been confirmed to provide:
- Stable machine running.
- Low thread breakage.
- Good seam appearance.
- Compatibility with the current machine configuration.
This spool can serve as a reference when complaints arise or when a new production lot arrives.
Incoming inspection by lot
Besides breaking strength and spool weight, monitor:
- Thread count or fineness.
- Relative diameter.
- Twist and twist direction.
- Elongation.
- Hairiness.
- Joint uniformity.
- Cone unwinding behavior.
- Friction characteristics or pulling force through a standard guide.
- Amount and uniformity of finish.
There is no immediate need to invest in sophisticated friction-testing equipment. A factory can build a simple test fixture consisting of a cone holder, standard guide, fixed tension device and force gauge to compare new lots against the reference lot.
Measure pulling force instead of only recording the tension knob position
The same knob position does not guarantee the same tension because the tension discs may be dirty, the spring may have weakened or the thread path may have changed.
Where possible, measure thread tension after the tension device using a tension meter. The important value is not only average tension but also its fluctuation during continuous pulling.
Track thread-breakage indicators
Practical indicators include:
- Number of thread breaks per 1,000 bags.
- Number of breaks per operating hour.
- Number of rethreading events per shift.
- Maximum stable machine speed.
- Skipped-stitch rate.
- Machine downtime caused by thread.
- Number of needles replaced per shift.
These records help identify whether problems increase after changing a thread lot, needle type, machine speed or supplier.
10. Troubleshooting sequence when the machine continuously breaks thread
When a problem is detected, handle it in the following order:
- Check whether the thread has been threaded correctly.
- Clean the tension discs and all thread guides.
- Check for burrs, wear grooves and points where the thread rubs outside the intended path.
- Install a new needle of the correct system and size.
- Reduce tension to the minimum required level.
- Check cone unwinding and thread-stand position.
- Compare with a reference thread spool.
- Check twist, uniformity and finish of the thread.
- Increase machine speed gradually.
- Only consider needle cooling or speed reduction after basic causes have been eliminated.
Do not immediately solve the problem by adding oil to the thread spool, using a needle several sizes larger, or tightening the tension excessively. These methods may temporarily hide the symptom but can create other seam problems.
Frequently Asked Questions
1. Why can thread with high breaking strength still break continuously on the machine?
Breaking strength is normally measured by pulling a new section of thread at a relatively slow speed. In an actual sewing machine, the thread is exposed to abrasion, bending, jerking, heat and numerous tension peaks within a very short period.
A strong thread with an uneven surface, poor lubrication or a tendency to separate its plies may run worse than a thread with lower breaking strength but more stable friction characteristics.
2. Does thread breaking near the needle definitely mean the needle is the problem?
No. Damage may begin at a guide above the needle but the thread may only break when it reaches the needle area, where tension and heat are highest.
The entire thread path should be checked rather than only replacing the needle. However, a new needle of the correct size is always one of the first tests worth performing.
3. Should a larger needle be used to reduce friction?
It may be appropriate to increase the needle size by one level when the current needle eye is too small for the thread. However, an excessively large needle creates a larger hole in the material, potentially damaging the bag and affecting appearance or seam integrity.
The goal is to select a needle large enough for the thread to pass through the eye smoothly and fit properly in the groove, not simply the largest possible needle.
4. Should more oil be applied when the thread becomes hairy?
Not before identifying the cause. If the thread is becoming hairy because a guide has a burr or the needle eye is scratched, adding oil will not eliminate the sharp edge.
Additional oil can also attract dust, cause tension-disc slippage and stain the product. Thread lubrication should be controlled during the thread finishing process.
5. Are friction and thread tension the same thing?
No.
- Friction is the resistance created when the thread slides across a surface.
- Tension is the pulling force existing within the thread.
Friction at guides causes thread tension to increase or fluctuate. The tension device deliberately uses friction to create controlled tension.
6. Does changing from PE 20/6 to PE 20/9 require changing the needle?
Not always, but it should be checked. PE 20/9 generally has a larger cross-section than 20/6, so the existing needle eye may become too tight.
The tension discs, guides, cone unwinding and machine speed should also be checked. Do not simply adjust the tension knob and continue production.
Conclusion
Thread–needle and thread–guide friction are among the most important factors determining the runnability of industrial bag sewing thread. Excessive or unstable friction can increase dynamic tension, cause linting, ply separation, needle heating, skipped stitches and thread breakage even when the thread's initial breaking strength meets requirements.
A stable sewing system requires three conditions simultaneously:
- The thread has a uniform surface, twist and finish.
- The thread path is clean, smooth, correctly positioned and free from burrs.
- The needle has the correct system and size for the thread diameter.
Therefore, when a machine encounters a problem, the question should not simply be “Is the thread strong enough?” Another important question is:
How much friction and fluctuating tension does the thread experience before it actually enters the seam?
>>> See also:
- 0 Comment


