


 Phan Van Hoang
- 05/08/2026
- 152
During bag sewing machine operation, operators often focus on adjusting thread tension, replacing the thread spool, or checking the thread guide when thread breakage, skipped stitches, or unstable seams occur. However, one easily overlooked cause is a needle that has become bent, dull, or developed burrs around the needle point, groove, or eye.
The needle may still penetrate the bag mouth and form a seam for a certain period of time, but its surface is no longer in its original technical condition. As a result, the thread is continuously rubbed, scratched, or forced out of alignment during every sewing cycle. The consequence is thread fraying, overheating, loss of strength, and abnormal breakage even when the thread tension settings remain unchanged.
Early detection of needle deterioration not only helps reduce thread breakage but also limits skipped stitches, needle breakage, damage to the hook or looper, and weakening of the seam at the bag mouth.
Table of Contents [Hide]
1. Why can a small needle damage the thread?
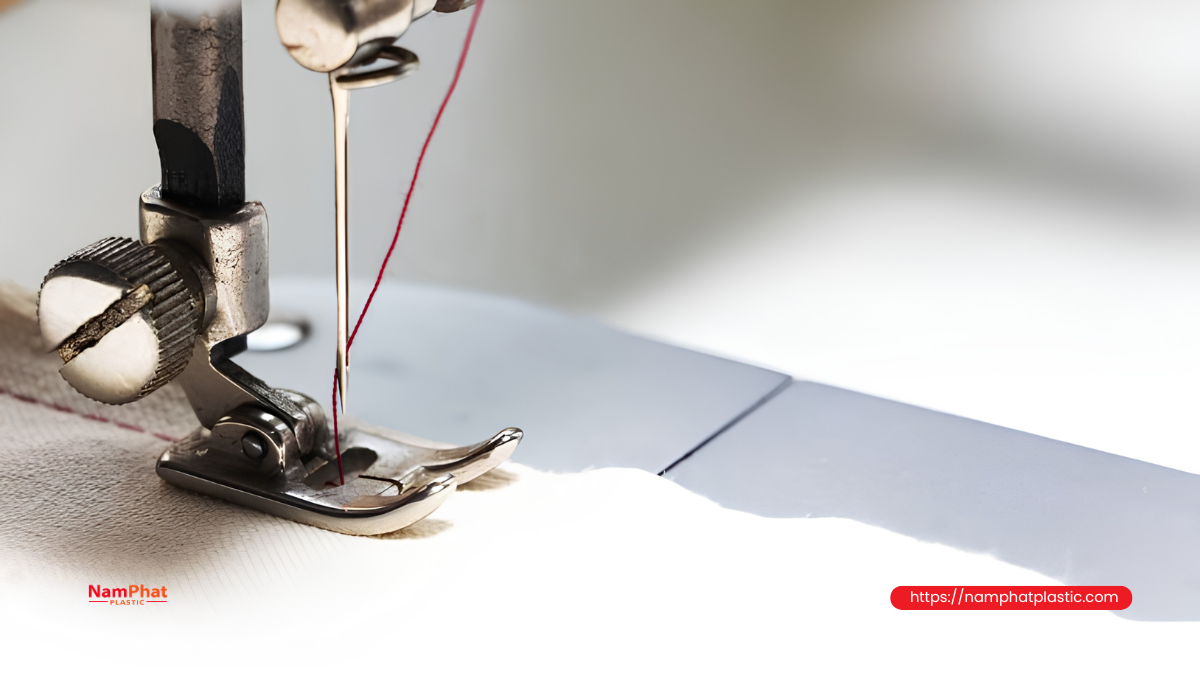
In a bag sewing machine, the needle must perform several functions simultaneously:
-
Guide the thread through the material layers.
-
Form a thread loop for the hook or looper to catch.
-
Keep the thread correctly positioned in the needle groove while penetrating the material.
-
Minimize friction at the needle eye throughout the downward and upward movement.
-
Coordinate precisely with the hook, looper, and needle plate.
When the needle is in good condition, the surface of the needle point, groove, and eye is relatively smooth. The thread is supported by the groove and moves through the eye without significant scratching.
When the needle is bent, dull, or burred, the thread can be damaged through three main mechanisms.
The thread is cut or scraped
A burr around the needle eye or groove acts like a small sharp edge. Each time the thread slides across it, some fibers or filaments are scraped away. After many cycles, the thread's load-bearing cross-section gradually decreases and eventually breaks.
The thread is compressed and subjected to excessive friction
A dull needle does not penetrate the material cleanly. Instead, it presses, pushes, and compresses the layers of the bag mouth. Penetration resistance increases, causing the needle temperature to rise and forcing the thread against the edge of the needle eye.
The thread follows the wrong path
A bent needle causes the needle point to deviate from the center of the needle plate hole and from its intended position relative to the hook. The thread may be pulled close to the wall of the needle hole, strike the needle plate, or be caught inconsistently by the hook.
These three types of damage may occur separately or simultaneously on the same needle.
2. Signs that a bag sewing machine needle is bent
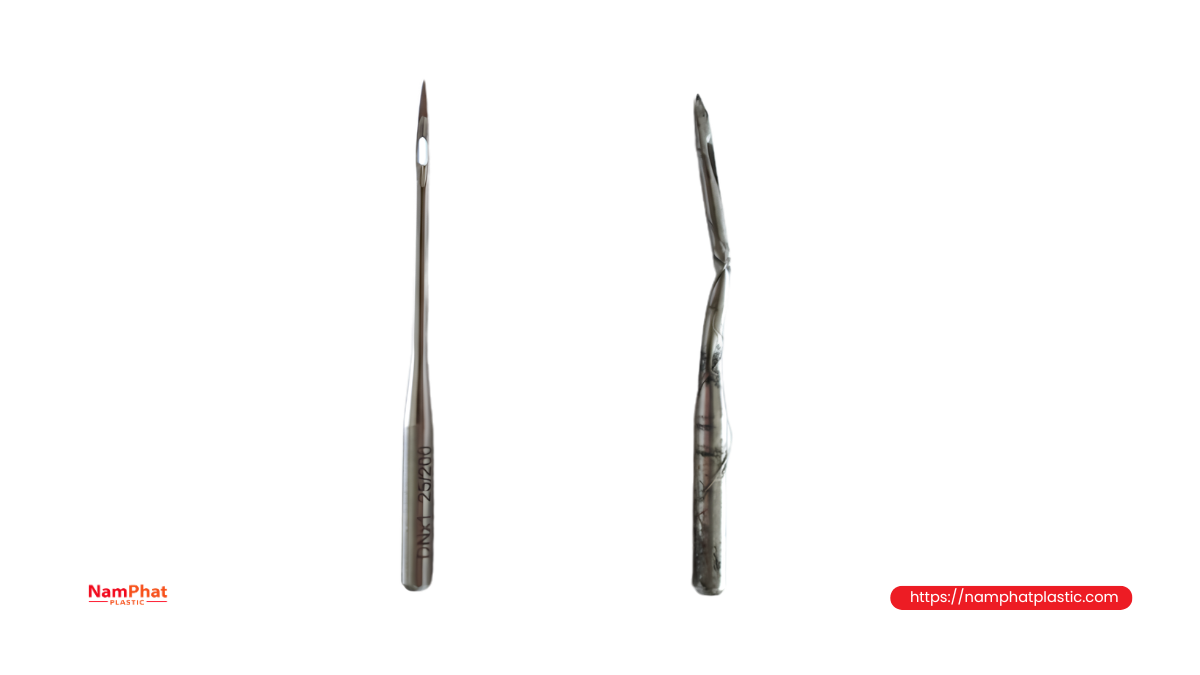
A bent needle is not always bent enough to be clearly visible to the naked eye. In many cases, a very small amount of bending is sufficient to change the needle point position when the machine operates at high speed.
2.1. The needle point does not travel through the center of the needle plate hole
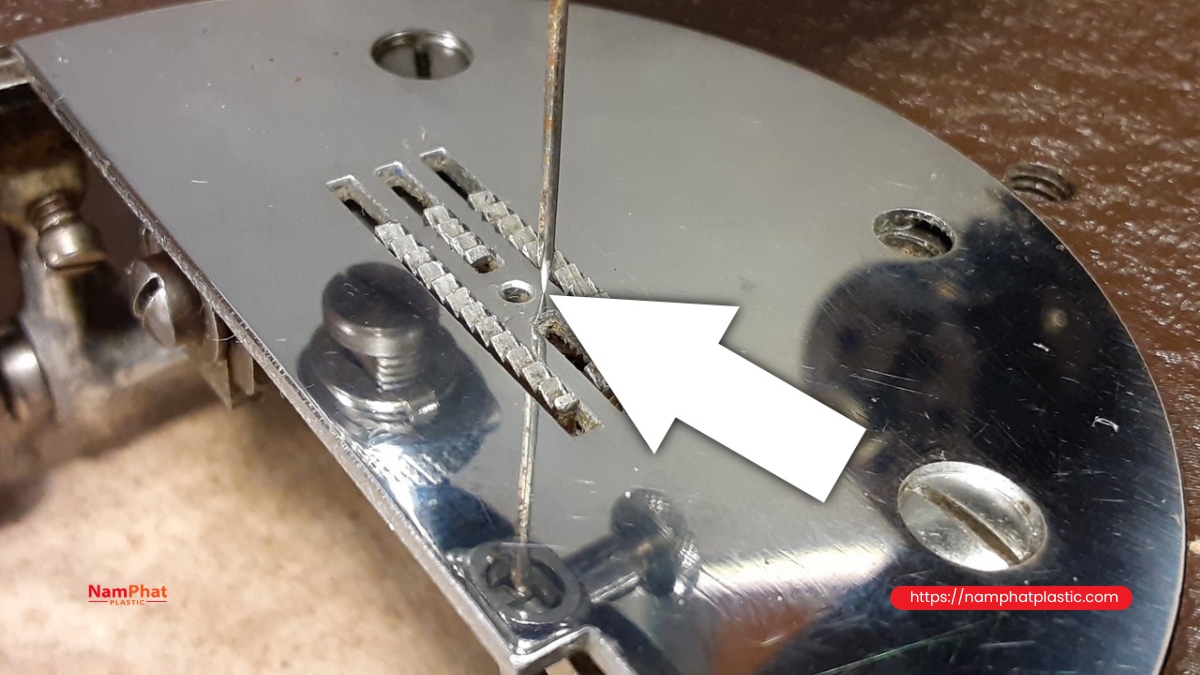
When the pulley is turned by hand, the operator may see the needle point moving close to one side of the needle plate hole instead of descending near the center.
If the deviation is greater, the needle may:
-
Lightly touch the wall of the hole.
-
Rub against the needle plate.
-
Strike the hook or looper.
-
Produce a "click" or "knock" sound during each cycle.
-
Leave a bright scratch mark on the needle plate.
This is one of the most important signs of a bent needle or an incorrectly installed needle.
2.2. Thread frays in a repeating cycle
A bent needle often causes the thread to rub against the same location repeatedly. As a result, thread fraying may appear in a regular pattern:
-
The machine runs for a certain distance before the thread begins to become fuzzy.
-
Small fibers begin to protrude from the thread near the needle.
-
The thread breaks after a relatively similar number of stitches.
-
Replacing the thread spool does not eliminate the problem.
If thread damage occurs regularly in a cycle, the needle path should be checked rather than simply increasing or decreasing thread tension.
2.3. The needle line on the bag mouth is misaligned
A bent needle can cause the penetration point to vary. Inspection of the seam may reveal:
-
Needle holes leaning toward one side.
-
Changing distance between the seam and the bag edge.
-
Some needle holes being larger than normal.
-
The thread tending to pull toward one side.
-
An imbalance between the two sides of the seam.
On multilayer woven PP bags or bag mouths with a PE liner, the deviation can be more noticeable because material resistance is not uniform.
2.4. The machine begins skipping stitches randomly
The hook needs to pass very close to the needle at a precisely defined point in time. When the needle is bent, the position of the thread loop changes, causing the hook to miss the loop during some cycles.
Symptoms may include:
-
The machine sews normally but occasionally misses a stitch.
-
Skipped stitches increase at higher speed.
-
The problem is less noticeable at low speed but returns when speed increases.
-
The problem is significantly reduced after replacing the needle.
Not every skipped-stitch problem is caused by a bent needle, but the needle should be checked first because replacement is simple and inexpensive.
2.5. Impact marks appear on the needle point
A bent needle may also show secondary signs such as:
-
One side of the needle point becoming polished or shiny from wear.
-
Longitudinal scratches on the needle shaft.
-
Small chips on the needle point.
-
Deformation around the needle hole.
-
Corresponding impact marks on the needle plate.
When impact marks are found, the needle should not simply be replaced and the machine returned to operation. The alignment of the needle plate, hook position, and needle-holding mechanism should also be checked.
3. Signs that the needle is dull
A dull needle is a condition in which the needle point loses its sharpness or becomes deformed after prolonged penetration through material. This is common when sewing woven PP bags, multilayer paper bags, coated bag mouths, or materials containing hard dust or particles.
3.1. The needle penetrates the material with greater resistance than normal
When the needle point is in good condition, it separates or penetrates the material with relatively low resistance. When the needle becomes dull, the point tends to press the material downward before penetrating it.
The operator may notice:
-
Stronger machine vibration.
-
A heavier, duller penetration sound.
-
Higher motor load when sewing thicker sections of the bag mouth.
-
A slight reduction in machine speed when passing through multiple layers.
-
The needle becoming hot more quickly than before.
On handheld machines, the operator may also feel more machine kickback or find the machine harder to control when passing through folded edges.
3.2. Needle holes in the bag are oversized, wrinkled, or deformed
A dull needle does not create a clean penetration hole but instead pushes the material fibers aside. The area around the needle hole may therefore:
-
Become wrinkled.
-
Stretch.
-
Develop white marks on woven PP.
-
Tear woven fibers.
-
Produce a hole larger than the needle shaft.
-
Pull and deform the PE film layer.
For multilayer bag mouths, oversized needle holes can reduce stitch holding strength and make the seam more susceptible to tearing when the bag is loaded.
3.3. The thread becomes hot, soft, or loses its firmness
Higher penetration resistance causes the needle temperature to rise. Heat is transferred to the thread at the needle eye, especially when the machine runs continuously at high speed.
Common signs include:
-
The thread near the needle becomes hotter than normal.
-
The thread becomes soft or flattened.
-
The thread surface loses its normal appearance.
-
The thread begins to develop loose fibers.
-
The thread breaks after the machine has been running continuously for some time.
-
The machine can run again after resting for several minutes, but the problem returns later.
The condition in which "the machine runs well at first but begins breaking thread after running for a while" is often associated with heat buildup at the needle. However, the thread finish/lubrication, tension, and smoothness of the thread guide should also be checked.
3.4. Fiber dust or material particles accumulate around the needle
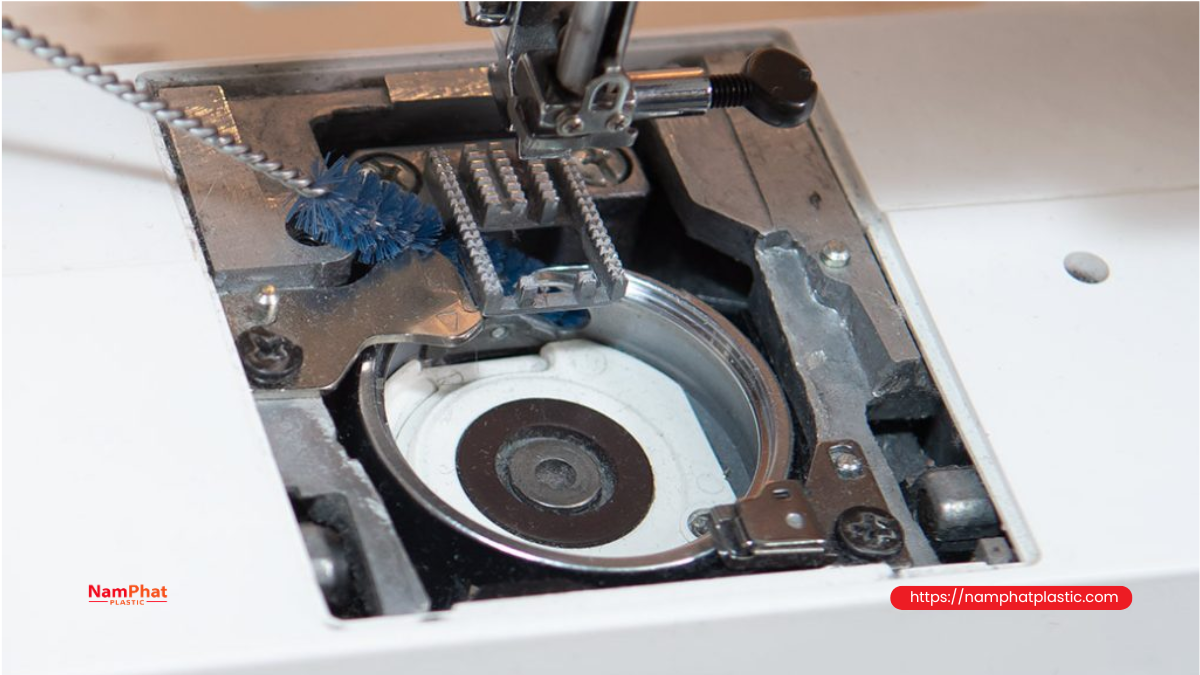
A dull needle makes material penetration rougher. Over time, the needle plate and presser foot area may accumulate:
-
PP fiber dust.
-
Paper fibers.
-
Small plastic particles.
-
Thread lint.
-
Residue around the needle plate hole.
If dust accumulation increases rapidly compared with normal operation, the needle point, needle size, and number of bag-mouth layers should be checked.
3.5. Seam tension becomes unstable
When the needle penetrates the material unevenly, the thread loop can also vary in size. The seam may show:
-
Stitches that alternate between tight and loose.
-
A neat upper side but an uneven lower side.
-
The stitch lock shifting.
-
The thread being pulled strongly at thicker material sections.
-
The machine being more likely to skip stitches at folded areas.
In this situation, simply adjusting the thread tension may make the problem worse if the actual cause is a dull needle.
4. Signs that needle burrs are scratching and cutting the thread
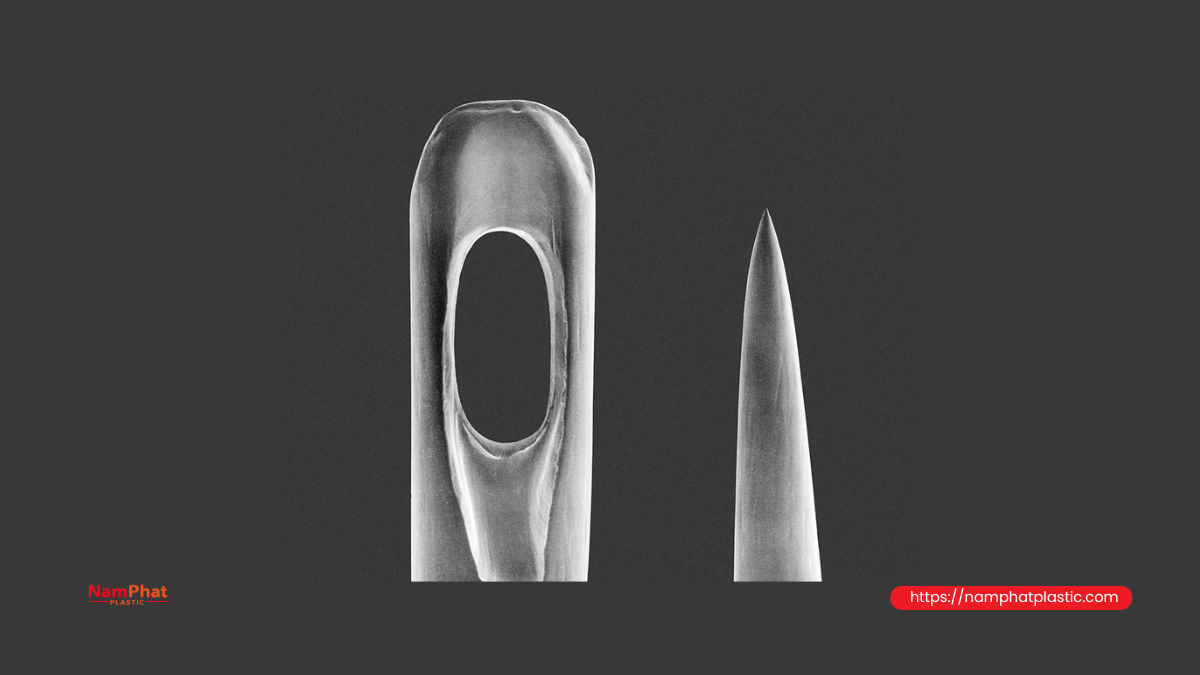
A burr is a very small sharp or rough metal ridge that appears on the needle surface. Burrs may be located at:
-
The edge of the needle eye.
-
Inside the needle eye.
-
The long groove of the needle.
-
The needle point.
-
The transition area between the needle eye and shaft.
-
An area of the needle that has previously struck the needle plate or hook.
Burrs can be so small that they are not visible to the naked eye, yet they may damage thread faster than a dull needle.
4.1. The thread becomes fuzzy right near the needle eye
The most typical sign is that the section of thread immediately above the needle develops protruding fibers resembling a small brush.
For multifilament or twisted thread, you may observe:
-
Some component fibers breaking first.
-
Outer fibers separating from the twisted structure.
-
The thread losing its round shape and becoming flattened.
-
Continuous scraping marks on the thread surface.
-
The thread breaking with a frayed rather than clean end.
If the broken thread end contains many loose fibers, friction and burrs should be checked. If the thread end appears cleanly cut, sharp edges around the needle plate, hook, or thread cutter should be inspected.
4.2. The thread breaks near the needle even when tension is not high
When the thread repeatedly breaks within a short distance of the needle while:
-
The thread spool is unwinding normally.
-
The tension assembly is not sticking.
-
The thread guides have no sharp edges.
-
The thread is not tangled.
-
Thread tension has already been reduced but the problem remains.
The cause may be located at the needle eye or groove.
Reducing thread tension may sometimes only delay the breakage rather than eliminate the burr that is scraping the thread.
4.3. The thread catches when threaded by hand
After removing the needle and cleaning it thoroughly, a new piece of thread can be passed through the needle eye and pulled gently from different angles.
The needle may have a burr if:
-
The thread catches in a particular direction.
-
Pulling in the opposite direction produces a rough sensation.
-
The thread surface becomes scratched after several passes.
-
Small fibers become caught on the edge of the needle eye.
Do not pull excessively hard, because this can obscure the burr location or cause the inspection to be misinterpreted due to pulling force.
4.4. Thread fibers accumulate on one side of the needle eye
If the burr is located on one edge of the needle eye, thread lint will often accumulate on that side. This can be a useful indicator when inspecting with a magnifying glass.
Symmetrical fiber accumulation on both sides may instead be related to a needle eye that is too small for the thread or excessive thread tension.
4.5. The machine operates normally immediately after replacing the needle
This is one of the fastest practical tests. If, after installing a new, correct needle:
-
The thread no longer frays.
-
Breakage frequency drops sharply.
-
The machine no longer skips stitches.
-
The seam becomes more stable.
-
Needle temperature decreases.
-
The machine runs more smoothly.
The old needle can be identified as one of the main causes.
However, if the new needle develops burrs again after a very short time, the machine should be checked for mechanical contact rather than simply replacing the needle repeatedly.
5. Distinguishing needle problems from thread and tension problems
Many symptoms of a damaged needle resemble thread-quality problems or machine-setting problems. The following table can be used as a reference:
| Symptom | Possibility of needle-related cause | Possibility of tension or thread-path cause |
| Thread fraying concentrated near the needle eye | Very high | Medium |
| Thread breaks after a relatively similar number of stitches | High | Medium |
| Problem disappears immediately after replacing the needle | Very high | Low |
| Thread breaks at multiple different locations | Medium | High |
| Thread jerks when the spool unwinds unevenly | Low | Very high |
| Machine skips stitches while the needle point is visibly off-center | Very high | Low |
| Needle gradually becomes hot during continuous operation | High | High |
| Thread breaks before reaching the needle | Low | Very high |
| Needle holes in the bag are oversized and wrinkled | High | Low |
| Needle makes metal-to-metal contact noise | Very high | Very low |
| Thread fibers accumulate on one edge of the needle eye | Very high | Low |
| Reducing thread tension does not stop thread abrasion | High | Medium |
Diagnosis should be based on multiple signs rather than a single symptom.
6. How to check whether a needle is bent, dull, or burred
Step 1: Stop the machine and work safely
Before touching the needle area:
-
Disconnect the power supply.
-
Wait until all components have stopped completely.
-
Allow the needle to cool if the machine has just been running continuously.
-
Note the needle installation position before removal.
-
Never inspect the needle by placing your hand near it while the motor is still running.
Step 2: Observe the needle while installed
Turn the pulley by hand and observe the needle movement.
Check:
-
Whether the needle travels through the center of the needle plate hole.
-
Whether the distance between the needle and hook changes abnormally.
-
Whether the needle touches any metal component.
-
Whether the needle shaft moves sideways while descending.
-
Whether the needle is incompletely inserted or incorrectly oriented.
Step 3: Remove the needle and check for bending
Place the needle on a clean, flat, sufficiently rigid surface. Roll the needle gently and observe:
-
Whether the shaft moves up and down.
-
Whether the needle point follows a deviating path.
-
Whether the gap between the shaft and the surface changes.
The old needle can be placed beside a new needle of the same type for direct comparison.
Note that some needle designs have shaft or groove geometries that are not completely symmetrical. Therefore, the rolling test is only a screening method and should be combined with observation of the needle path on the machine.
Step 4: Check the needle point
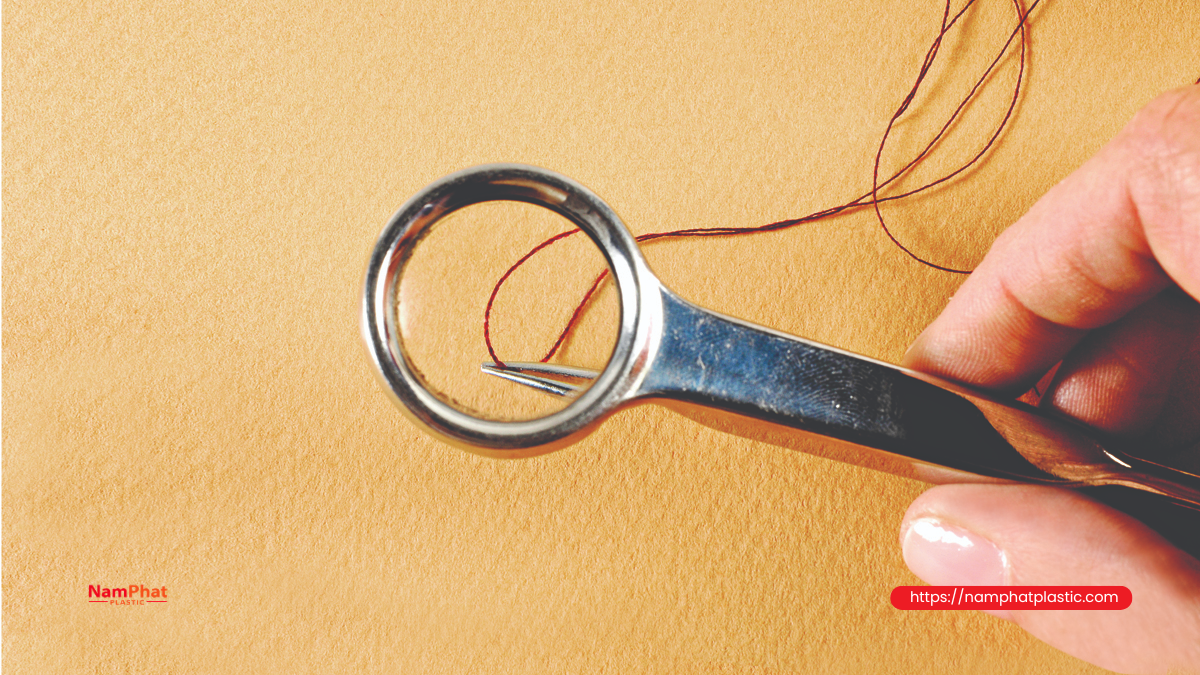
Use a magnifying glass or a phone camera with sufficient magnification to inspect the needle point.
Signs of a damaged needle point include:
-
A flattened point.
-
An asymmetrical point.
-
Chipping.
-
One side becoming polished or shiny from wear.
-
Impact marks.
-
A hooked or deformed point.
Do not rely only on your fingertip to inspect the needle because a small burr can cut the skin and tactile inspection is generally not accurate enough.
Step 5: Check the needle eye and groove
Clean away oil, dust, and thread lint before inspection. Then check:
-
Whether the needle-eye edge is uniform.
-
Whether the inside surface has scratches.
-
Whether the needle groove has dents or sharp edges.
-
Whether thread fibers remain trapped at a fixed location.
-
Whether the needle eye has become deformed after impact.
A piece of new thread can be passed through the needle eye and pulled gently to detect a catching point. Use the same type of thread currently running on the machine for a more representative result.
Step 6: Install a new needle for comparison
Use a new needle with the correct system, size, and installation orientation. After replacement:
-
Turn the machine manually for several cycles.
-
Make sure the needle does not make contact.
-
Run the machine at low speed.
-
Check approximately 10–20 seams.
-
Gradually increase to production speed.
-
Monitor thread fraying, skipped stitches, and needle temperature.
If the problem disappears, the old needle should be discarded and marked to prevent reuse.
7. Why do needles become bent, dull, or burred so quickly?
Selecting a needle that is too small for the thread
When the needle eye is too small:
-
The thread is heavily compressed as it passes through.
-
Friction at the needle eye increases.
-
The thread is more likely to become abraded.
-
Heat rises rapidly.
-
The needle is subjected to greater bending load while penetrating the material.
Needle size should be selected according to thread size, thread construction, number of bag-mouth layers, and material stiffness.
>>> See also: How to select needle size according to thread size and number of bag-mouth layers
Needle too thin for the thickness of the bag mouth
The bag mouth may consist of multiple layers:
-
Folded woven PP.
-
PE liner.
-
Paper tape.
-
Laminated film.
-
Overlapping material.
If the needle is too thin, the penetration force may bend the needle shaft during every cycle. After a short period, the needle may become permanently bent or strike the needle plate.
Incorrect needle orientation or incomplete insertion
Incorrect needle installation changes the position of the needle groove and loop-forming area. Common errors include:
-
Not pushing the needle fully into the stop position.
-
Rotating the needle to the wrong angle.
-
Insufficiently tightening the needle-clamp screw.
-
Dust or metal particles inside the needle clamp.
-
Using the wrong needle system with a different length.
These errors can cause the needle to strike the hook even when the needle itself is completely new.
Misaligned needle plate or hook
If the machine mechanism is out of alignment, a new needle can quickly be struck and develop burrs.
Particular attention is required when:
-
Several new needles become damaged consecutively.
-
The needle is scratched on the same side each time.
-
New impact marks appear on the needle plate.
-
The machine produces a metallic sound during each cycle.
-
The problem appears after repair or component replacement.
Hard foreign matter in the material
The bag mouth may contain:
-
Metal staples.
-
Sand.
-
Hard plastic fragments.
-
Adhesive residue.
-
Thick splices.
-
Abnormally folded sections.
When the needle strikes a hard foreign object, the point may chip or bend immediately.
Using a needle for too long
Even without impact, the needle point gradually wears through repeated material penetration. Waiting until the needle breaks or the machine continuously breaks thread before replacing it often creates greater losses than the cost of proactive replacement.
8. Consequences of continuing to use a damaged needle
Reducing the actual strength of the thread
The thread may not break immediately at the machine but may already have lost part of its constituent fibers due to abrasion. When the bag is filled, transported, or subjected to impact, the weakened section may break at the seam.
Making the seam easier to open
A dull needle creates larger holes and damages the structure of the bag mouth. Under tensile load, the material may tear around the needle holes instead of the thread simply breaking.
Increasing machine downtime
Every thread break requires:
-
Stopping the machine.
-
Re-threading.
-
Removing the defective seam section.
-
Sewing a replacement section.
-
Inspecting the bag.
-
Reducing speed for monitoring.
The total production loss can be much greater than the cost of proactively replacing the needle.
Damaging the hook and needle plate
A bent needle can strike precision components. Continued operation may:
-
Chip the hook point.
-
Create grooves in the needle plate.
-
Shift the timing of loop catching.
-
Break the needle and leave fragments inside the machine.
-
Create burrs on other components.
At that point, replacing the needle alone will not be enough to resolve the problem.
9. What to do when you suspect the needle is damaging the thread
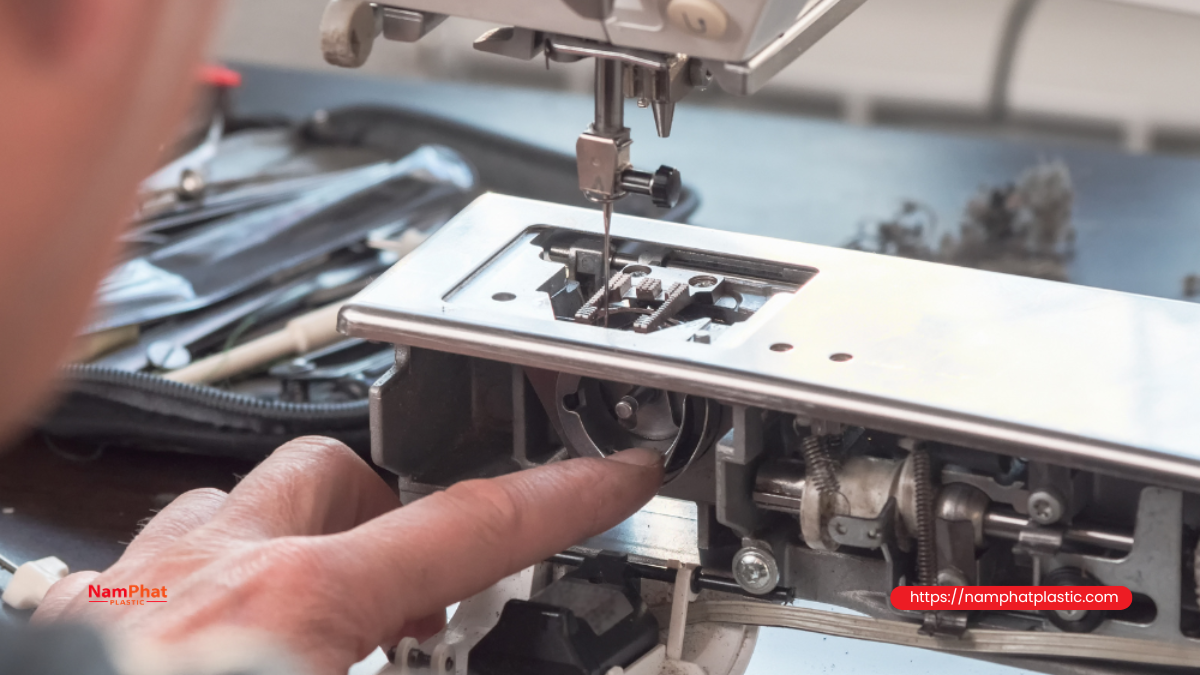
The following sequence is recommended:
-
Stop the machine immediately when thread fraying or impact noise is detected.
-
Record where the thread is being damaged.
-
Check the needle path by turning the pulley.
-
Remove the old needle and inspect the point, eye, and shaft.
-
Check the needle plate, hook, and thread guides near the needle.
-
Install a new needle of the correct type.
-
Re-thread the machine according to the correct thread path.
-
Return thread tension to the standard setting.
-
Run a test at low speed.
-
Inspect both sides of the seam.
-
Increase speed gradually and monitor needle temperature.
-
Record the cause if the problem occurs again.
Do not change too many parameters at the same time. If the needle, thread, tension, and hook are all adjusted simultaneously, it becomes difficult to determine the original cause.
10. Should a burred needle be ground or polished?
For stable production, a needle with burrs should not be reused by manually grinding or polishing it.
Using sandpaper, a grinding stone, or polishing tools can:
-
Change the shape of the needle point.
-
Deform the needle eye.
-
Create additional microscopic burrs.
-
Damage the needle's surface finish.
-
Make the needle unbalanced.
-
Cause unstable sewing results.
A safer and more economical solution is to replace the needle with a new one and then investigate the cause of abnormal needle contact or wear.
11. Preventive measures to keep the needle from damaging the thread
Standardize the needle type for each product
Each product code should have its own instructions covering:
-
Needle system.
-
Needle size.
-
Needle point type.
-
Thread type.
-
Number of bag-mouth layers.
-
Recommended machine speed.
-
Initial thread tension.
A single needle size should not be used for every bag configuration simply because the machine is still able to form a seam.
Check the needle before every shift
A quick inspection can include:
-
Whether the needle is installed in the correct orientation.
-
Whether the needle-clamp screw is tight.
-
Whether the needle point is chipped.
-
Whether the needle shaft is bent.
-
Whether thread lint is caught in the needle eye.
-
Whether the needle travels through the center of the needle plate.
The inspection takes little time but can prevent multiple machine stoppages during a shift.
Replace needles according to a planned schedule
A fixed replacement interval should not be applied to every factory because it depends on:
-
Machine speed.
-
Sewing material.
-
Number of bag-mouth layers.
-
Continuous operating hours.
-
Needle quality.
-
Dust and contaminant levels.
A factory can establish its own replacement interval by recording the operating hours or number of bags produced from the time a new needle is installed until defects begin to appear.
Do not mix used needles with new needles
Needles removed from the machine because of suspected defects should be:
-
Broken or clearly marked.
-
Placed in a separate collection container.
-
Never returned to the new-needle box.
-
Never transferred to another machine for "continued use."
-
Recorded if abnormal damage is found.
Check the machine if a new needle fails quickly
If a new needle becomes bent or burred after only a short operating period, check:
-
Alignment between the needle and needle plate.
-
Hook or looper position.
-
Needle-bar play.
-
Needle clamp.
-
Needle-clamp screw.
-
Machine vibration.
-
Compatibility between the needle and material.
-
Operating speed at thick bag-mouth sections.
Simply continuing to replace needles will not solve the mechanical root cause.
12. Five-minute quick inspection checklist
| Inspection item | Pass | Fail |
| Needle system and orientation are correct | ☐ | ☐ |
| Needle is fully inserted into the correct position | ☐ | ☐ |
| Needle-clamp screw is secure | ☐ | ☐ |
| Needle shaft is not bent | ☐ | ☐ |
| Needle point is not dull or chipped | ☐ | ☐ |
| No thread lint is caught in the needle eye | ☐ | ☐ |
| Needle groove has no scratches | ☐ | ☐ |
| Needle travels through the center of the needle plate hole | ☐ | ☐ |
| Needle does not contact the hook or looper | ☐ | ☐ |
| Thread passes through the needle eye smoothly without catching | ☐ | ☐ |
| Test run produces no thread fraying | ☐ | ☐ |
| Seam has no skipped stitches | ☐ | ☐ |
If any critical item fails, the machine should not be returned to high-volume production until the issue has been resolved.
Frequently Asked Questions
1. Can a needle damage the thread even if it still looks straight?
Yes. A needle may have a very small burr around the eye or point even when the shaft still appears straight. This is why inspection with magnification and a thread-through-the-eye test are useful.
2. Why does the machine only start breaking thread after running for a while?
One possible cause is heat accumulation at the needle. A dull needle, incorrect needle size, excessive tension, high speed, or insufficient thread finish/lubrication can all cause temperature to increase over time.
3. Does a bent needle always break?
No. A needle can be slightly bent and continue operating for many hours while causing skipped stitches, thread abrasion, and unstable seams. Needle breakage is more likely when the bending becomes severe or the needle strikes the needle plate or hook.
4. If replacing the needle does not stop thread fraying, what should be checked next?
Check:
-
Needle plate hole.
-
Hook or looper.
-
Thread guides.
-
Tension assembly.
-
Presser foot.
-
Thread-cutter edge.
-
Thread unwinding path from the spool.
-
Uniformity of the thread finish/lubrication.
A component that has previously been struck by the needle may have developed a burr and continue cutting the thread even after the needle has been replaced.
5. Should thread tension be reduced when the thread frays near the needle?
It can be reduced slightly for testing, but it should not be considered the primary solution. If the needle eye has a burr, reducing tension does not remove the sharp edge that is scraping the thread.
6. When should the machine be stopped immediately?
The machine should be stopped immediately when there is:
-
A metal-to-metal needle impact sound.
-
Clearly visible needle deviation.
-
Rapid thread fraying.
-
Lateral needle vibration.
-
Continuous skipped stitches.
-
Large tears around needle holes in the bag.
-
A risk of needle breakage.
Conclusion
A bent, dull, or burred needle is a common but often overlooked cause of thread breakage, thread fraying, and skipped stitches on bag sewing machines. Important signs include an off-center needle path, impact noise, thread fuzzing near the needle eye, oversized penetration holes, rapid needle heating, and defects that disappear after replacing the needle.
When an abnormality is detected, the needle should be replaced before making major adjustments to thread tension or the stitch-forming mechanism. At the same time, the needle plate, hook, looper, and thread guides should be checked to ensure that the new needle will not continue to be damaged.
A short needle inspection routine before each shift, combined with correct needle-size selection according to thread size and the number of bag-mouth layers, can reduce thread breakage, improve seam stability, and minimize unplanned machine downtime.
>>> See also:
- 0 Comment


