


 Phan Van Hoang
- 05/08/2026
- 158
During bag-mouth sewing, many people tend to choose the needle according to a simple rule: the larger the thread, the larger the needle; the more layers at the bag mouth, the larger the needle should be. This reasoning is not entirely wrong, but it is not sufficient to ensure stable machine operation.
The correct needle size must meet three requirements at the same time:
-
The needle eye and groove must be wide enough for the thread to pass through without excessive friction.
-
The needle shaft must be rigid enough to penetrate the entire thickness of the bag mouth without bending or deflecting.
-
The needle must not be so large that it creates oversized sewing holes, cuts PP woven fibers, or weakens the bag edge.
Therefore, the appropriate principle is not to use the largest needle that the machine can accept, but:
Choose the smallest needle that still allows the thread to move freely and penetrate the bag mouth stably at the actual production speed.
Groz-Beckert also recommends that the needle should be “as thin as possible but as thick as necessary.” When the needle is too small for the thread, the risk of thread breakage and skipped stitches increases; when the needle is too large, material damage may increase.
1. Distinguishing needle system and needle size for bag sewing
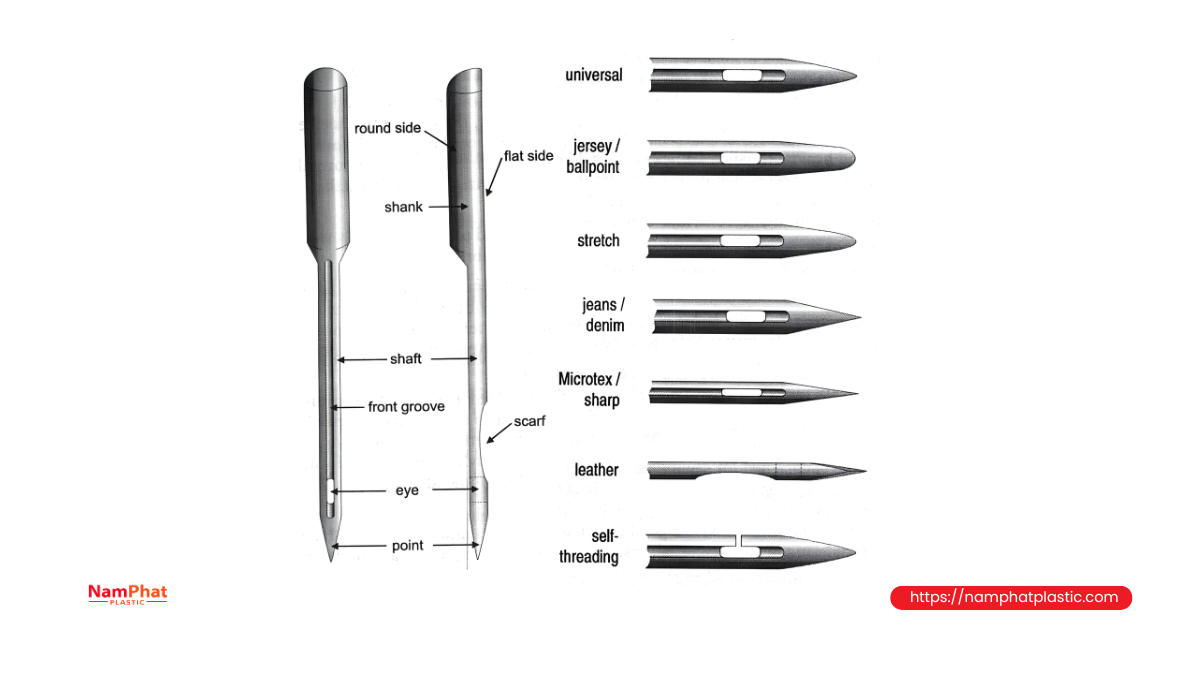
Before selecting the needle diameter, it is important to clearly distinguish between the needle system and needle size. These are two different specifications but are often confused.
1.1. What is a needle system?
The needle system defines the overall construction of the needle, including:
-
Diameter and shape of the needle shank.
-
Length from the shank to the needle eye.
-
Position of the needle eye.
-
Shape of the long groove.
-
Position of the scarf for the hook or looper to catch the thread loop.
-
Needle-point shape.
-
Method of installing the needle into the needle bar.
Some needle systems commonly found on bag-sewing machines include:
-
DNx1 or DNx1-25.
-
144GS.
-
9848GF.
-
-
80800 or model-specific codes.
Two needles of the same size, such as size 200, but from different needle systems cannot necessarily replace each other. A difference in length or eye position alone can alter the relationship between the needle and looper, resulting in skipped stitches, needle collision, or needle breakage.
According to Union Special documentation, the needle-type code represents characteristics such as the shank, point, length, groove and finish, while the needle-size code represents the maximum diameter of the needle shank.
1.2. What is needle size?
.png "Các cỡ kim may bao")
Industrial bag-sewing needle sizes are commonly indicated as follows:
| Designation | Approximate needle-shaft diameter |
| 180/070 | 1.80 mm |
| 200/080 | 2.00 mm |
| 230/090 | 2.30 mm |
| 250/100 | 2.50 mm |
In the designation 200/080:
-
The number 200 indicates an approximate 2.00 mm needle-shaft diameter in the metric system.
-
The number 080 indicates the corresponding diameter of approximately 0.080 inch.
As needle size increases, the needle shaft is generally more rigid, while the needle eye and thread groove also become larger. However, the hole created in the material also becomes larger.
2. Why must needle size match thread size?
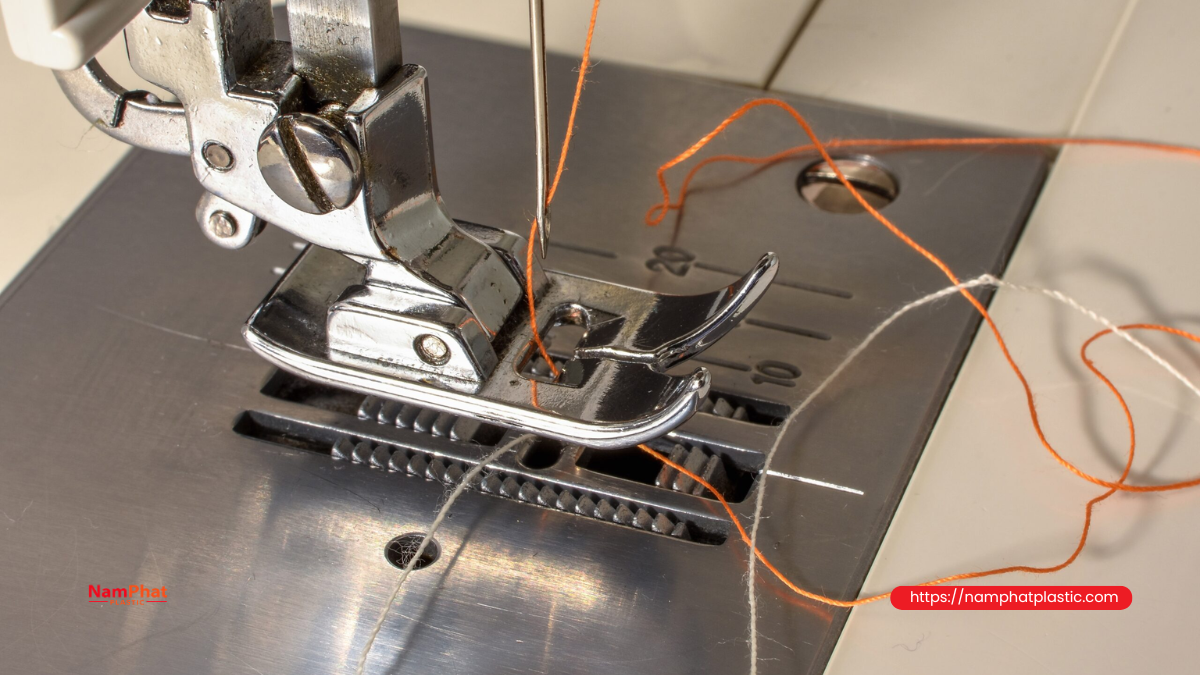
When the machine is running, the thread does not simply pass through the needle eye once. The thread continuously moves through the eye and groove at high speed while being subjected to tension, friction and heat generated during material penetration.
If the thread is too large for the needle eye, the following problems may occur:
-
The thread is pressed tightly against the needle-eye wall.
-
The thread surface becomes fuzzy or fibers begin to separate.
-
The finishing lubricant on the thread is locally scraped away.
-
The thread heats up quickly near the needle.
-
The thread loop becomes unstable.
-
The looper has difficulty catching the thread loop.
-
The thread frequently breaks immediately above or behind the needle eye.
Conversely, when the needle is too large for the thread, the thread may pass through easily, but this does not necessarily produce a better seam. A large needle hole reduces the material's ability to grip the thread and may cause:
-
Clearly visible sewing holes.
-
The bag edge becoming perforated along the stitch line.
-
PP woven fibers separating or being cut.
-
Paper bags tearing around the needle holes.
-
Powder or fine materials escaping through the seam.
-
A loose seam even when thread tension is not low.
Therefore, an appropriate relationship between thread diameter, needle eye and needle groove must be selected.
3. Why you should not select a needle only based on 20/6, 20/8 or 20/9
For PE bag-sewing thread, 20/6, 20/8 and 20/9 thread generally increases in size as follows:
-
PE 20/6: smaller and lighter.
-
PE 20/8: medium size.
-
PE 20/9: larger and heavier.
However, two spools both labeled 20/9 do not necessarily have the same actual diameter. The thread cross-section also depends on:
-
The size of the input single yarn.
-
The actual number of plies.
-
Twist level.
-
Twist direction and number of twists.
-
Compactness of the fiber bundle.
-
Raw material type.
-
Amount of finishing lubricant.
-
Surface hairiness.
-
Uniformity between sections of thread.
A tightly twisted thread may have a smaller outside diameter but be relatively stiff. A low-twist thread may appear larger, softer and more easily flattened when passing through the needle eye. Therefore, the needle-selection table for 20/6–20/9 should only be used as a starting point, followed by testing with the actual thread lot and actual bag-mouth configuration.
4. How to determine the actual number of bag-mouth layers
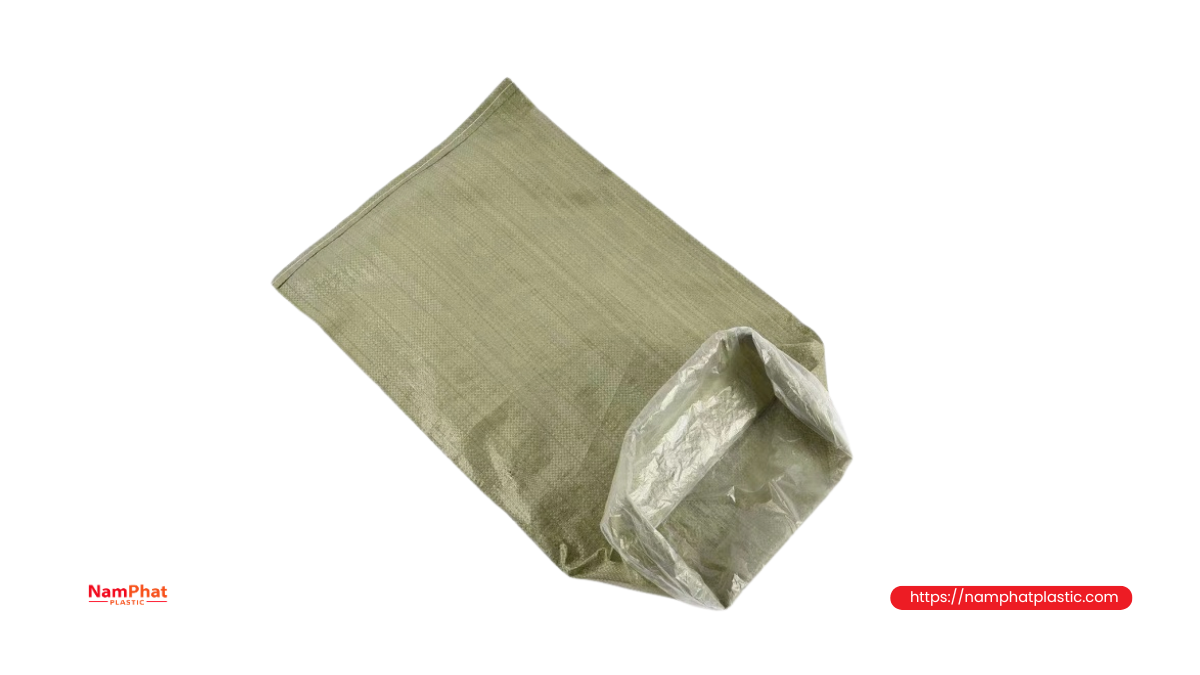
“Number of bag-mouth layers” should be understood as the total number of material layers that the needle actually penetrates at the stitch line, not the number of material types used to construct the bag.
Common configurations
| Bag-mouth configuration | Reference effective number of layers |
| Unfolded bag mouth, sewing through both sides of the bag | 2 layers |
| Bag mouth folded once before sewing | Approximately 4 layers |
| Bag with an inner PE liner | Add the liner layer at the sewing position |
| Bag mouth folded with paper or crepe tape | 4 bag layers plus the tape layers |
| Multi-layer laminated bag or multi-layer paper bag | Count all layers penetrated by the needle |
| Edge joint, overlapping edge or local fold | May be considerably thicker than the rest |
Two bag mouths with four layers do not necessarily require the same needle size. Four layers of loosely woven PP are different from four layers of coated PP, compacted paper bags, or a PP–PE–paper combination.
Therefore, in addition to the number of layers, the following should also be checked:
-
Total thickness after light compression.
-
Rigidity of the material combination.
-
Weave density.
-
Whether there is a coated film layer.
-
Whether adhesive, dust or material particles are present in the sewing area.
-
Whether an overlapping fold or welded seam is located within the sewing area.
5. Needle size selection table by PE thread and number of bag-mouth layers
The table below is a practical starting range for developing test samples with PE 20/6, 20/8 and 20/9 thread. It is not a mandatory specification for every machine. Only needle sizes belonging to the correct needle system and within the machine manufacturer's permitted range should be used.
| Bag-mouth configuration | PE 20/6 thread | PE 20/8 thread | PE 20/9 thread |
| 2 relatively thin layers of woven PP, no fold | NM 180–200 | NM 200 | NM 200–230 |
| 2 layers of coated PP or relatively rigid material | NM 200 | NM 200–230 | NM 230 |
| Approximately 3–4 effective layers | NM 200 | NM 200–230 | NM 230 |
| Approximately 5–6 layers, with folded mouth or liner | NM 200–230 | NM 230 | NM 230–250 |
| More than 6 layers or a very thick, rigid combination | Reassess thread suitability | NM 230–250 | NM 250 and check machine limits |
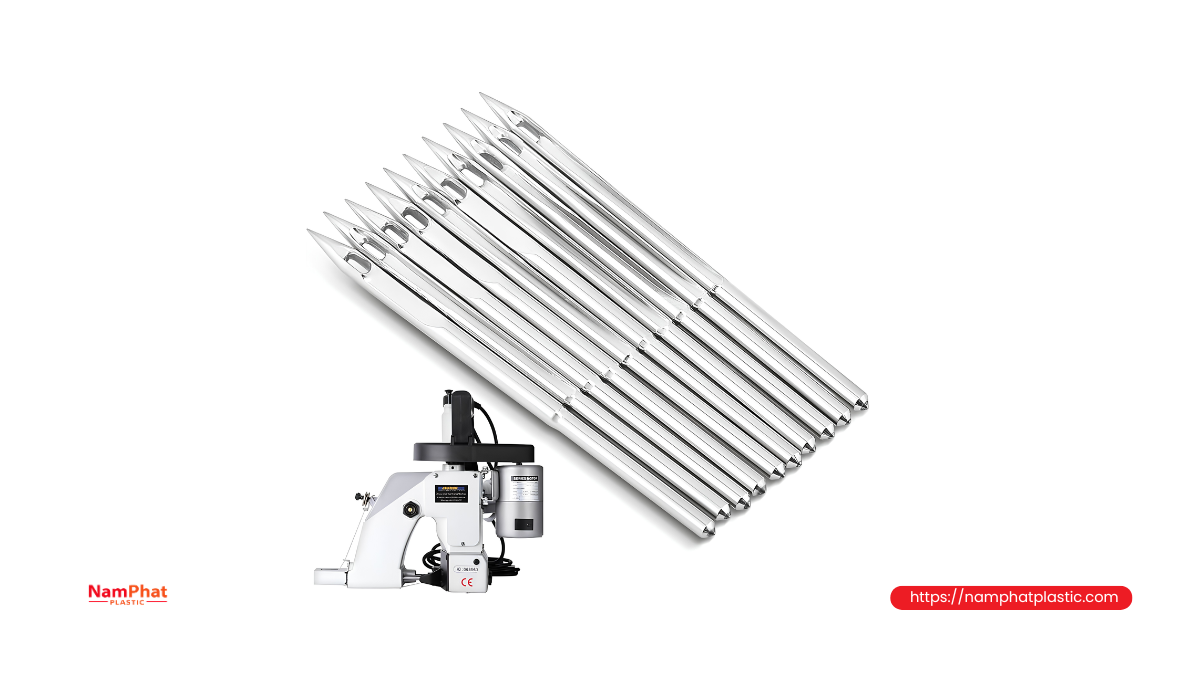
How to use the table
Always start with the smaller size within the recommended range. Increase by one size only when there is clear evidence that the current needle is too small, such as:
-
The thread does not move freely through the needle eye.
-
The thread becomes fuzzy immediately after passing through the needle eye.
-
The needle visibly bends or deflects when penetrating the bag mouth.
-
The machine mainly skips stitches at thick sections.
-
The thread breaks near the needle even though the needle has no burrs and tension is reasonable.
-
The needle heats up unusually quickly when machine speed increases.
The table is compiled based on the principle of selecting needle size according to thread size and on needle sizes 200/080, 230/090 and 250/100 supplied for certain Union Special bag-sewing machines. The manufacturer also requires the thread to pass freely through the needle eye to form a proper stitch.
6. Examples of needle selection for different cases
Case 1: PE 20/6 thread sewing two layers of woven PP
This is a relatively light configuration. You can start with an NM 180 or NM 200 needle, depending on the machine's needle system.
If a handheld machine is specified by the manufacturer to use a 200/080 needle, use that specification rather than trying to install an NM 180 needle from a different system. For example, the Union Special 4500 uses a DNx1-25-200/080 needle and, according to the machine documentation, can sew materials up to approximately 6.5 mm thick.
After testing, if the thread passes easily through the needle eye, does not become fuzzy, the needle hole is not excessively large and the seam remains stable, there is no need to increase needle size.
Case 2: PE 20/8 thread sewing a bag mouth folded once
When the bag mouth is folded, the number of layers at the sewing line may increase from two to approximately four layers. For PE 20/8, you can:
-
Start with NM 200.
-
Test at low speed.
-
Increase to production speed.
-
Check needle deflection, skipped stitches and thread fuzzing.
-
Move to NM 230 if NM 200 is not sufficiently stable.
Do not immediately increase to NM 250 if NM 230 already runs well, because a larger needle may create unnecessarily large sewing holes.
Case 3: PE 20/9 thread sewing a coated bag with a liner
PE 20/9 has a larger cross-section and generally requires a larger needle eye. If the bag mouth also has a PE liner, folded sections or paper tape, the material combination becomes both thick and uneven in rigidity.
A suitable starting size is generally within the NM 230–250 range, provided that the machine permits these sizes. Particular attention should be paid to:
-
Areas where the liner is folded over.
-
Intersections with welded seams.
-
Rigid coated-film edges.
-
Overlapping paper tape.
-
The beginning and end of the seam.
If the machine only skips stitches at the thickest points, the cause may be needle deflection rather than thread tension alone.
7. Each machine line has a different needle-size range
The needle-size table for one machine cannot be directly applied to all bag-sewing machines.
For example:
-
The Union Special 4500 handheld bag-sewing machine uses a DNx1-25-200/080 needle in its standard configuration.
-
Some Union Special 56100 series machines use the 144GS needle system and offer sizes 200/080, 230/090 and 250/100.
-
Some heavy-duty stationary bag-sewing machines use a standard 250/100 needle and can handle thicker material combinations.
This shows that needle size depends not only on the thread and bag mouth but also on:
-
Needle-bar stroke.
-
Machine power.
-
Presser-foot and feed-dog design.
-
Clearance between the needle and looper.
-
Feeding system.
-
Operating speed.
-
Rigidity of the needle bar.
-
Availability of the required needle size within the correct system.
The Union Special 56100 is available with 200/080, 230/090 and 250/100 needle sizes; the manufacturer's documentation specifies that the appropriate size should be selected based on thread size and that the thread must pass freely through the needle eye.
8. Quick check of thread and needle-eye compatibility
A simple test can be performed before installing the needle in the machine.
How to perform the test
-
Use a new needle from the correct needle system.
-
Pass the thread being tested through the needle eye.
-
Hold both ends of the thread to create an approximately 45-degree slope.
-
Allow the needle to slide along the thread under its own weight.
-
Observe the movement of the needle.
Result evaluation
-
If the needle does not slide or repeatedly catches: the needle eye may be too small, the thread may be excessively hairy, or the needle eye may have a burr.
-
If the needle slides but jerks intermittently: the thread size may be uneven, or there may be small knots or surface fuzz.
-
If the needle slides relatively smoothly and continuously: the relationship between the thread and needle eye is likely suitable.
-
If the needle slides well but the machine still skips stitches: check needle installation direction, timing, needle–looper clearance, thread tension and needle deflection during material penetration.
SCHMETZ states that when needle size and thread size are appropriate, the needle can slide along an inclined section of thread under its own weight. However, this test only evaluates the relationship between the thread and needle eye; it does not evaluate penetration performance in the actual material.
9. Signs that the needle is too small
A needle is considered too small when it does not provide enough space for the thread or lacks sufficient rigidity to penetrate the material combination.
Common signs include:
Thread becomes fuzzy near the needle eye
The thread surface experiences excessive friction against the edge of the needle eye or does not fit properly inside the long groove. After a short period, the thread develops fuzz, becomes flattened or separates into fibers.
Thread breaks when speed increases
The machine may run at low speed but break the thread at production speed. This occurs because the number of friction cycles and accumulated heat increase rapidly.
Skipped stitches at thick sections
A slender needle may deflect when penetrating an overlapping fold. The thread loop forms in the wrong position, preventing the looper from catching it.
Needle produces impact noise or frequently breaks
The needle may be pushed sideways and contact the needle plate, feed dog or looper. Do not continue increasing thread tension to address this condition.
Thread is difficult to pass through the needle eye
Even when threading is possible, the thread may still be tightly pressed against the eye wall. This is a clear indication that a larger needle size or a review of thread quality may be necessary.
10. Signs that the needle is too large
A larger needle does not automatically mean a stronger seam. The following signs indicate that a smaller needle should be tested:
-
Sewing holes are wide and clearly visible.
-
PP woven fibers around the stitch line are separated or broken.
-
The bag tears along the row of holes during tensile testing.
-
The coated film cracks around the needle holes.
-
Fine powder can escape through the seam.
-
The bag mouth becomes wrinkled or deformed.
-
The seam appears loose even though thread tension is sufficient.
-
Penetration noise is unusually loud.
-
The needle pushes the material down into the needle-plate hole instead of penetrating cleanly.
A thinner needle generally produces lower penetration force and reduces material displacement or structural damage. Therefore, the needle size should only be increased when the current size does not allow the thread to pass properly or the needle is not sufficiently stable.
11. Needle-size selection process at the factory
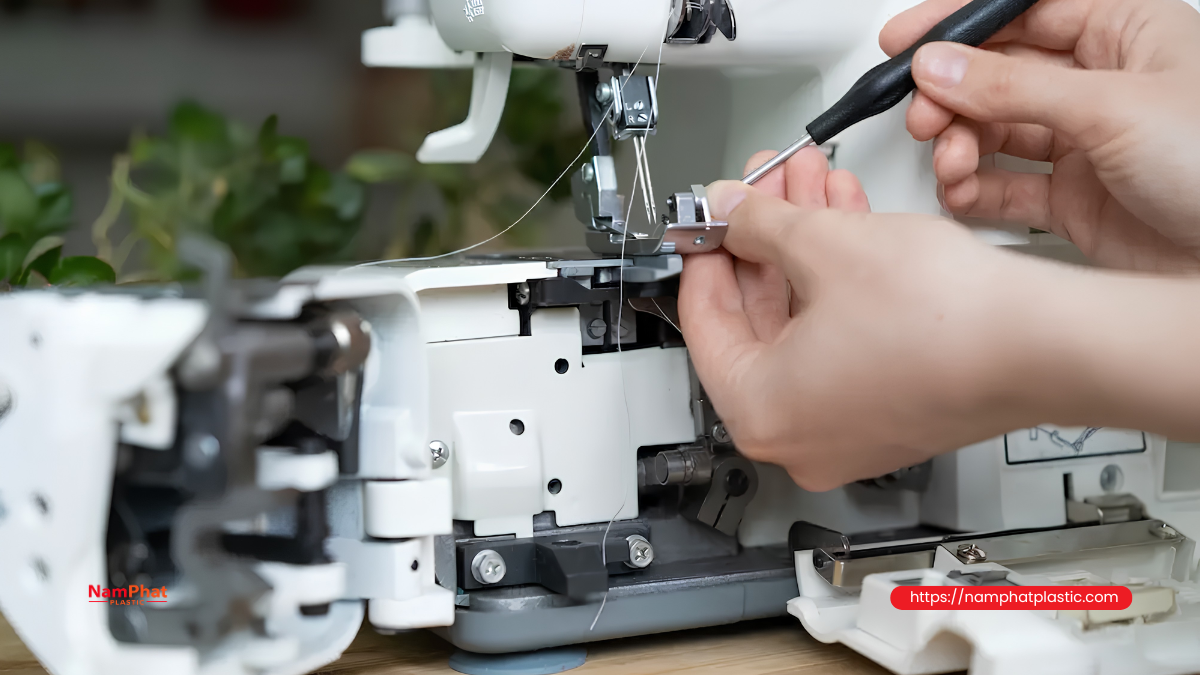
To avoid subjective assessment, a factory can apply the following procedure.
Step 1: Confirm the correct needle system
Check:
-
Machine model.
-
Manufacturer's instructions.
-
Code printed on the old needle package.
-
Needle length.
-
Shank type and eye position.
-
Direction of the long groove and scarf.
Do not use a needle simply because it has the same diameter.
Step 2: Prepare an actual bag-mouth sample
The test sample must match production in terms of:
-
Bag type.
-
Number of layers.
-
Folding method.
-
Liner.
-
Paper or crepe tape.
-
Material moisture and rigidity.
-
Edge joints or welded seams.
Testing on a single piece of PP cannot represent the actual bag-mouth combination.
Step 3: Select the smallest size within the expected range
For example, with PE 20/8 and a four-layer bag mouth, start with NM 200 instead of NM 230 or NM 250.
Step 4: Check passage through the needle eye
Perform the needle-sliding test on the thread while also checking:
-
Whether the thread becomes flattened.
-
Whether there are abnormal thick sections.
-
Whether the needle eye is sharp or scratched.
-
Whether the thread sits properly inside the long groove.
Step 5: Run the machine at low speed
Observe:
-
Needle movement.
-
Needle deflection when penetrating thick sections.
-
Looper's ability to catch the thread loop.
-
Shape of the thread chain.
-
Machine sound.
Step 6: Run at actual production speed
A needle–thread combination may run well at low speed but develop problems during continuous operation. Therefore, testing must be carried out under conditions close to production:
-
Actual machine speed.
-
Sufficient running time for heat to develop.
-
Current thread tension.
-
Normal operator and bag-feeding method.
Step 7: Inspect the sewn product
At least the following points should be evaluated:
| Item | Inspection criteria |
| Thread surface | No fuzzing, flattening, melting or fiber separation |
| Needle holes | Not excessively large and no tearing of woven fibers |
| Stitches | No skipped stitches and relatively uniform stitch length |
| Thread chain | Stable loop locking and not excessively loose |
| Bag mouth | No wrinkling, tearing or layer misalignment |
| Needle | No bending, dullness or impact marks |
| Temperature | No abnormal increase during continuous operation |
Step 8: Change only one parameter at a time
When changing from NM 200 to NM 230, keep the other settings unchanged during the first test. If the needle, thread tension, stitch length and presser-foot adjustment are all changed at the same time, it becomes difficult to determine which factor caused the improvement or deterioration.
12. Do not use needle size to hide machine adjustment problems
Some problems are often addressed by increasing needle size even though the actual cause lies elsewhere.
12.1. Machine skips stitches
In addition to needle size, check:
-
Needle is not fully inserted.
-
Needle scarf direction.
-
Needle–looper clearance.
-
Timing between the needle and looper.
-
Bent needle.
-
Presser-foot pressure.
-
Thread tension.
-
Incorrect thread path.
-
Thread loop becoming too small because of friction.
12.2. Thread breaks near the needle
Possible causes include:
-
Burr on the needle eye.
-
Misaligned needle.
-
Needle overheating.
-
Excessive thread tension.
-
Sharp edge on the thread guide.
-
Thread knot or thick spot.
-
Uneven finishing lubricant.
-
Needle contacting the needle plate or looper.
12.3. Needle breakage
In addition to a needle being too small, causes may include:
-
Operator pulling or pushing the bag.
-
Uneven feed-dog movement.
-
Presser foot not holding the material stably.
-
Needle hitting the looper.
-
Excessive play in the needle bar.
-
Needle not tightened properly.
-
Hard object inside the bag mouth.
Increasing needle size may temporarily reduce the problem but does not eliminate the root cause.
13. Common mistakes when selecting bag-sewing needles
Using one needle size for all thread types
A needle that works well with PE 20/6 may not be suitable for PE 20/9. When changing thread size, recheck the needle eye, thread tension and thread-loop formation.
Counting only the number of layers without considering rigidity
Four soft layers of woven PP may be easier to penetrate than two thick, coated and compacted layers of material.
Assuming that a larger needle breaks less often
A larger needle is generally more rigid but also creates greater penetration force and larger needle holes. If a needle breaks because of incorrect timing or because the operator pulls the bag, increasing needle size is not the correct solution.
Installing the correct size but the wrong needle system
This is a dangerous mistake because it can cause the needle to collide with the looper as soon as the machine starts.
Continuing to use a dull needle
A dull needle increases penetration force, generates heat and pushes woven fibers out of position. The operator may then mistakenly assume that a larger needle is required.
Selecting a needle using an empty-bag sample without testing with a loaded bag
When the bag contains material, the bag mouth may become stretched, layers may shift, or dust may accumulate. The sewing conditions can therefore differ significantly from those of a flat sample on a table.
14. Quick troubleshooting table by symptom
| Symptom | Possible needle-related cause | Inspection direction |
| Thread is difficult to pass through the needle eye | Needle too small | Try one larger needle size from the correct system |
| Thread becomes fuzzy after the needle eye | Needle eye too small, burr, or unsuitable groove | Replace with a new needle and verify the correct size |
| Skipped stitches at folded sections | Needle deflection or insufficient rigidity | Try one larger needle size and check timing |
| Skipped stitches along the entire seam | Not necessarily caused by needle size | Check needle installation, looper and thread tension |
| Needle holes too large | Needle too large or unsuitable needle point | Reduce needle size |
| Bag tears along the row of holes | Large needle or needle point damaging material | Reduce needle size and check needle-point type |
| Needle becomes hot and thread breaks at high speed | Excessive friction or unsuitable needle size | Check needle eye, thread tension and speed |
| Needle frequently bends | Needle too small, material combination too thick, or incorrect feeding | Check needle size and feeding system |
| Loose seam | Not necessarily caused by the needle | Check thread tension, looper and stitch length |
Conclusion
Effective bag-sewing needle selection should start with the correct needle system, followed by consideration of thread size and the number of bag-mouth layers.
The principle can be summarized as follows:
-
PE 20/6 thread typically starts with an NM 180–200 needle.
-
PE 20/8 thread typically starts with an NM 200–230 needle.
-
PE 20/9 thread typically starts with an NM 230 needle; increase to NM 250 only when the material is thick, rigid and the machine permits it.
-
The more layers or the greater the rigidity of the bag mouth, the greater the need for needle stability.
-
Do not use a larger needle than necessary.
-
The final result must be confirmed by testing at actual production speed.
The correct needle size not only helps reduce thread breakage and skipped stitches, but also protects the structure of the bag mouth, reduces needle breakage, stabilizes the seam and limits machine downtime.
Frequently asked questions
1. Does PE 20/9 thread have to use a 250/100 needle?
No. In many cases, PE 20/9 can run well with a 230/090 needle. A 250/100 needle should only be tested when the thread cannot pass through the needle eye consistently, the bag mouth is too thick, the 230 needle bends or deflects, or the machine manufacturer recommends that size.
2. Can PE 20/6 thread be used with a 230/090 needle?
It may be possible on some machines, but a 230 needle is generally larger than necessary for PE 20/6 and thin bags. This may create larger needle holes, damage woven fibers and reduce seam appearance.
3. Does a bag mouth with more layers always require a larger needle?
Not necessarily. If the material layers are soft, loosely woven and the current needle does not deflect, the same size may be retained. The decision should be based on total thickness, rigidity and test results.
4. Can a 230 needle replace a 200 needle on a handheld bag-sewing machine?
Only if the needle system is compatible and the machine documentation permits it. Do not change it arbitrarily because a larger needle may affect the clearance with the looper, needle plate and moving components.
5. Does a larger needle make the seam stronger?
Not directly. Seam strength depends on thread strength, stitch density, tension, stitch structure and the strength of the material around the needle holes. An excessively large needle may even weaken the bag mouth by creating an overly wide row of holes.
6. When the thread breaks near the needle, should the needle size be increased immediately?
First check the needle eye, burrs, needle installation direction, tension, needle temperature and thread guide. Increase needle size only after confirming that the thread is being compressed or experiencing excessive friction inside the needle eye.
>>> See also:
- 0 Comment


