


 Phan Van Hoang
- 27/07/2026
- 128
During the bag-mouth sewing process, a fairly common phenomenon is that the machine runs normally when first started, but after some time, the thread begins to fray, deform, melt, stick together, or break repeatedly right around the needle hole. The operator may replace the thread spool, increase or decrease the thread tension, or reconnect the thread several times, but the problem keeps recurring.
In this case, the cause may not be entirely related to thread quality. When the sewing machine needle moves at high speed and continuously penetrates multiple layers of material, friction between the needle, thread, and bag body generates heat. If the amount of heat generated exceeds the ability to dissipate it, the needle temperature gradually rises and directly affects the thread passing through the needle hole.
The problem of a hot needle causing thread to fray, melt, or break should be handled according to the actual cause. If the operator only focuses on replacing the thread without checking the needle, tension, machine speed, and thread-guiding system, the factory may continue to experience machine stoppages, unstable seams, and increased thread consumption.
Table of Contents [Hide]
1. Why can a bag sewing machine needle become hot?
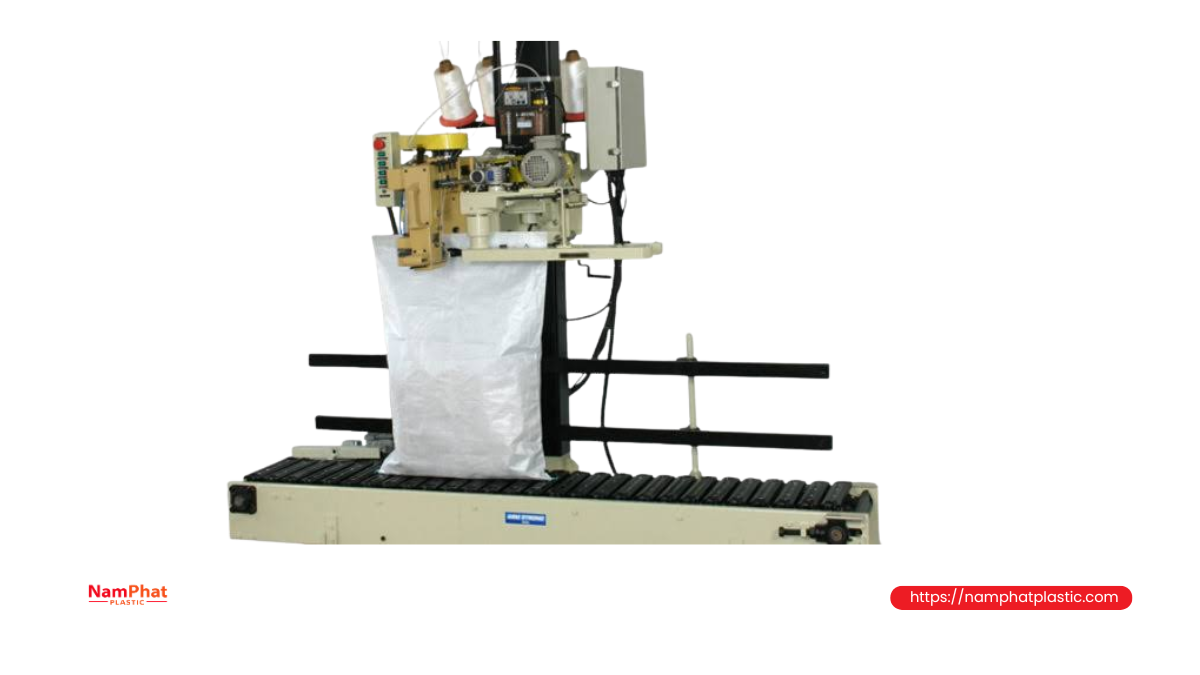
A sewing machine needle is not electrically heated, but it can become hot very quickly due to mechanical friction. Every time the needle penetrates the material, its surface has to overcome the resistance of the packaging material. At the same time, the sewing thread continuously slides through the needle groove and needle hole at high speed.
Heat is mainly generated at three locations:
- Between the needle shaft and the bag material.
- Between the thread and the wall of the needle hole.
- Between the needle and the needle plate, looper, or other machine components when misalignment or rubbing occurs.
The faster the machine runs, the more times the needle penetrates the material per minute. If the machine is sewing thick bags, multilayer bags, coated materials, or materials with high surface friction, the needle temperature will rise more quickly.
For threads made from thermoplastic materials such as PP, PE, or polyester, high temperatures around the needle hole can soften the fiber surface. The thread may then lose its original round structure and fiber cohesion. The fibers can become flattened, frayed, locally fused, and eventually break under tension.
2. How does a hot needle damage the thread?
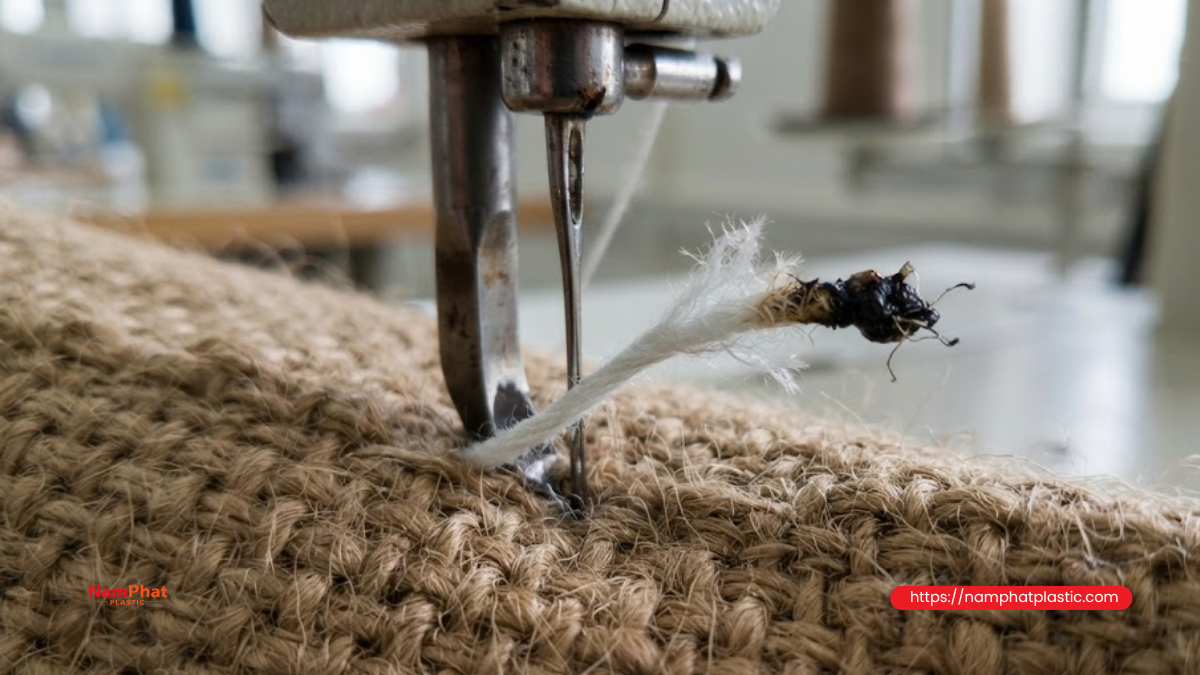
Heat-related defects do not always appear immediately. They can develop through three stages.
Stage 1: The thread begins to fray
As the needle temperature starts to rise, the surface of the sewing thread becomes softer but has not yet visibly melted. Friction at the needle hole pulls apart some of the outer filaments or fibers.
The thread can still form stitches, but its surface begins to show fine fuzz, with small fibers being pulled away from the thread body.
Stage 2: The thread becomes flattened, shiny, or sticky
If the machine continues running, the section of thread passing through the needle hole may become flattened and develop an unusually shiny surface. Some filaments soften, stick together, or form a hard spot on the thread.
This is a clear indication that heat has affected the fiber structure.
Stage 3: The thread breaks
When a softened, frayed, or deformed section continues to withstand tension, the load-bearing cross-section of the thread decreases. The thread will then break at the needle hole, needle groove, or immediately above the needle.
After reconnecting the thread, the machine may run for a short distance before the thread breaks again because the needle is still hot and the root cause has not been addressed.
3. Signs that thread damage is caused by a hot needle
Not every thread breakage is caused by heat. The operator should observe the shape of the thread end, the break location, and when the defect occurs.
3.1. The machine runs well when first started but the thread breaks after some time
This is one of the most typical signs. When the needle is still cool, the thread works normally. After continuous operation, heat accumulates in the needle and the problem begins to appear.
If stopping the machine and allowing the needle to cool causes the machine to sew normally again for a certain period, the likelihood of a heat-related problem is relatively high.
3.2. The thread usually breaks right at the needle hole
If the thread consistently breaks at the point where it contacts the needle hole, three factors should be checked at the same time:
- Whether the needle is too hot.
- Whether the needle hole has burrs or a rough surface.
- Whether the needle size is too small for the thread.
Heat and friction often occur together. A small needle hole compresses the thread more strongly, increasing friction and generating more heat.
3.3. The thread end shows signs of melting
When examining the broken thread end, you may see:
- The thread end contracting into a small lump.
- Filaments sticking together.
- A shinier or more transparent thread surface than normal.
- The thread becoming flattened before the break.
- The thread end not opening up as it would after a normal mechanical break.
These are valuable signs when diagnosing a heat-related defect.
3.4. The thread frays locally where it passes through the needle
If the section of thread above the needle remains intact but the portion passing through the needle hole becomes fuzzy, the cause is usually related to the needle hole, needle groove, needle installation, or needle temperature.
Conversely, if the thread is already frayed before reaching the needle, the thread guides, tension assembly, and thread path should be checked.
3.5. The problem increases significantly when the machine runs faster
The machine may sew stably at low speed but begin to fray or break the thread when the speed increases. When the speed is reduced, the problem decreases significantly.
This indicates that frictional heat, thread delivery, or mechanical stability is not suitable for the current operating speed.
3.6. The problem appears when sewing through folded areas with multiple layers
The bag mouth may contain folded edges, binding tape, lining layers, or overlapping material. When the needle passes through these areas, resistance suddenly increases, causing the needle to heat up more and increasing the tension on the thread.
If the thread frays or breaks only at thicker sections, check the needle size, needle type, presser foot pressure, and the machine's material feeding capability.
4. How to distinguish hot-needle problems from other causes
| Symptom | Likelihood of hot-needle cause | Other causes to check |
| Machine sews well when first started, but the defect increases over time | High | Insufficient lubrication or overheated machine components |
| Thread breaks directly at the needle hole | High | Burrs in the needle hole, needle too small |
| Thread end is shiny, flattened, or fused | Very high | Thread exposed to another heat source |
| Thread frays from the tension assembly upward | Low | Scratched thread guide or tension disc |
| Thread breaks randomly at multiple locations | Medium to low | Uneven thread quality, thread joints |
| Thread breaks immediately after starting the machine | Low | Incorrect threading, excessive tension, incorrect timing |
| Reducing machine speed clearly reduces the problem | High | Machine vibration or unstable feeding |
| Replacing the needle with a new needle of the correct size eliminates the problem | Medium to high | Old needle is worn, bent, or has burrs |
| Thread is pulled tight but shows no melting | Medium | Excessive thread tension, obstructed thread path |
| Skipped stitches occur together with thread breakage | Cannot be determined | Bent needle, incorrect needle and looper position |
The table above is only for narrowing down the possible causes. In practice, many defects result from a combination of heat, friction, tension, and the mechanical condition of the machine.
5. Causes of a hot needle making thread fray, melt, or break
5.1. Machine speed is too high
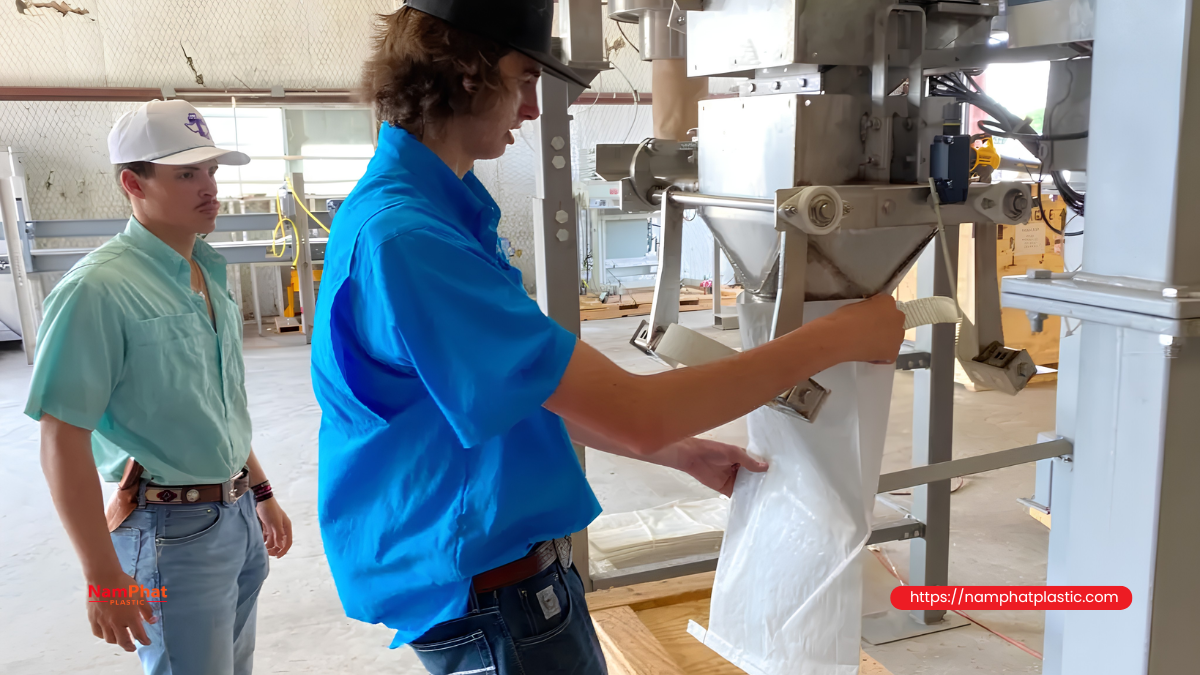
The higher the speed, the more times the needle penetrates the material within the same period. Heat is continuously generated, while the needle does not have enough time to dissipate it into the surrounding environment.
This is common on:
- Bag sewing machines running continuously for many hours.
- Automatic bagging lines.
- Machines operating above the speed suitable for the material.
- Older machines with significant vibration and mechanical friction.
- Machines operated at maximum speed for extended periods.
Reducing the speed is not necessarily the final solution, but it is a quick test to determine whether heat is a major factor.
5.2. The needle size is too small for the thread size
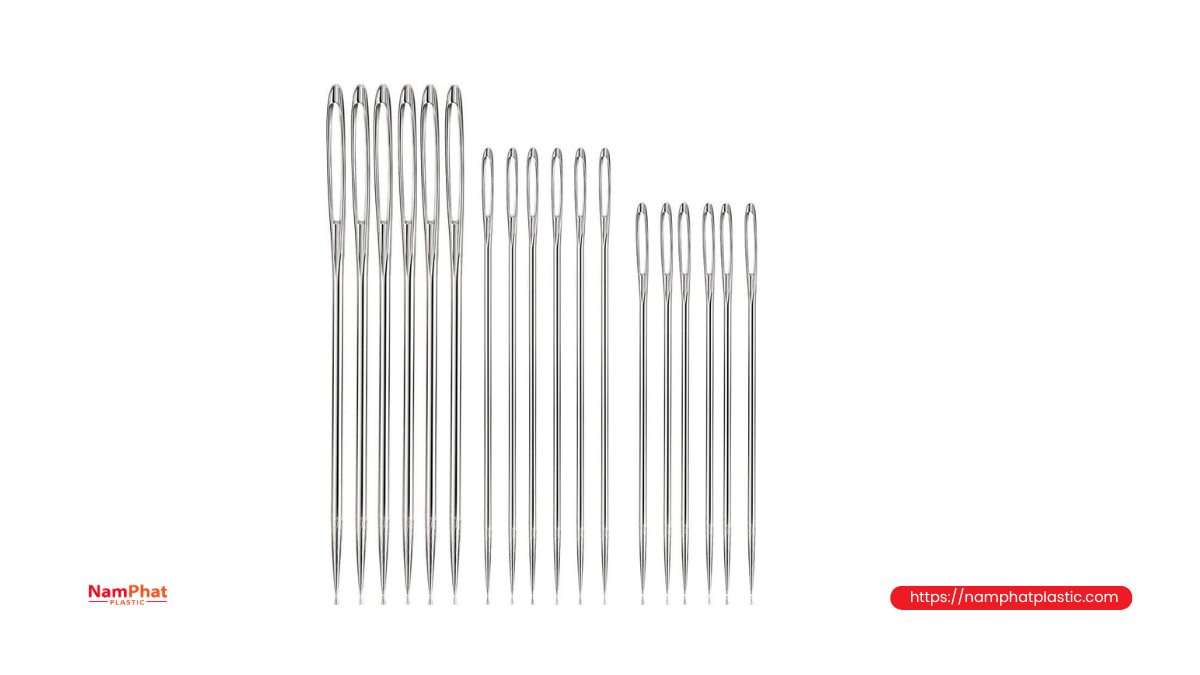
When the thread is too large for the needle hole, the thread must be compressed and deformed each time it passes through. The contact area between the thread and needle hole increases, resulting in greater friction.
Besides the risk of melting, an unsuitable needle size can cause:
- Thread fraying.
- Uneven stitches.
- Unstable loop formation.
- Skipped stitches.
- Increased tension from the tension assembly.
- Thread breakage at the needle hole.
The needle size should be selected based on the actual thread diameter, not solely on the commercial name or nominal thread number.
5.3. The needle is blunt, bent, or has burrs
A needle that has been used for a long time can become worn around the tip, groove, or needle hole. Even a very small scratch can scrape the thread surface thousands of times while the machine is running.
A bent needle may also rub against the needle plate, presser foot, or looper, generating additional abnormal heat. In this case, the operator may hear a light impact sound or see the needle vibrating during operation.
The needle should not be evaluated only by visual inspection. If there is any doubt, replacing it with a new needle of the correct specification is usually the fastest and least expensive test.
5.4. The needle is installed in the wrong direction or position
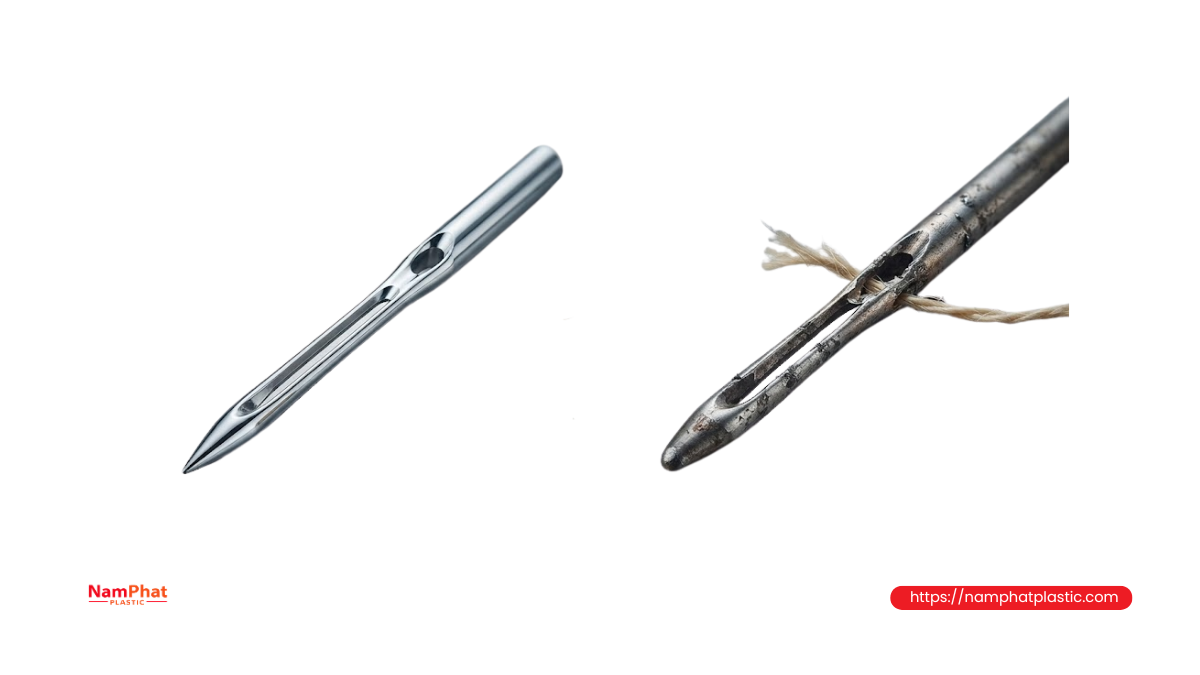
The long groove of the needle protects the thread as the needle penetrates the material. If the needle is installed in the wrong direction, the thread will not sit correctly inside the protective groove and will experience direct friction against the needle shaft.
A needle that has not been pushed fully into position or has been rotated incorrectly can also cause an inaccurate distance between the needle and looper, resulting in rubbing, skipped stitches, and thread breakage.
After replacing the needle, check:
- Whether the needle has been pushed fully to the specified position.
- Whether the needle groove faces the correct direction for the machine.
- Whether the needle retaining screw is securely tightened.
- Whether the needle is straight along its movement axis.
5.5. The upper thread tension is too high
When thread tension is too high, the thread is pulled strongly through the needle hole. The pressure of the thread against the needle hole wall increases, which increases friction and heat.
Many operators tighten the thread to make the seam look tighter. However, excessive seam tension can cause:
- Wrinkling along the bag edge.
- Reduced thread cross-section due to excessive stretching.
- Reduced stitch flexibility.
- Increased risk of breakage when the bag is impacted.
- Increased heat around the needle.
- Increased load on the loop-forming mechanism.
The correct tension should be sufficient to form a strong stitch without stretching the thread excessively.
5.6. The thread path is obstructed
The thread can become trapped or experience excessive friction at:
- Thread guides.
- Tension discs.
- Take-up springs.
- Tubes.
- Upper thread guides near the needle.
- Thread spool holders.
- Spool edges or packaging.
When the thread path is not smooth, the pulling force changes continuously. Each time the thread is jerked, the section around the needle hole experiences a higher load and can break more easily when the needle is hot.
5.7. The sewing thread has unsuitable hairiness or uniformity
A hot needle can make a problem appear more quickly, but the sewing thread itself must also have a structure suitable for the machine speed.
Thread characteristics that increase the risk of fraying, melting, or breaking include:
- Uneven diameter.
- Excessively low twist.
- Inconsistent twist between sections.
- Excessive surface hairiness.
- Large knots or joints.
- Contaminants or hard spots.
- Low tensile strength.
- Overly tight spool winding or uneven unwinding.
- Dry surface with high friction.
A thread with high tensile strength can still run poorly if its surface is rough. For high-speed bag sewing, uniformity, twist, and thread delivery are just as important as breaking strength.
5.8. The bag material is too thick or has high friction
Woven PP bags, laminated bags, bags with PE layers, multilayer paper bags, and other coated bags create different levels of resistance against the needle.
Areas that often cause the needle to heat up quickly include:
- Multiple folded layers at the bag edge.
- Binding or reinforcing tape.
- Overlapping seams.
- Bags with thick coatings.
- Areas with adhesive or raw-material dust.
- Areas with labels, reinforcement tape, or lining.
A machine setting suitable for thin woven PP bags may not be suitable for multilayer paper bags or bags with a PE lining.
5.9. The stitch length is too short
A short stitch length means the needle penetrates the material more times over the same seam length. This increases friction per meter of seam and also increases thread consumption.
If the stitch density is set too high without a clear technical requirement, the factory may consume more thread and heat the needle more without achieving a proportional increase in seam strength.
5.10. The presser foot pressure is too high or the bag feeding system is uneven
Excessive presser foot pressure compresses the material tightly around the needle shaft. The bag becomes more difficult to move, forcing the needle to penetrate a more tightly compressed area and increasing friction.
If the feed dog or bag conveyor does not feed the bag evenly, the thread is also pulled in jerks during each cycle, increasing the risk of breakage around the needle.
5.11. The needle rubs against the needle plate or looper
Incorrect needle installation, a bent needle, misaligned needle bar, or incorrect timing can cause the needle to lightly strike other metal components. This not only wears the needle but also generates heat very quickly.
Common signs include:
- A light metallic contact sound.
- The needle becoming scratched quickly.
- Scratch marks on the needle plate.
- Impact marks on the looper.
- Skipped stitches occurring together with thread breakage.
- A newly replaced needle becoming hot quickly.
In this case, the mechanical system needs adjustment rather than simply changing thread tension.
5.12. The machine environment contains excessive dust
Powder, fertilizer dust, feed dust, cement dust, or raw-material particles can stick to the needle, needle hole, and thread path. Dust makes the contact surfaces rougher, increasing friction.
Some types of dust can also combine with machine oil and form hard deposits around the needle plate and tension assembly. If the machine is not cleaned regularly, thread breakage can become increasingly severe.
6. How to check whether the needle is actually too hot
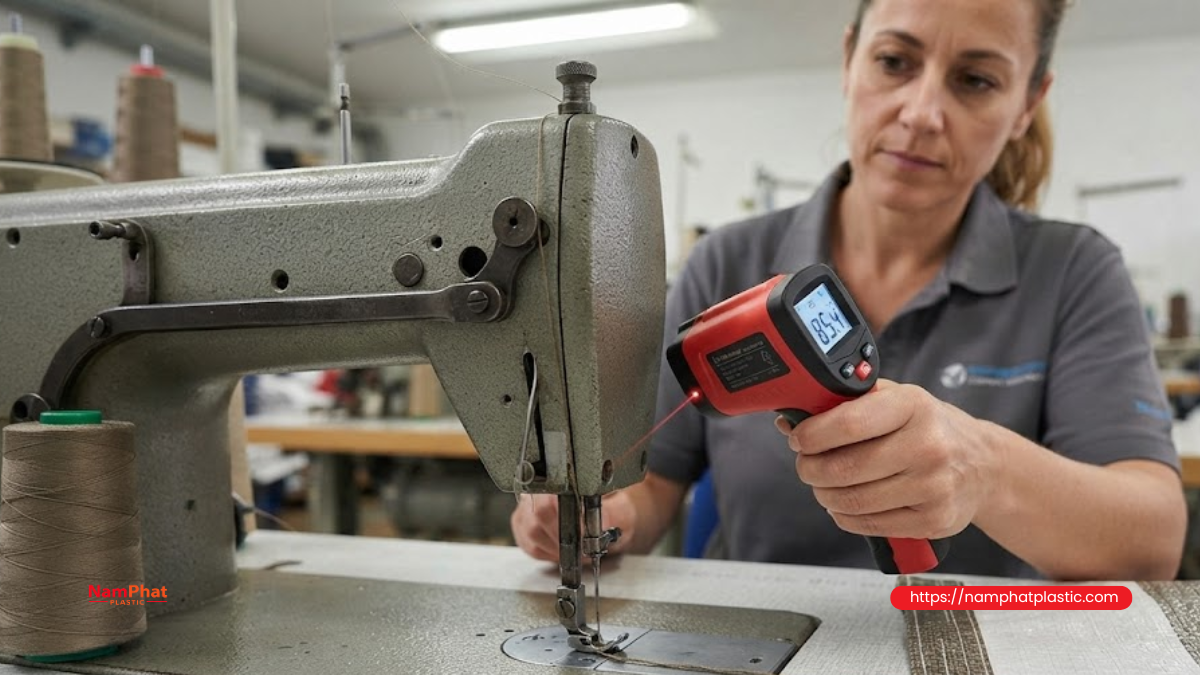
Do not touch the needle directly with your hand immediately after the machine has been running. The needle is small, but its surface temperature may be high enough to cause burns.
Safer methods can be used.
Observe the problem over operating time
Run the machine using the same type of bag and the same speed. Record:
- When the thread first begins to fray.
- When the first break occurs.
- Where the thread breaks.
- The condition of the thread end.
- How the problem changes when the speed is reduced.
If the defect repeatedly appears after a similar operating period and decreases after the machine cools down, heat should be prioritized during troubleshooting.
Use a non-contact temperature measuring device
An infrared thermometer or thermal camera can be used to compare needle temperature under different operating conditions.
However, the needle has a very small surface area and can reflect light, so the absolute measurement may not be completely accurate. The measuring device should be used mainly for relative comparisons, such as:
- Before and after reducing machine speed.
- An old needle versus a new needle.
- With and without cooling.
- Two different bag materials.
Check heat marks on the thread
A melted, shiny, flattened, or fused thread end is more direct evidence than simply feeling the needle temperature.
Keep samples of broken thread and compare them under magnification with a thread sample broken by pulling at normal temperature.
7. Procedure for handling a hot needle that causes thread to fray, melt, or break
The problem should be handled from the simplest cause to the more complex ones. Do not change too many parameters at the same time because it will be difficult to determine which factor actually solved the problem.
Step 1: Replace the needle with a new needle of the correct type
This should be the first action because the needle is a consumable component with relatively low cost but a direct impact on seam quality.
When replacing the needle:
- Select the correct needle system for the machine.
- Select a needle size suitable for the thread.
- Check the installation direction.
- Push the needle fully into the specified position.
- Tighten the retaining screw securely.
- Turn the machine by hand to check for interference.
If the problem decreases significantly after replacing the needle, the old needle may have been worn, scratched, bent, or have a damaged needle hole.
Step 2: Reduce the speed for testing
Reduce the machine speed moderately and observe how long it takes for the problem to appear again.
If the thread no longer melts or takes significantly longer to break, the cause is related to heat and speed.
After confirming this, the factory can consider:
- Maintaining a lower speed.
- Upgrading the needle cooling system.
- Selecting a more suitable needle and thread.
- Improving the thread path.
- Reducing material resistance.
The speed should not simply be reduced excessively because this can reduce productivity without addressing the root cause.
Step 3: Reduce thread tension gradually
Loosen the thread tension slightly, then sew a test sample and inspect the seam.
The goal is to find the lowest tension level that still ensures:
- Complete stitch formation.
- No loose loops.
- No seam slippage.
- No wrinkling along the bag edge.
- No excessive thread tension.
Adjust in small increments. Excessive loosening can cause loose stitches or skipped stitches, especially on chain-stitch bag sewing machines.
Step 4: Inspect the entire thread path
Remove the thread from the machine and inspect every guide in the direction of thread travel.
A new section of thread can be gently pulled through each point to detect resistance. If the thread catches, becomes scratched, or produces an abnormal rubbing sound, the component should be cleaned or replaced.
Pay particular attention to:
- Ceramic guide edges.
- Tension disc surfaces.
- Tension springs.
- Thread guides near the needle.
- Thread guide tubes.
- Spool holders.
- The direction in which thread unwinds from the spool.
Do not use coarse sandpaper on thread guides because it can create additional scratches. Damaged components should be properly polished or replaced.
Step 5: Select a needle size suitable for the thread
The thread should pass smoothly through the needle hole, while the hole should not be so large that it affects loop formation or creates an excessively large hole in the bag.
A practical check is to pass the thread through a new needle while the machine is stopped. The thread should move relatively easily without being scraped or catching at normal-diameter sections.
If the thread contains large joints or significant diameter variation, the thread quality should be addressed rather than using an excessively large needle to compensate.
Step 6: Check the stitch length
If the stitch is too dense, the stitch length can be increased slightly within the range suitable for the required seam strength.
A reasonable stitch length helps:
- Reduce the number of needle penetrations per meter of seam.
- Reduce thread consumption.
- Limit excessive perforation of thick bag edges.
- Reduce heat accumulation along the seam.
- Increase bag feeding speed.
Do not increase stitch length excessively because the seam may become too loose, open, or slip under load.
Step 7: Clean the machine and needle area
Regularly clean:
- Needle plate.
- Presser foot.
- Feed dog.
- Looper.
- Thread tension assembly.
- Needle bar.
- Thread guide area.
- Filters and cooling air passages, if equipped.
Use only machine oil and cleaning agents suitable for the manufacturer's instructions. Do not arbitrarily apply oil to the needle hole or thread because oil can transfer to the bag, contaminate the product, or affect hygiene requirements.
Step 8: Add a needle cooling system
For high-speed machines or continuous production lines, clean, dry air can be used to blow toward the needle area.
The system should ensure:
- The air nozzle is directed correctly at the needle shaft.
- Air pressure is properly adjusted.
- The air contains no water or oil.
- The airflow does not push the thread away from its path.
- Dust is not blown into the looper.
- The airflow does not interfere with loop formation.
A stronger airflow does not necessarily provide better cooling. Excessive airflow can cause thread vibration, skipped stitches, or force dust deeper into the mechanical components.
Step 9: Consider thread or needle lubrication when appropriate
Some production lines use specialized lubricants to reduce the friction coefficient between the thread and needle. However, this is not a solution that should be applied arbitrarily.
Before using a lubricant, consider:
- Whether the bag is used for food or chemicals.
- Whether the customer permits oil residue.
- Whether the lubricant changes the thread color.
- Whether the oil attracts dust.
- Whether the oil affects printing, labeling, or packaging.
- Whether the lubrication amount can be controlled consistently.
Unlubricated sewing thread can still run well if twist, uniformity, strength, needle size, and machine parameters are properly selected. Lubrication should not be used to hide problems such as a scratched needle, oversized thread, or obstructed thread path.
Step 10: Check timing and alignment of the needle assembly
If the needle has been replaced, speed reduced, and tension adjusted but the problem remains, the mechanical system should be inspected more deeply.
A technician should check:
- The distance between the needle and looper.
- The timing at which the looper catches the thread loop.
- The straightness of the needle bar.
- The position of the needle plate.
- Play in bushings and transmission joints.
- Signs of contact between the needle and machine components.
- Vibration at the actual operating speed.
Incorrect timing can cause abnormal thread tension precisely when the needle is hot, resulting in thread breakage even when the thread itself meets quality requirements.
8. How to handle each specific symptom
Case 1: The thread frays but does not break
Prioritize checking:
- Whether the needle hole and groove are smooth.
- Whether the needle size is too small.
- Whether the thread guide near the needle is scratched.
- Whether thread tension is too high.
- Whether the thread has excessively low twist.
- Whether the needle becomes hot after continuous operation.
If the machine continues running while the thread is already frayed, seam strength may decrease even if the thread does not break at the machine.
Case 2: The thread becomes flattened or shiny
This indicates that heat has clearly affected the thread surface.
You should:
- Stop the machine and inspect the needle.
- Replace the needle.
- Reduce the speed for testing.
- Reduce thread tension.
- Check needle size.
- Check the material at the sewing position.
- Consider needle cooling.
Do not continue increasing thread tension to make the seam tighter because this will make the thread break more quickly.
Case 3: The thread end melts into a lump
The heat around the needle hole is likely too high. Prioritize:
- Reducing the speed immediately.
- Replacing the needle.
- Checking whether the needle rubs against the needle plate or looper.
- Checking the cooling system.
- Evaluating whether the thread material is suitable for the machine speed.
- Checking the material layers at the bag edge.
If the thread melts only when sewing through a thick folded section, the edge construction or the parameters for that area should be addressed separately.
Case 4: The thread breaks continuously immediately after reconnecting
If the needle has accumulated heat, reconnecting the thread and immediately restarting the machine can cause the new thread section to become damaged almost immediately.
Stop the machine, allow the needle assembly to cool, and identify the cause before continuing. Repeatedly reconnecting the thread only increases waste and creates inconsistent seam sections.
Case 5: The thread breaks when the production line speed is increased
Do not immediately conclude that the thread quality is poor. Conduct a controlled test:
- Keep the same thread and reduce the speed.
- Keep the same speed and replace the needle.
- Keep the same needle and reduce tension.
- Test another spool from the same lot.
- Test a different thread lot.
- Compare using the same type of bag.
Changing one factor at a time helps determine the actual operating limit of the machine and materials.
9. Common incorrect handling methods
Using your hand to check the needle temperature
The needle is small but can cause burns. Touching it also does not provide an accurate measurement and may contaminate the sewing area.
Only replacing the thread spool without checking the machine
If the needle is scratched, the needle size is incorrect, or tension is too high, a new thread spool will continue to fray and break.
Increasing the needle size excessively
A larger needle may reduce friction with the thread, but it also creates a larger hole in the bag, potentially weakening the bag edge or affecting loop formation.
The needle size must be selected based on a balance between thread size, bag material, and machine design.
Applying oil to the thread arbitrarily
Unsuitable oil can:
- Attract dust.
- Stain the bag.
- Create odors.
- Affect the product inside.
- Cause the tension assembly to slip.
- Make the seam unstable.
- Violate customer requirements.
Only use specialized lubricants when the production process and product requirements allow them.
Increasing thread tension to prevent seam slippage
Excessive tension does not always make the seam stronger. It can weaken the thread, wrinkle the bag edge, and increase the risk of thread breakage.
Changing many parameters at the same time
If the operator replaces the needle, increases the needle size, reduces tension, reduces speed, and changes the thread all at once, it becomes impossible to know which factor solved the problem.
Changes should be made one at a time and the results recorded.
Quick machine troubleshooting table
| Symptom | First thing to check | Priority action |
| Thread frays at the needle hole | Needle and needle size | Replace the needle, inspect the needle hole |
| Thread becomes shiny and flattened | Needle temperature | Reduce speed, cool the needle |
| Thread end melts into a lump | Friction and mechanical contact | Check needle, needle plate, and looper |
| Machine works well when cold but breaks after prolonged operation | Heat accumulation | Reduce speed for testing |
| Thread breaks when passing a folded edge | Material thickness | Select needle, adjust presser foot and feeding |
| Thread breaks immediately after startup | Threading and tension | Rethread, reduce tension |
| Thread frays before reaching the needle | Thread guides and tension disc | Clean or replace scratched components |
| Thread still breaks with a new needle | Timing and thread path | Inspect the entire mechanical system |
| Thread breaks irregularly depending on spool | Thread uniformity | Check spool, joints, and twist |
| Thread breaks when speed increases | Heat, vibration, and pulling load | Determine the maximum stable operating speed |
10. How to prevent hot needles and thread breakage during production
10.1. Establish a periodic needle replacement schedule
Do not wait until the needle breaks before replacing it. A needle may still appear intact while the needle hole is worn or its surface has developed small scratches.
The replacement cycle should be based on:
- Machine operating hours.
- Bag material.
- Machine speed.
- Frequency of sewing through multiple layers.
- Thread breakage rate.
- Seam quality requirements.
10.2. Standardize parameters for each bag type
Each bag type should have its own reference settings:
- Needle type.
- Needle size.
- Thread type.
- Thread tension.
- Stitch length.
- Machine speed.
- Presser foot pressure.
- Cooling requirements.
Using one setting for every bag type often increases defects and makes production overly dependent on individual operator experience.
10.3. Inspect incoming thread
At minimum, inspect:
- Diameter uniformity.
- Twist.
- Tensile strength.
- Surface hairiness.
- Joint size.
- Unwinding behavior.
- Spool weight and length.
- Consistency between production lots.
A good spool of thread should not only feel strong when pulled by hand. It must also run consistently through the tension assembly, needle hole, and stitch-forming mechanism at the actual operating speed.
10.4. Keep the machine clean and properly lubricated
Friction in machine joints, bushings, shafts, and transmission mechanisms increases the temperature of the entire machine head. This heat can indirectly transfer to the needle assembly.
Proper maintenance helps reduce:
- Vibration.
- Noise.
- Needle contact.
- Mechanical heat.
- Timing deviations.
- Abnormal thread breakage.
10.5. Record defect data
The factory can create a simple monitoring table containing:
- Machine ID.
- Bag type.
- Thread code.
- Needle size.
- Speed.
- Start time.
- Time of thread breakage.
- Break location.
- Corrective action.
- Result after correction.
Over time, the data can show which machines frequently overheat the needle, which bag types cause more defects, and which thread types provide better operating stability.
11. Criteria for selecting sewing thread to reduce fraying and breakage
To run stably on bag sewing machines, the thread should have the following characteristics:
Suitable twist
Twist binds the component fibers into a stable structure. Thread with too little twist can easily open and fray, while excessively tight twist can reduce flexibility and make loop formation more difficult.
Uniform diameter
Thread with thick and thin sections causes tension to change continuously. Thick sections can catch at the needle hole, while thin sections are more likely to break under tension.
Low surface hairiness
A smooth surface reduces friction with thread guides and the needle hole. However, smoothness should result from good raw materials, appropriate twist, and stable production processes rather than simply relying on oil.
Stable tensile strength
It is not enough to check the maximum breaking force. The degree of variation between samples and between sections of the same spool is also important.
Good unwinding performance
The spool should release thread evenly without collapsing, tangling, or creating abnormal pulling forces when the machine accelerates.
Small and secure joints
Large joints may not pass smoothly through thread guides or the needle hole. Loose joints can come apart under tension.
12. When should you replace the thread and when should you repair the machine?
Prioritize machine inspection if:
- The thread breaks only on one particular machine.
- The problem appears after the machine becomes hot.
- The thread breaks exactly at the needle hole.
- The needle shows rubbing marks.
- The problem remains after changing to another thread spool.
- The machine becomes more stable when the speed is reduced.
Prioritize thread quality inspection if:
- Several machines experience the same problem with the same thread lot.
- Thread diameter varies significantly.
- The thread is already frayed on the spool.
- There are many large joints.
- The thread breaks at many different locations.
- The spool unwinds unevenly.
- Tensile strength varies significantly between spools.
In many cases, both the machine and the thread contribute to the defect. A thread with a narrow quality tolerance may run well on a properly adjusted machine but break easily on a machine that is slightly misaligned. Conversely, a well-maintained machine may still have difficulty running consistently if the thread diameter and twist are uneven.
Conclusion
A hot needle causing thread to fray, melt, or break is a problem involving heat, friction, and tension during sewing. Typical signs include the machine running well when first started but developing more defects over time, the thread becoming damaged around the needle hole, and the thread end showing signs of becoming shiny, flattened, or fused.
For effective troubleshooting, follow this sequence:
- Replace the needle with the correct type and size.
- Reduce machine speed to test the effect of heat.
- Adjust thread tension.
- Inspect the entire thread path.
- Check the bag material and stitch length.
- Clean the machine and needle area.
- Add cooling if the machine operates continuously.
- Check timing and alignment of the needle assembly.
- Evaluate the thread's uniformity, twist, and running performance.
Addressing the actual cause not only reduces thread breakage but also helps minimize machine downtime, reduce thread waste, stabilize seam quality, and improve the productivity of the bagging line.
Nam Phát Plastic supplies sewing threads for sewing the mouths of woven PP bags, rice bags, animal feed bags, fertilizer bags, and various industrial packaging products. Thread specifications can be selected according to the machine type, seam requirements, and the customer's actual operating conditions.
Frequently asked questions about hot needles and thread breakage
1. Does a hot bag sewing machine needle mean that the machine is running too fast?
High speed is a common cause, but it is not the only one. The needle may also become hot because the needle size is unsuitable, the needle is bent, the needle rubs against the needle plate, the bag material is too thick, thread tension is too high, or the thread path is obstructed.
2. Why does the thread melt right at the needle hole?
The needle hole is where the thread makes contact and slides against the needle at high speed. If the needle is hot or the needle hole is too small, the surface of a thermoplastic thread may soften, flatten, and fuse before breaking under tension.
3. Should a larger needle be used to prevent thread breakage?
The needle size can be increased if the current needle is too small for the thread, but it should not be increased arbitrarily. An excessively large needle creates a larger sewing hole, which may weaken the bag edge and affect stitch formation.
4. Will reducing thread tension weaken the seam?
If tension is reduced too much, the seam may become loose. However, excessive tension can also weaken the thread and increase breakage. The tension should be adjusted to a level that provides stable stitches without excessively stretching the bag edge.
5. Can unlubricated thread run on a high-speed machine?
Yes. Unlubricated thread can run stably when the raw material, twist, uniformity, thread surface, needle size, and machine parameters are appropriate. Lubrication is only a technical solution for certain operating conditions, not a mandatory requirement for every machine.
6. Why does the machine still break the thread after replacing the spool?
The cause may be the needle, thread guides, tension assembly, timing, needle plate, or accumulated heat. If these areas are not corrected, replacing the thread spool usually will not solve the problem.
7. Is cooling the needle with compressed air effective?
Clean and dry compressed air can help reduce needle temperature on continuously operating machines. However, the nozzle must be positioned correctly and the airflow adjusted appropriately so that it does not cause thread vibration or blow dust into the machine mechanism.
8. How can you tell whether the thread broke due to heat or pulling force?
A thread broken by heat often has a shiny, flattened, contracted, or fused end. A thread broken mechanically by pulling usually has a more open and frayed end. The break location and timing should also be considered before drawing a conclusion.
>>> See more:
- 0 Comment


