


 Phan Van Hoang
- 24/07/2026
- 194
Stitch length does not only determine whether a seam looks sparse or dense. It is also a parameter that directly affects load-bearing capacity, stretch, the degree of material damage, production speed, and the amount of thread required for each product.
In principle, the shorter the stitch, the more stitches there are per unit length. As a result, the load can be distributed across more connection points, and the seam is generally stronger. However, when stitch density exceeds the material’s suitable limit, needle holes that are too close together can turn the seam into a perforated strip, causing the fabric to tear before the thread breaks.
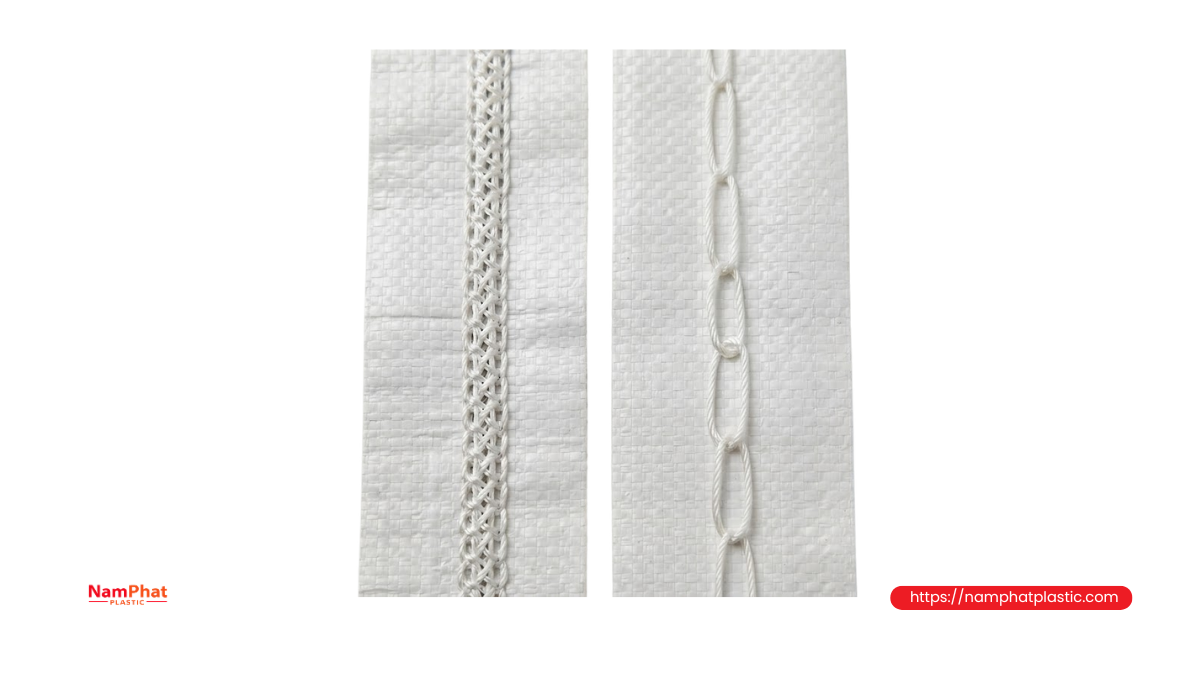
Conversely, longer stitches reduce thread consumption and shorten the machine running time per meter of seam, but may make the seam more prone to opening, less stable, or unable to meet load-bearing requirements. Therefore, the best setting is not the shortest or longest stitch, but the optimal stitch length for each combination of material – thread – needle – stitch type – intended use. Technical documents from A&E and Coats also regard stitch density as one of the important factors affecting strength, appearance, elasticity, and thread consumption.
Quick conclusion: Shorter stitches generally make seams stronger but consume more thread and require more sewing time. Stitches that are too short can damage the material; stitches that are too long can make the seam weak or prone to opening.
Table of Contents [Hide]
1. How are stitch length and stitch density different?
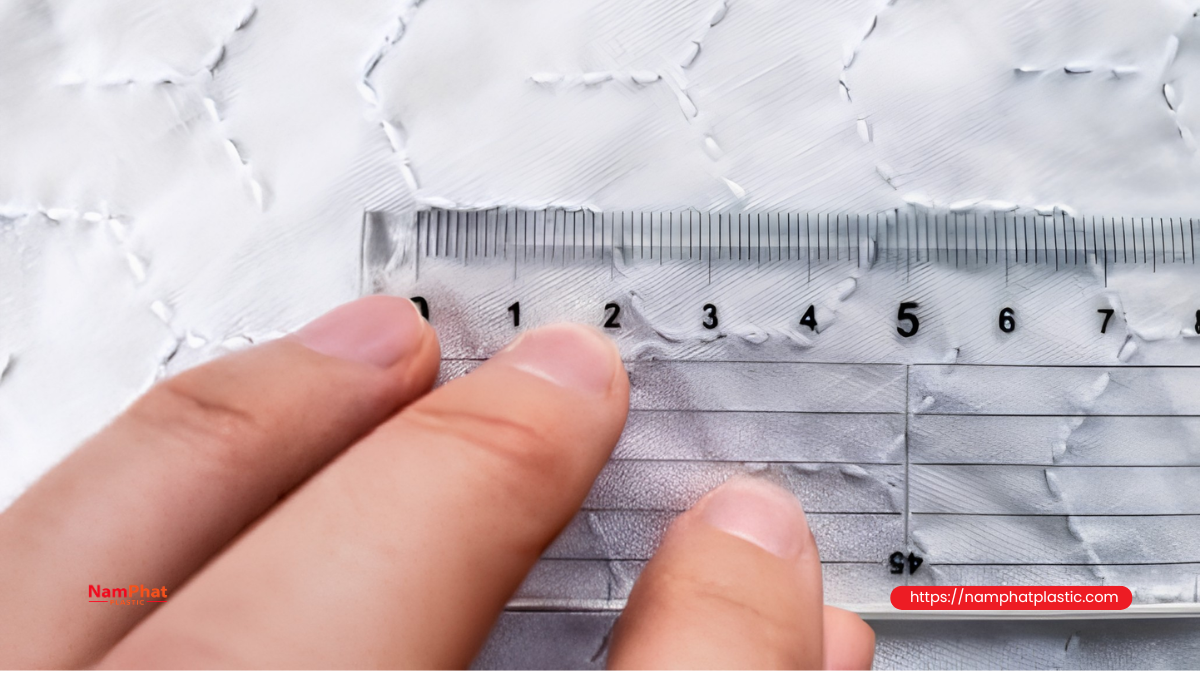
Stitch length, also called stitch pitch, is the distance the material advances after each stitch formation cycle. This parameter is generally expressed in millimeters per stitch.
Stitch density indicates how many stitches there are per unit length. In sewing production, two common ways of expressing it are:
- Stitches per centimeter, abbreviated as stitches/cm.
- Stitches per inch, commonly called SPI – Stitches Per Inch.
Stitch length and stitch density have an inverse relationship:
- SPI = 25.4 / Stitch length (mm)
- Number of stitches per 1 meter = 1000 / Stitch length (mm)
For example, a 2 mm stitch produces 500 stitches per meter of seam. A 4 mm stitch produces only 250 stitches, or half as many.
| Stitch length | Approximate density | Stitches per 1 meter |
| 1.5 mm | 16.9 SPI | 667 stitches |
| 2.0 mm | 12.7 SPI | 500 stitches |
| 2.5 mm | 10.2 SPI | 400 stitches |
| 3.0 mm | 8.5 SPI | 333 stitches |
| 3.5 mm | 7.3 SPI | 286 stitches |
| 4.0 mm | 6.4 SPI | 250 stitches |
| 5.0 mm | 5.1 SPI | 200 stitches |
| 7.0 mm | 3.6 SPI | 143 stitches |
In production control, stitch density should be measured on the actual seam rather than relying only on the number shown on the machine adjustment dial. Slippage between material layers, presser-foot pressure, feed-dog condition, and the thickness of the sewing assembly can cause the actual stitch pitch to differ from the set value.
A simple method is to count the number of stitches over a 100 mm section:
- Average stitch length (mm/stitch) = 100 / Number of stitches counted over 100 mm
For example, if a 100 mm section contains 40 stitches, the average stitch length is 2.5 mm/stitch.
2. Why do shorter stitches generally make seams stronger?
2.1. Load is distributed across more connection points
When a seam is subjected to tension, the force is not transmitted through the entire thread at once but is distributed across the stitches in the loaded area. Higher stitch density creates more points holding the material together, so the average force acting on each stitch tends to decrease.
Shorter stitches also reduce the free thread length between two needle penetrations. The material is less likely to open into a large gap, and seam opening or “gaping” is also reduced.
In an estimation formula for lockstitch seams on woven fabric, A&E expresses preliminary seam strength as follows:
- Estimated strength of 301 stitch seam = SPI × Thread breaking strength × 1.5
- Estimated strength of 401 stitch seam = SPI × Thread breaking strength × 1.7
These formulas show that when thread type and seam construction are kept constant, increasing SPI can increase estimated seam strength. However, these are only preliminary prediction tools for certain seams on woven fabrics. Actual results are also limited by material strength, needle type, thread tension, sewing direction, and seam construction.
Experimental studies on woven fabrics have also found that seam strength increases as stitch density increases within the tested range. This does not mean the relationship continues to increase indefinitely, because the material may transition from thread breakage to fabric tearing when the number of needle penetrations becomes excessive.
2.2. The seam is less likely to open under load
In a low-density seam, the distance between needle penetration points is greater. When tensile force is applied perpendicular to the seam, the material can open between stitches, particularly with loosely constructed fabrics, easily slipping yarns, or a narrow seam allowance.
Increasing stitch density within a reasonable range helps to:
- Reduce seam opening.
- Increase the ability to hold yarns at the seam edge.
- Limit force concentration on a small number of stitches.
- Improve seam stability when the product is pulled, bent, or subjected to vibration.
However, increasing stitch density cannot fully compensate for an excessively small seam allowance, weak thread, or an unsuitable seam construction.
2.3. Usable seam elasticity can be improved
For stretch materials, the seam needs to stretch with the product without thread cracking. Excessively low stitch density can require each thread segment between stitches to stretch more, resulting in seam cracking when pulled in the sewing direction.
In many knitted-fabric applications, increasing SPI together with suitable stretch thread and properly adjusted tension helps reduce the risk of stitch cracking. However, excessively high density can increase the likelihood of the needle cutting yarn loops, so needle point, needle size, and material construction must also be considered.
3. Why can stitches that are too short weaken a seam?
The concept that “more stitches always mean greater strength” is only true within a certain range. When stitch length is reduced excessively, the seam can lose strength because the material is damaged.
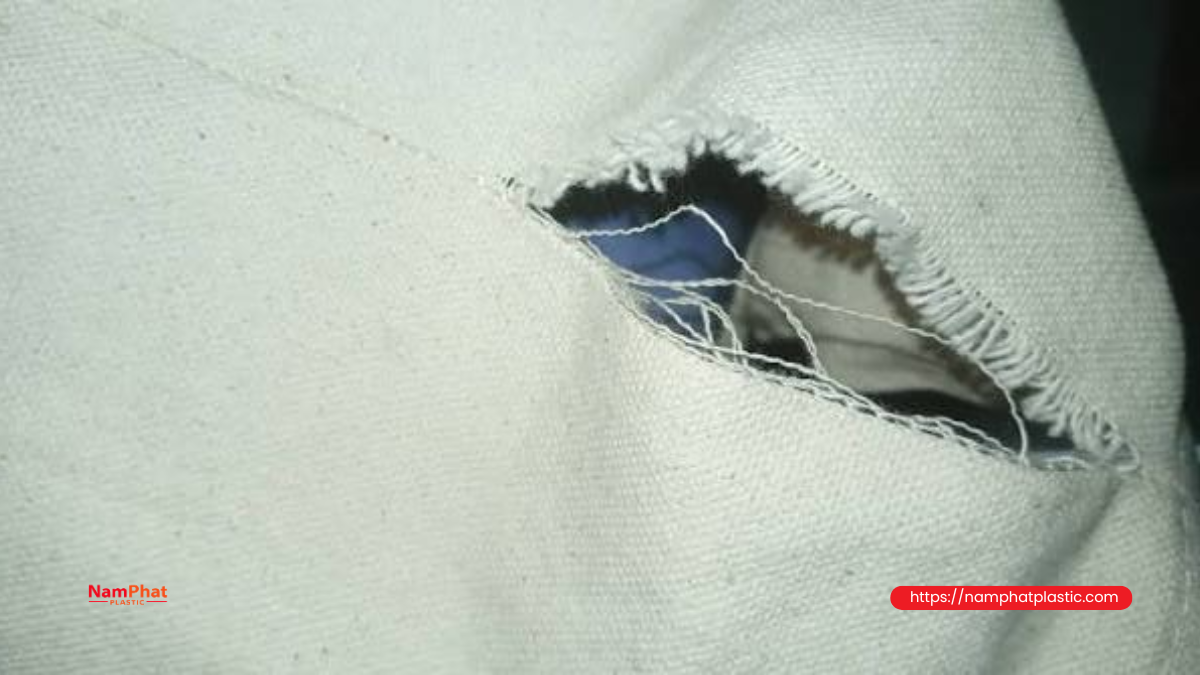
3.1. Perforation effect
Each needle penetration creates a hole in the material. When the holes are too close together, very little material remains between them. Under load, these small sections can tear successively, similar to the perforated edge of a sheet of paper.
Common signs include:
- The material tears along the needle line while the thread remains intact.
- The seam edge separates into an even strip.
- Needle holes become enlarged after tensile testing.
- The seam breaking force is lower even though the number of stitches has increased.
A&E notes that increasing SPI generally increases strength, but in materials sensitive to needle penetration, excessive density can cause damage and weaken the seam.
3.2. Increased risk of needle cutting yarns or cracking coatings
In knitted fabrics, an unsuitable needle point can cut yarn loops instead of pushing them aside. When stitches are placed too densely, the number of potentially damaged locations per meter of seam increases.
For coated materials, synthetic leather, laminated films, nonwoven fabrics, or certain fabrics woven from polyolefin tapes, needle holes often do not close themselves as they do in conventional apparel fabrics. Excessive stitch density can create cracks, tear the coating, or reduce water resistance.
3.3. Increased mechanical and thermal effects
Shorter stitches increase the number of needle penetration cycles per meter of seam. Under high-speed sewing, thick materials, or synthetic materials, friction between the needle and material can raise needle temperature, potentially causing localized melting, weakening synthetic thread, or damaging the material surface. Studies on needle heating show that sewing speed, material thickness, and material properties can all affect thermal damage and seam strength.
3.4. Greater risk of seam puckering
When stitch density is high but thread tension is not reduced accordingly, the amount of thread tightened per centimeter increases. Thin materials may become compressed, creating wrinkles or ripples along the seam.
A puckered seam does not only affect appearance. Residual tension also causes less effective load distribution, increases friction, and can make the thread more likely to break when the product is pulled.
4. How do stitches that are too long affect seam strength?
Longer stitches reduce the number of connection points per unit length. This makes the seam softer and saves thread, but also creates several risks.
4.1. Each stitch has to carry a greater load
When the number of stitches decreases, the total force acting on the seam is distributed across fewer locations. The thread at each stitch must carry a greater portion of the load, especially at the beginning, end, turning points, or areas of the product that are frequently subjected to tension.
If the thread lacks sufficient strength or abrasion resistance, the seam can break at one stitch and then propagate to the following stitches.
4.2. The seam is more likely to open
The larger distance between stitches allows the two material layers to separate when subjected to load. This is particularly noticeable in:
- Loosely woven fabrics.
- Fabrics with smooth surface yarns.
- Seams with a narrow seam allowance.
- Locations subjected to loads perpendicular to the seam.
- Products requiring tightness or the ability to retain fine materials.
4.3. Seam stretch may be insufficient
On elastic materials, excessively low stitch density can cause the thread to be locally stretched. When the product stretches, the thread may not have enough reserve length to move with the material, resulting in stitch cracking.
This issue should not be addressed simply by reducing stitch length. The correct thread type, stitch type, differential feed ratio, thread tension, and seam width must also be considered.
5. How does stitch length affect thread consumption?
5.1. The shorter the stitch, the more times the thread loop is formed
For the same meter of seam, reducing stitch length increases the number of stitches in inverse proportion.
Taking a 3 mm stitch as the reference:
| Stitch length | Stitches/meter | Density index vs. 3 mm stitch |
| 2.0 mm | 500 | 150% |
| 2.5 mm | 400 | 120% |
| 3.0 mm | 333 | 100% |
| 3.5 mm | 286 | 85.7% |
| 4.0 mm | 250 | 75% |
| 5.0 mm | 200 | 60% |
| 7.0 mm | 143 | 42.9% |
The table above shows the change in stitch count, not an absolute thread allowance. However, it is a clear indicator of the consumption trend.
For example, changing from a 3 mm stitch to 2.5 mm increases the number of stitches per meter from approximately 333 to 400, equivalent to a 20% increase. Actual thread consumption will also increase, but not necessarily by exactly 20%, because the thread loop length for each stitch type also depends on material thickness, seam width, and thread tension balance.
The stitch-count comparison formula is:
- % change in stitch count = ((Old stitch length / New stitch length) - 1) × 100
5.2. Thread consumption does not depend only on stitch length
According to Coats’ guidance, thread consumption is also affected by:
- Stitch type.
- Seam type.
- Number of needles and loopers.
- Material thickness.
- Number of material layers.
- Overlock or covering width.
- Stitch density.
- Thread tension and balance.
- Allowance for production waste.
Therefore, two seams with the same stitch length do not necessarily consume the same amount of thread.
301 lockstitch uses one needle thread and one bobbin thread. 401 two-thread chain stitch has a loop structure on the underside and therefore generally uses more thread over the same seam length. Overlock, coverstitch, and multi-thread stitches use additional looper threads and have wider seam structures, so consumption is even higher.
In Coats’ reference consumption table at a density of 7 stitches/cm, 301 stitch is calculated at approximately 2.5 cm of thread per centimeter of seam, while 401 is approximately 5.5 cm of thread per centimeter. These are reference ratios under a defined condition and should not be used as fixed allowances for every machine and material.
5.3. Thread allowance formulas should be used in the factory
A general calculation model is:
- C = (Total (Li × Ri)) × Q × (1 + W)
Where:
- C: total thread length required.
- Li: length of each seam type per product.
- Ri: thread consumption factor for the corresponding stitch type.
- Q: quantity of products.
- W: allowance for waste from thread tails, thread joining, thread breakage, rework, and operation.
Coats recommends a practical method of sewing a standard-length seam, separately pulling out each thread, then dividing the recovered thread length by the seam length. This factor better reflects the actual machine, material, thread size, and settings than a general allowance. Coats also gives a reference waste allowance of 10–15%, but each business should adjust it according to actual production data.
6. Example: Changing stitch length over 1,000 meters of seam
Assume an order has a total of 1,000 meters of main seam.
Option A: 3 mm stitch
- N = 1,000,000 / 3 ≈ 333,333 stitches
Option B: 2.5 mm stitch
- N = 1,000,000 / 2.5 = 400,000 stitches
Increase in stitch cycles:
- ((400,000 - 333,333) / 333,333) × 100 ≈ 20%
Therefore, when reducing stitch length from 3 mm to 2.5 mm:
- Needle cycles increase by approximately 20%.
- Thread consumption tends to increase.
- Machine running time per meter increases.
- Needle penetration on the material increases.
- Seam strength may increase if the material is not damaged.
- The risk of puckering, needle heating, or yarn breakage may increase if other parameters are not adjusted.
This is why every change in stitch length should be evaluated simultaneously through tensile testing, thread-consumption measurement, and production-defect monitoring.
7. Stitch length also affects sewing productivity
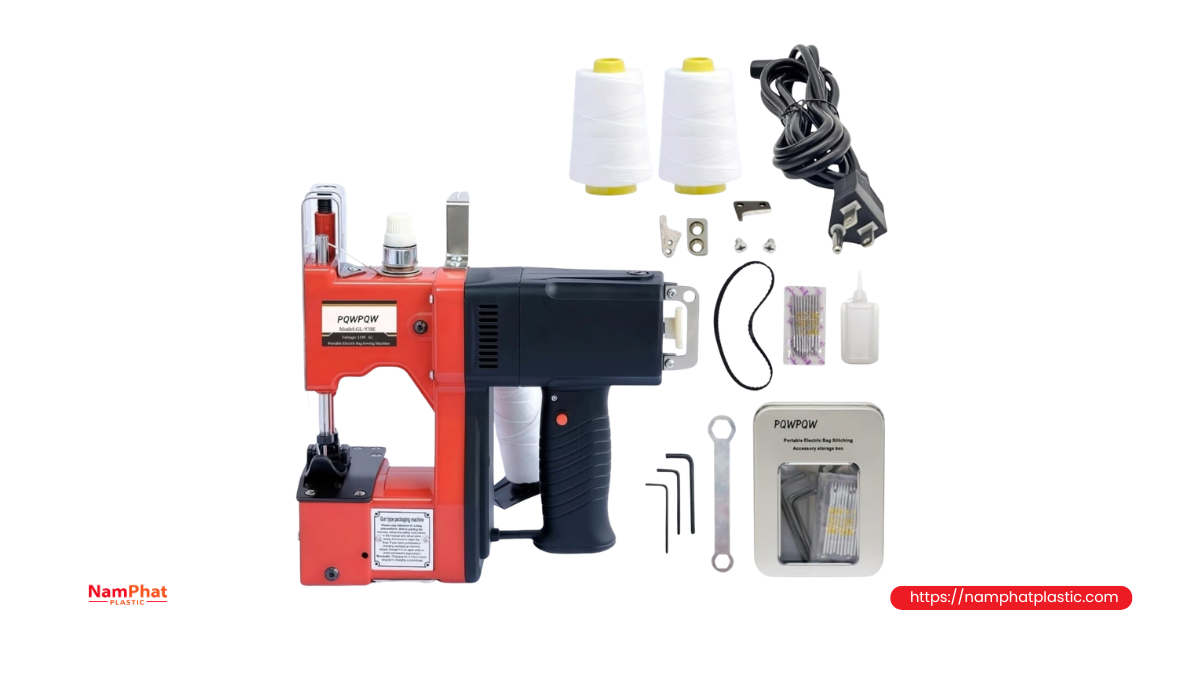
A sewing machine operates according to stitches per minute, while production-line productivity is often evaluated by meters of seam or products per hour.
The theoretical sewing speed can be calculated as:
- V = (SPM × Stitch length (mm)) / 1,000
Where SPM is stitches per minute.
For example, with a machine running at 5,000 stitches/minute:
| Stitch length | Theoretical seam speed |
| 2.5 mm | 12.5 m/min |
| 3.0 mm | 15.0 m/min |
| 3.5 mm | 17.5 m/min |
| 4.0 mm | 20.0 m/min |
Actual speed will be lower because of material handling, turning, machine stops, thread cutting, and acceleration/deceleration. Nevertheless, the table shows that reducing stitch length can significantly increase sewing time per meter.
A&E also provides an example in which a machine running at 5,000 stitches/minute can produce substantially more seam length per minute at 8 SPI than at 14 SPI. Higher density means longer sewing cycles, higher labor costs, and lower output by seam length.
Therefore, optimization should not consider thread cost alone. Total cost should include:
- Actual cost = Thread cost + Machine time cost + Labor cost + Defect cost + Rework cost + Complaint risk cost
A longer stitch may save a few percent of thread but become more expensive if seam-opening or return rates increase.
8. Reference stitch lengths for some product groups
There is no single setting suitable for all materials. The table below should only be used as a starting point for sample sewing.
| Material or application | Reference density | Equivalent stitch length |
| Thin shirts, blouses | 14–20 SPI | Approximately 1.3–1.8 mm |
| Casual shirts, regular woven fabrics | 10–14 SPI | Approximately 1.8–2.5 mm |
| Trousers, skirts | 10–12 SPI | Approximately 2.1–2.5 mm |
| Twill, shorts | 8–10 SPI | Approximately 2.5–3.2 mm |
| Denim, jean jackets | 7–8 SPI | Approximately 3.2–3.6 mm |
| Jersey, knitted polo shirts | 10–12 SPI | Approximately 2.1–2.5 mm |
| Highly elastic fabrics | 14–18 SPI | Approximately 1.4–1.8 mm |
| Medium-to-heavy knitted fabrics | 8–10 SPI | Approximately 2.5–3.2 mm |
The ranges above are converted from A&E SPI guidance for certain textile and apparel categories. The final setting must still be based on stitch type, thread size, material thickness, required appearance, and test results.
For woven PP fabric and industrial packaging
Woven PP fabric should not directly use apparel sewing parameters. PP tapes, coatings, packaging loads, stitch rows, thread size, and bag-bottom construction all change the requirements.
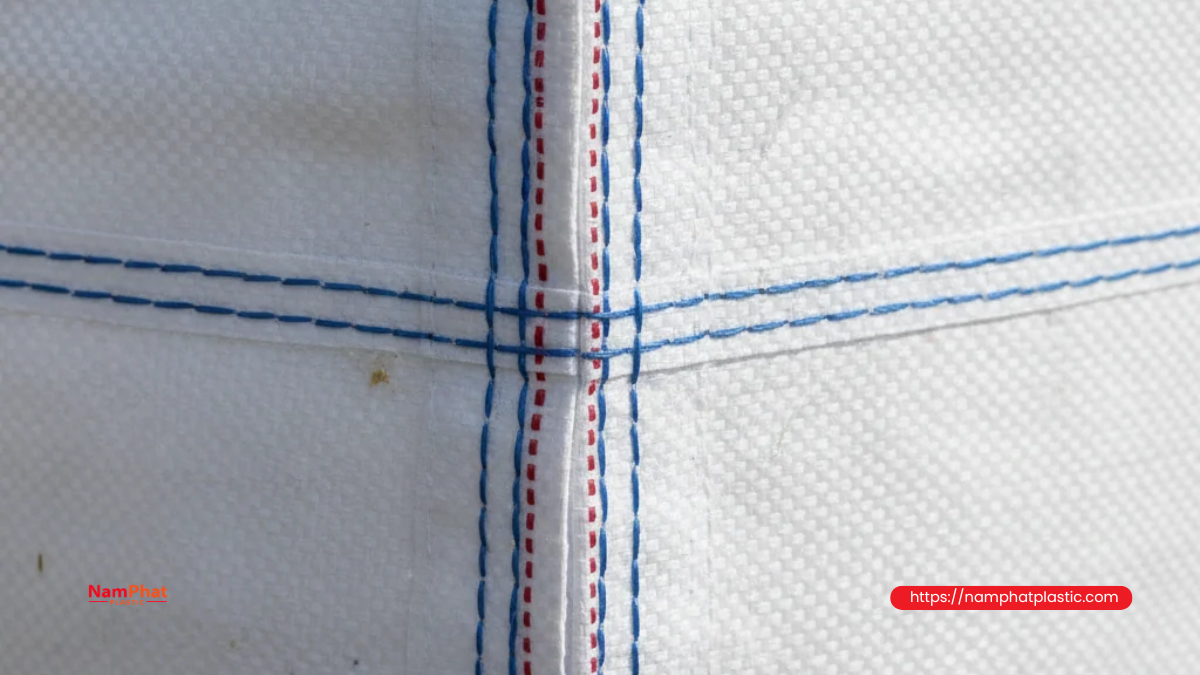
A technical specification for woven PP cement bags specifies two rows of chain stitching, using 120 Tex/1080 denier fibrillated or twisted multifilament thread, with a nominal density of 14 stitches per decimeter and a tolerance of ±2 stitches. This nominal density is equivalent to a stitch length of approximately 7.1 mm; the 12–16 stitches/dm range corresponds to approximately 8.3–6.25 mm. This is an example of a specific specification, not a general standard for all PP bags.
For woven PP bags, the setting should be determined based on:
- Required seam breaking strength.
- Bag filling load.
- Density and strength of the woven tapes.
- Whether the fabric is coated or uncoated.
- PP multifilament, fibrillated, or other thread type.
- Thread size and twist.
- Number of seam rows.
- Bottom folding or bag-mouth closing method.
- Distance from the seam to the edge.
- Impact resistance when the bag is dropped.
In many cases, increasing the number of seam rows or improving the edge distance can be more effective than excessively shortening the stitch.
9. How to determine the optimal stitch length in production
Step 1: Define mandatory criteria
Before adjusting the machine, clearly define what the seam must achieve:
- Minimum breaking strength.
- Required elongation.
- Permitted seam opening.
- Tightness or material-retention requirements.
- Appearance of the upper and lower surfaces.
- Thread-consumption limit.
- Target productivity.
Optimization is not possible with vague requirements such as “sew firmly” or “save thread.”
Step 2: Keep other variables stable
When testing stitch length, keep the following unchanged:
- Same material lot.
- Same seam type.
- Same thread type and size.
- Same needle type, point, and size.
- Same number of material layers.
- Same thread tension.
- Same machine or machine condition.
- Same cutting direction and load direction.
If multiple parameters are changed simultaneously, it is difficult to determine what caused the improvement or deterioration.
Step 3: Select at least three test levels
You can select:
- One level shorter than the current setting.
- The current setting.
- One level longer.
For example, if currently sewing at 3 mm, test 2.5 mm – 3 mm – 3.5 mm. For woven PP bags with requirements specified in stitches per decimeter, test around the customer-specified setting, such as 12 – 14 – 16 stitches/dm.
Step 4: Measure quality and cost simultaneously
For each setting, record:
| Indicator group | What to measure |
| Mechanical | Seam breaking force, elongation, force at initial opening |
| Failure mode | Thread breakage, material tearing, yarn slippage, skipped stitches |
| Consumption | Meters of thread per 100 m or 1,000 m of seam |
| Production | Meters of seam/minute, cycle time |
| Appearance | Puckering, visible stitches, skipped stitches, incorrect stitch length |
| Stability | Thread-break rate, number of machine stops, rework |
Seam strength can be tested using tensile methods with the force applied perpendicular to the seam. ASTM D1683/D1683M is a method used for seams in woven fabrics, while ISO 13935 describes maximum-force tests for seam rupture using strip or grab methods. The specific method must be appropriate for the material type and customer standard.
Step 5: Observe the failure mode, not only the force value
Two samples may reach the same breaking force but have different implications for actual use.
Thread breakage: The stitch density, thread strength, thread tension, or stitch type may need adjustment.
Material tearing along the needle line: Stitch density may be too high, the needle may be too large, or the needle point may be unsuitable.
Yarn slippage and seam opening: Stitch density, seam allowance, sewing direction, and fabric construction should be reviewed.
Chain-stitch unraveling: Check the end lock, thread-tail length, and stitch-forming mechanism.
Seam puckering: Review thread tension, feed, thread shrinkage, and stitch density.
Step 6: Select the longest stitch that still fully meets the requirements
From a cost perspective, an effective principle is:
Choose the longest stitch length that still exceeds requirements for strength, tightness, elongation, appearance, and stability with an appropriate safety margin.
This principle avoids both extremes: excessively dense stitching that wastes thread and damages the material, or excessively sparse stitching that reduces quality.
10. Formula for evaluating seam efficiency
In addition to absolute breaking force, businesses can monitor seam efficiency:
- Seam efficiency (%) = (Breaking force of sewn sample / Breaking force of unsewn material) × 100
This indicator shows what percentage of the original load-bearing capability of the material is retained after sewing.
When comparing, the sewn sample and original material sample should be tested under equivalent conditions. A seam with a high breaking force is not necessarily optimal if the original material is much stronger or if the failure mode is tearing along the needle-hole line. ASTM D1683 also considers comparing seam breaking force with material strength as a basis for evaluating seam efficiency and sewing construction.
11. Common mistakes when optimizing stitch length
Looking only at the amount of thread saved
Increasing stitch length from 3 mm to 4 mm reduces the number of stitches by approximately 25%, but this does not mean total cost will decrease by 25%. If the seam becomes weaker, rework and complaint costs may exceed the thread savings.
Assuming shorter stitches are always stronger
Shorter stitches are beneficial only until the material begins to be damaged by the needle. On easily torn materials, dense stitching can become a tear line.
Using the same setting for every material weight
Even the same fabric type may require different stitch lengths when GSM, weave density, coating, or number of sewn layers changes.
Adjusting stitch length while ignoring thread tension
Increasing stitch density while maintaining excessive tension can cause seam puckering and excessive thread stress.
Calculating thread consumption using one general factor
The factor for 301 stitch cannot simply be applied to 401, 504, or multi-needle seams. Each stitch type needs its own consumption factor.
Not checking the actual stitch pitch
A machine dial displaying 3 mm does not guarantee that the finished seam is actually 3 mm. It must be measured on the material being produced.
Conclusion
Stitch length creates a direct trade-off between quality and cost.
Shorter stitches increase stitch density, generally improve force distribution, reduce seam opening, and can improve seam strength. In return, thread consumption, needle cycles, and sewing time per meter all increase. When density exceeds the material’s needle-penetration tolerance, the seam can actually become weaker due to fabric tearing, yarn cutting, or thermal damage.
Longer stitches reduce thread consumption, increase seam speed, and create a more open appearance. However, if they are too sparse, each stitch must carry more load, the seam gap can open more easily, and product stability decreases.
Therefore, the optimal setting must be determined by testing multiple stitch lengths under controlled conditions and then comparing breaking force, failure mode, thread consumption, productivity, and defect rate simultaneously. In industrial production, the most effective choice is generally the longest stitch length that still fully meets quality requirements with an appropriate safety margin.
Frequently asked questions about stitch length
1. Does a shorter stitch always mean a stronger seam?
Not completely. Within a suitable range, shorter stitches generally make seams stronger because the load is distributed across more points. When stitches are too short, closely spaced needle holes can cause the material to tear along the seam.
2. How much does thread consumption increase when reducing the stitch from 3 mm to 2.5 mm?
The number of stitches per meter increases by approximately 20%. Actual thread consumption also increases, but not necessarily by exactly 20%, because it also depends on stitch type, thickness, seam width, and tension.
3. Does increasing stitch length save thread?
Yes. Longer stitches reduce the number of stitch formations per meter. However, they should only be increased when the seam still meets the required breaking force, tightness, elongation, and appearance.
4. How long a section should be measured to determine stitch length?
You can count stitches over a 100 mm section to reduce error. Dividing 100 by the number of stitches counted gives the average stitch length in millimeters.
5. What stitch length is suitable for woven PP fabric?
There is no universal value. Woven PP bags generally use a longer stitch pitch than apparel, but the setting must be based on bag type, load, bottom construction, number of stitch rows, thread type, and customer-required seam breaking strength.
6. Can formulas alone be used to determine seam strength?
No. Formulas are only useful for prediction. The final setting should be confirmed using actual sewn samples, tensile testing, and observation of the failure mode.
>>> See more:
- 0 Comment


