


 Phan Van Hoang
- 24/07/2026
- 150
In bag closing production lines, many issues such as thread breakage, skipped stitches, loose seams, frayed thread, or unusual machine noises do not originate from thread quality. The cause may sometimes be nothing more than bag dust, fiber lint, dirty oil, or small thread pieces accumulating around the thread guide, needle, and looper.
If the machine is not cleaned regularly, this dust can change thread tension, interfere with stitch formation, and cause unstable machine operation. Therefore, establishing a sewing machine cleaning checklist for each shift is one of the simple but highly effective measures to reduce machine downtime and limit seam defects.
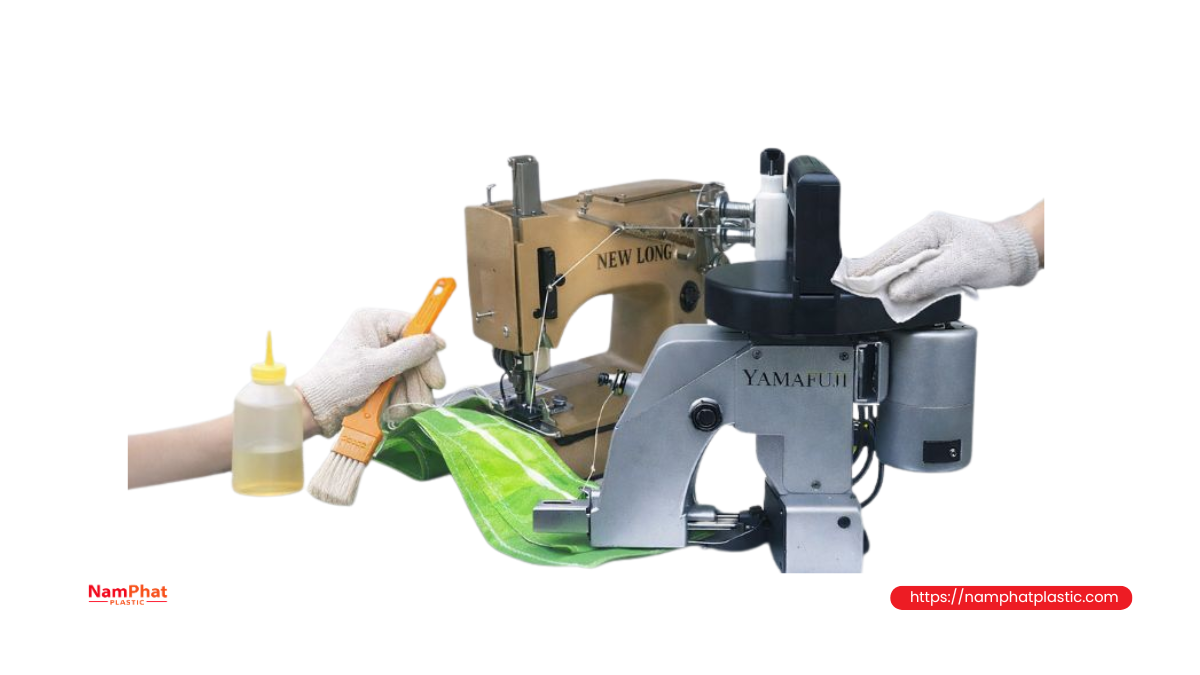
A good procedure should not only require the machine to be clean. Operators must also know where to clean, when to clean, and how to clean without affecting the accuracy of machine components.
Table of Contents [Hide]
1. Why should bag sewing machines be cleaned every shift?
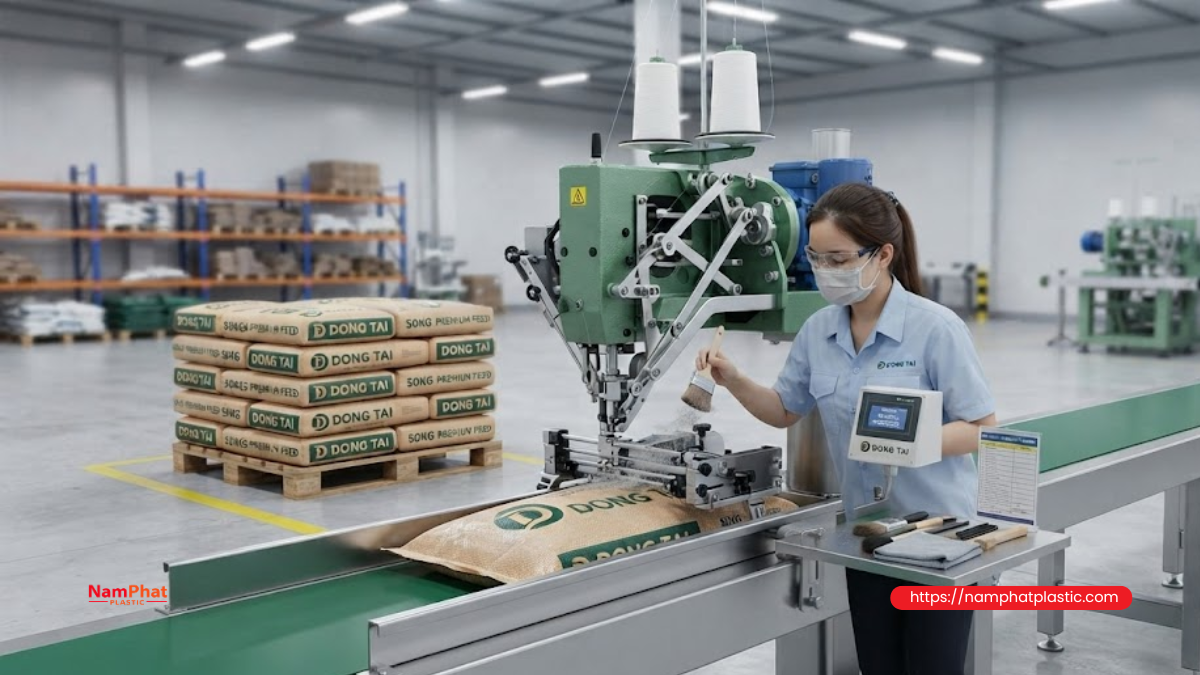
Bag sewing environments generally generate more dust and contaminants than conventional textile sewing. Depending on the type of bag and packaged product, the sewing area may contain:
- Dust from woven PP bags.
- Small PP tape fragments generated at the bag edges.
- Powder from the product inside the bag.
- Thread lint accumulating around the tension discs.
- Machine oil mixed with dust, forming residue.
- Loose thread ends caught in the looper or cutting mechanism.
- Small pieces of crepe paper, binding tape, or BOPP layers.
When the machine runs continuously at high speed, these contaminants can be drawn deep into the thread guide gaps and stitch-forming area. Even a thin layer of dust on the tension discs can change thread tension. A small piece of thread caught near the looper can cause the thread loop to form unevenly.
Cleaning every shift helps businesses achieve four important objectives:
- Keep the thread path clear.
- Maintain stable thread tension.
- Detect worn needles, loopers, or thread-guiding components early.
- Prevent dust and thread fragments from accumulating into serious problems.
2. Safety principles before cleaning a bag sewing machine
Before touching the needle, looper, cutter, or moving mechanism, the operator must bring the machine to a safe state.
Mandatory steps
- Stop the machine completely.
- Disconnect the power supply or lock the operating switch.
- Wait until the needle and all rotating mechanisms have come to a complete stop.
- Do not place your hand under the presser foot while the machine can still start.
- Wear safety glasses when using compressed air.
- Use a soft brush, clean cloth, and specialized tools.
- Do not remove the looper, needle assembly, or tension assembly without proper training.
For automatic bag sewing lines, both the sewing machine and conveyor must be stopped before cleaning the needle area. If the machine has a test-run mode or foot pedal, prevent others from accidentally activating it while work is being performed.
3. What cleaning methods should be avoided?
Some operations may seem quick but can make the machine condition worse:
- Do not use hard metal objects to scrape directly along thread guide grooves.
- Do not blow high-pressure compressed air directly at bearings or machine seals.
- Do not spray oil directly onto the tension discs.
- Do not use highly linty cloths to wipe the looper and needle.
- Do not bend the needle to check its stiffness.
- Do not use coarse sandpaper to aggressively rub the looper.
- Do not pull strongly on thread caught inside the cutting mechanism.
The purpose of cleaning is to remove contaminants while preserving the shape, smoothness, and position of the precision components.
4. Start-of-shift bag sewing machine cleaning checklist
Start-of-shift cleaning and inspection help operators detect problems left from the previous shift before production begins.
The procedure normally takes only about 5–10 minutes if the work area has been properly handed over.
4.1. Check the thread spool area
☐ The thread spool is positioned in the correct unwinding direction.
☐ The spool surface is free of oil, dust, and water.
☐ No packaging, ties, or loose thread ends are caught around the base.
☐ The spool holder does not vibrate, tilt, or rub against the spool.
☐ The distance from the spool to the first thread guide is appropriate.
☐ The unwinding path is not obstructed by tools or electrical wires.
A clean thread spool can still cause uneven unwinding if the holder is misaligned. When the spool rotates or vibrates abnormally, the incoming pulling force changes continuously, causing the seam to alternate between tight and loose.
4.2. Clean the thread eyes and thread guide bar
☐ Wipe dust from the thread guides.
☐ Remove thread lint wrapped around the guide bar.
☐ Check whether the thread eyes are chipped, scratched, or deformed.
☐ Ensure the thread passes through the guide positions in the correct order.
☐ Check that the thread is not crossed or rubbing against the machine body.
A clean piece of thread can be pulled gently through the thread eye to check smoothness. If the thread catches or becomes frayed after passing through, the thread eye may have a burr or worn surface.
Do not rely only on visual inspection because small scratches on the inside of a thread eye are often difficult to detect.
4.3. Clean the thread tension assembly
☐ Remove the thread from the tension discs before cleaning.
☐ Use a soft brush to remove all dust and lint between the discs.
☐ Wipe the contact surfaces of the tension discs clean.
☐ Check whether the tension spring is misaligned or stuck.
☐ Check that the tension adjustment knob is not loose.
☐ Re-thread the machine through the correct groove and position.
The thread tension assembly is one of the areas where lint accumulates most easily. When lint is trapped between the discs, the pressure applied to the thread may decrease. Conversely, if oil and dust combine into residue, the thread may be held too tightly.
After cleaning, do not immediately turn the tension knob. Keep the previous setting, run a test, and adjust only if the seam actually shows abnormal signs.
4.4. Check the thread take-up lever and thread-holding spring
☐ Clean thread lint around the thread take-up lever.
☐ Check that the guide hole on the take-up lever is not scratched.
☐ Check that the take-up lever moves freely.
☐ Inspect the thread-holding spring for deformation.
☐ Ensure the thread does not catch on the machine housing.
The thread take-up lever retrieves excess thread during stitch formation. When this area is stuck or the thread path is obstructed, the thread loop may not be tightened at the correct time.
4.5. Clean and inspect the needle
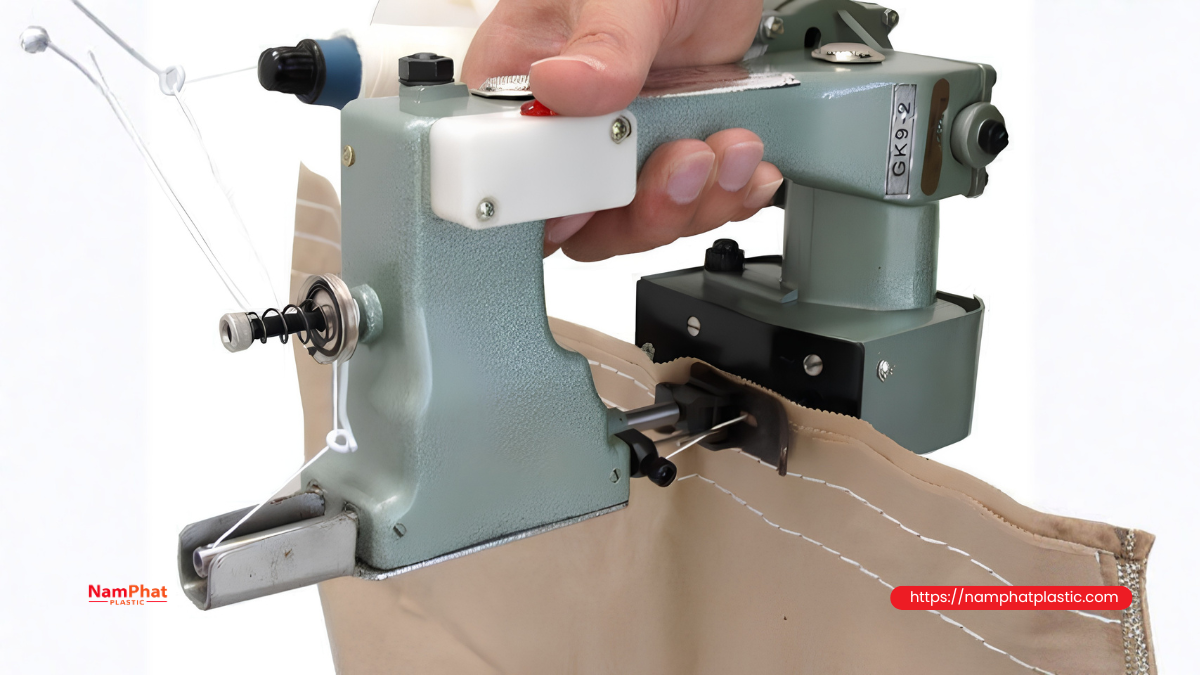
☐ Wipe dust, dirty oil, and residue from the needle shaft.
☐ Check whether the needle tip is dull, bent, or chipped.
☐ Check the needle groove for scratches.
☐ Check that the needle is installed in the correct direction.
☐ Check that the needle has been pushed fully into the specified position.
☐ Tighten the needle retaining screw.
☐ Match the needle size to the thread type and bag material being sewn.
Do not continue using a slightly bent needle because even a small bend can change the distance between the needle and looper. Common consequences include skipped stitches, failure of the looper to catch the thread loop, or the needle striking the stitch-forming components.
The needle should also be replaced when:
- The needle tip is no longer sharp.
- The needle produces a louder penetration sound than normal.
- The thread becomes frayed around the needle eye.
- The bag surface develops large needle holes or torn hole edges.
- The needle becomes abnormally hot even though the machine speed has not changed.
4.6. Clean the looper
☐ Turn the machine by hand to a position where the looper can be easily observed.
☐ Use a small brush to remove all thread lint around the looper.
☐ Remove loose thread ends caught in the looper gap.
☐ Wipe oil and dust residue from the looper surface.
☐ Check whether the looper tip is blunt, scratched, or chipped.
☐ Check that the looper does not contact the needle.
☐ Do not change the looper position without first identifying the cause.
The looper is the component that determines whether the thread loop can be properly caught. The looper tip must be sufficiently smooth and pass the needle at the correct distance.
If the looper tip is scratched, the thread may be frayed during stitch formation. If the looper is covered with residue, the thread loop may slip unevenly and cause intermittent skipped stitches.
4.7. Check the presser foot and throat plate
☐ Clean dust beneath the presser foot.
☐ Remove bag fragments caught in the feed dog.
☐ Check that the throat plate is not scratched around the needle hole.
☐ Check that the presser foot presses evenly against the material.
☐ Check that the feed dog is not worn, broken, or covered with residue.
☐ Ensure no loose thread is wrapped underneath the throat plate.
When the feed dog is covered with dust or product powder, its ability to feed the bag may decrease. Operators often compensate by pulling the bag manually, but this can make stitches uneven and increase the risk of bending the needle.
4.8. Clean the thread cutter and cutting mechanism
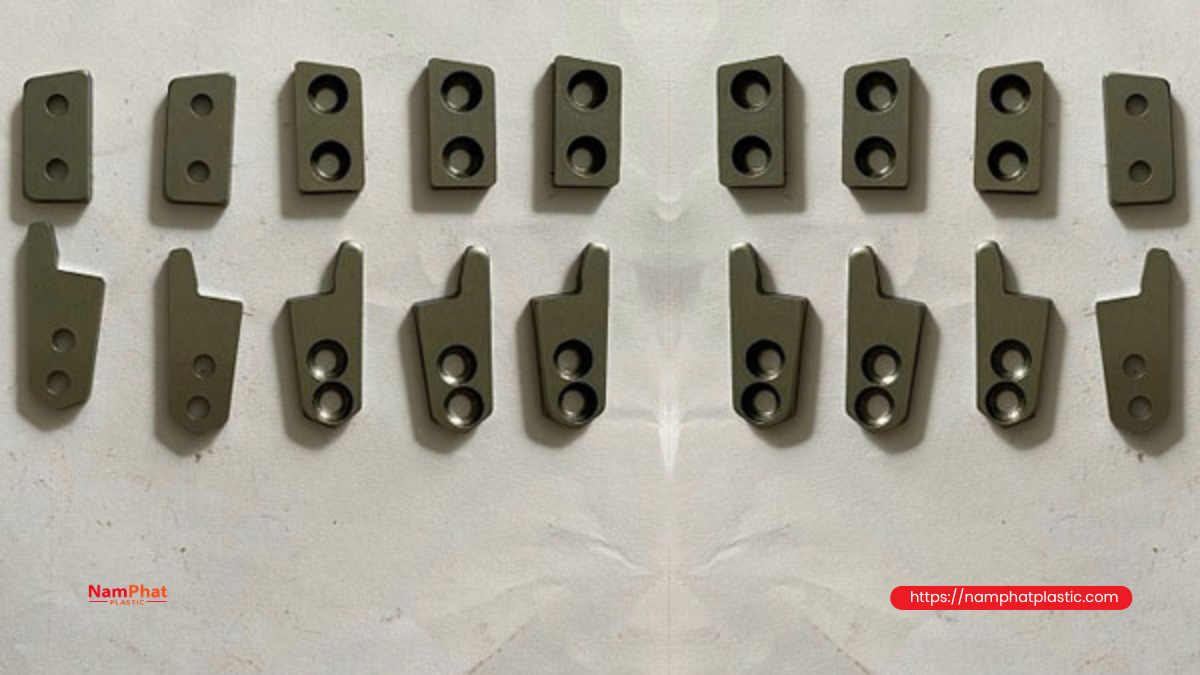
☐ Remove loose thread and bag fragments around the cutter.
☐ Check that the cutter is not jammed.
☐ Check that the blade is not chipped.
☐ Check that the cutting mechanism completes its full stroke.
☐ Do not allow heavy dirty oil residue to accumulate around the cutting area.
An unclean cutter may cause the bag edge to tear instead of being cut cleanly. Thread that is not completely cut can also be pulled back into the looper area and cause thread tangling.
4.9. Test run before production
After completing start-of-shift cleaning, sew several sample bags.
☐ Run the machine at low speed.
☐ Observe whether the thread unwinds steadily from the spool.
☐ Check that the machine does not produce impact or collision noises.
☐ Check both the upper and lower sides of the seam.
☐ Pull-test the seam horizontally and vertically.
☐ Check the chain-stitch end after cutting.
☐ Increase speed only after the seam is stable.
5. In-shift quick inspection checklist
Not every component needs to be disassembled and deep-cleaned during the shift. However, operators should perform quick inspections after a certain period or when changing bag lots, thread colors, or product specifications.
Areas to observe
☐ Has thread lint accumulated on the tension assembly?
☐ Does the thread vibrate or jerk while unwinding from the spool?
☐ Is there an unusual amount of dust around the needle area?
☐ Is the needle hot, discolored, or covered with plastic residue?
☐ Does the looper make unusual noises or show signs of contact?
☐ Has the seam tightness changed?
☐ Is the stitch length uniform?
☐ Are there many loose threads and bag fragments on the floor?
6. When should the machine be stopped and cleaned immediately?
Do not wait until the end of the shift if any of the following occurs:
- The thread begins to fray continuously.
- The machine skips stitches periodically.
- Thread tension changes abnormally.
- The needle heats up faster than usual.
- There is a sound of the needle contacting the looper or throat plate.
- Loose thread ends are pulled into the stitch-forming area.
- The cutter does not operate cleanly.
- Dust or product powder completely covers the feed dog.
- Dirty oil appears on the seam or bag surface.
Continuing to operate the machine after abnormal signs appear can cause a minor problem to develop into a broken needle, chipped looper, or damaged cutter.
7. End-of-shift bag sewing machine cleaning checklist
End-of-shift cleaning aims to hand over the machine in a clean, safe condition and ready for the next shift.
7.1. Stop the machine and collect materials
☐ Disconnect the power supply.
☐ Secure the thread end to prevent it from coming out of the thread path.
☐ Cover or properly store the thread spool in use.
☐ Collect defective bags and test products.
☐ Do not place thread spools directly on the floor.
☐ Record the thread code, bag code, and current specifications.
7.2. Clean the entire thread path
☐ Clean the spool holder.
☐ Wipe the inlet thread guide.
☐ Clean the thread tension discs.
☐ Clean the thread take-up lever.
☐ Remove loose thread around the guide shafts.
☐ Check areas where the thread frequently rubs.
7.3. Clean the needle and looper area
☐ Remove all loose thread around the needle.
☐ Clean beneath the presser foot.
☐ Clean the throat plate and feed dog.
☐ Clean the looper.
☐ Inspect the cutter and cutting mechanism.
☐ Look for contact marks on the needle, looper, and throat plate.
☐ Replace the needle if there are signs of bending, dullness, or scratches.
7.4. Clean the machine body and surrounding area
☐ Wipe the machine body.
☐ Clean dust around the motor ventilation openings.
☐ Collect thread pieces, bag fragments, and binding tape.
☐ Sweep the floor around the sewing station.
☐ Do not leave tools on the conveyor.
☐ Store scissors, brushes, tweezers, and machine oil in their designated locations.
☐ Keep the walkway around the machine clear.
7.5. Record handover condition
☐ Number of bags sewn.
☐ Number of thread breakages.
☐ Number of needle replacements.
☐ Number of skipped stitches or resewing operations.
☐ Cutter condition.
☐ Unusual noise or vibration.
☐ Areas that were cleaned but still show potential problems.
☐ Recommendation for technician inspection if necessary.
8. Bag sewing machine cleaning checklist by shift
| Time | Item | Inspection content | Person responsible |
| Start of shift | Thread spool | Clean, dry, steady unwinding | Operator |
| Start of shift | Thread guide eyes | Free of dust and scratches, correctly threaded | Operator |
| Start of shift | Thread tension assembly | No lint between discs, spring operates properly | Operator |
| Start of shift | Needle | Not bent, dull, or scratched; installed correctly | Operator |
| Start of shift | Looper | Clean, smooth, no loose thread obstruction | Operator |
| Start of shift | Presser foot and feed dog | Free of dust and bag fragments | Operator |
| Start of shift | Cutter | Clean, not chipped, completes full cutting stroke | Operator |
| During shift | Thread unwinding path | No vibration, jerking, or tangling | Operator |
| During shift | Needle temperature | Not abnormally hot or covered with plastic residue | Operator |
| During shift | Stitch quality | No skipped stitches, loose seams, or excessive tightening | Operator |
| End of shift | Thread path | All lint and dust removed | Operator |
| End of shift | Stitch-forming area | Needle, looper, throat plate, and feed dog cleaned | Operator |
| End of shift | Machine area | Loose threads, defective bags, and tools collected | Operator |
| End of shift | Machine log | Record defects, thread breakages, and needle replacements | Operator |
| End of shift | Handover | Report abnormal signs to the next shift | Team/shift leader |
9. Distinguishing machine cleaning, inspection, and adjustment
In practice, these three tasks are often confused.
Cleaning
Means removing dust, dirty oil, thread lint, bag fragments, and contaminants from the machine.
Trained operators can perform this according to the checklist.
Inspection
Means observing, listening, touching, or test-running the machine to detect abnormal signs such as:
- Bent needle.
- Scratched looper.
- Chipped thread guide.
- Excessive machine vibration.
- Cutter failing to complete the cut.
- Changes in seam quality.
The operator can record and report these findings.
Adjustment
Means changing technical settings or component positions, such as:
- Adjusting the needle-to-looper distance.
- Adjusting the timing of the looper catching the thread loop.
- Adjusting the feed dog stroke.
- Adjusting the cutter position.
- Adjusting needle height.
- Adjusting presser foot pressure.
These operations should be performed by a technician or trained personnel. Routine cleaning should not become an opportunity to arbitrarily adjust the machine.
10. Tools that should be provided at each sewing station
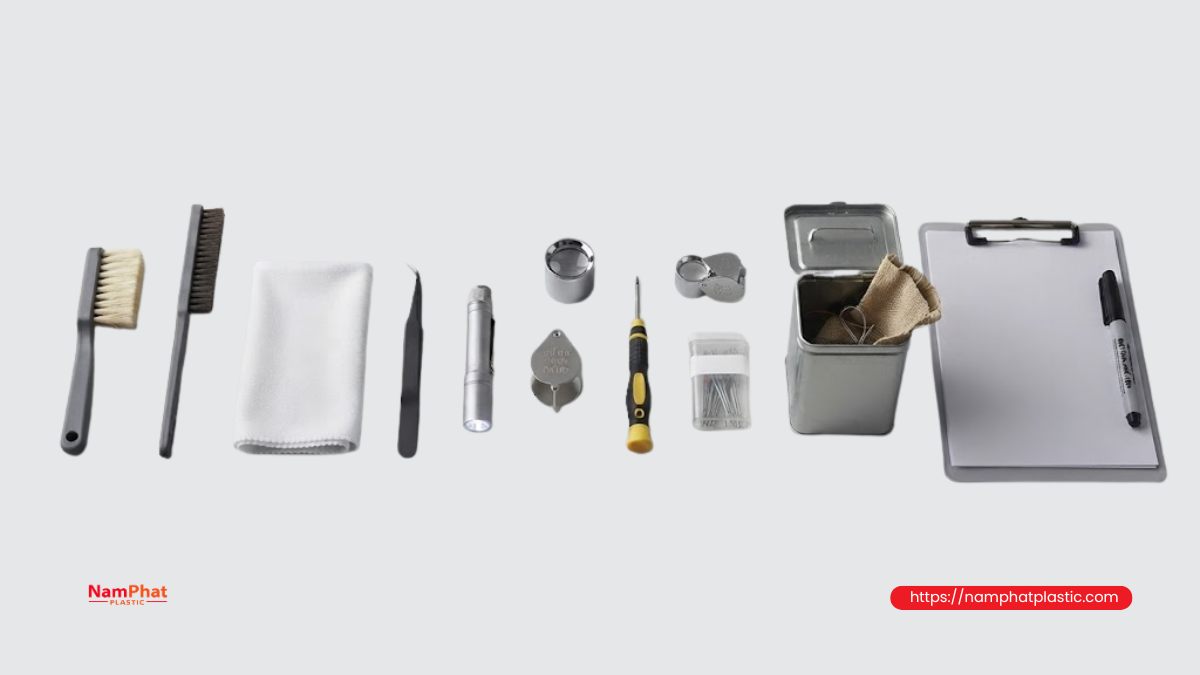
A standard cleaning tool set may include:
- Small soft-bristle brush.
- Long brush for cleaning narrow gaps.
- Lint-free cloth.
- Fine-tip tweezers for removing loose thread.
- Inspection flashlight.
- Handheld magnifying glass.
- Correct-size screwdriver.
- Used needle container.
- Container for loose thread and bag fragments.
- Start-of-shift and end-of-shift checklist forms.
Compressed air should only be used when the company has regulations covering pressure, blowing direction, and protective equipment. In many cases, a soft brush and industrial vacuum cleaner are safer because they do not push dust deeper into the machine.
11. Appropriate cleaning frequency for different production conditions
Not every production line generates the same amount of dust. Cleaning frequency should be based on the bag type, packaged product, and machine speed.
| Production condition | Recommended frequency |
| Clean bags, low-dust products | Start and end of shift |
| Woven PP bags generating a lot of lint | Start, middle, and end of shift |
| Bags containing feed, powder, cement, or fertilizer | Quick inspections several times per shift |
| High-speed production line | Periodic inspection of needle and looper areas during the shift |
| Frequent thread color changes | Clean the thread path before threading the new color |
| Changing from woven PP bags to BOPP bags | Clean the feed dog, needle, and throat plate before operation |
| Machine experiencing thread breakage or skipped stitches | Stop and inspect immediately; do not wait until the end of the shift |
Businesses can start with a fixed cleaning frequency and then adjust it based on actual defect data.
12. How to evaluate the effectiveness of the cleaning checklist
A checklist is only effective when its results are monitored. Some indicators that should be recorded include:
- Number of thread breakages per shift.
- Number of bags requiring resewing.
- Number of skipped stitches.
- Number of needles used per week.
- Machine downtime due to unexpected cleaning.
- Machine downtime due to thread jams.
- Number of times the cutter fails to cut completely.
- Number of defects caused by dirty oil getting onto bags.
- Production output before and after implementing the checklist.
For example, if thread breakages decrease but the skipped-stitch rate does not change, the business should further inspect needle and looper accuracy and stitch-forming timing. If defects are concentrated in one shift, the cause may lie in handover procedures, threading practices, or cleaning compliance.
13. Common mistakes when implementing shift-based checklists
Checklist is too long and lacks focus
A list with too many difficult-to-verify items can cause workers to check boxes out of habit. The checklist should focus on locations that directly affect seam quality.
Signing off without actually inspecting
The team leader should randomly inspect areas such as the tension discs, looper area, and underside of the presser foot. These areas are easily overlooked.
No clearly assigned responsibility
Each item should clearly identify whether the operator, shift leader, or technician is responsible. When responsibility is unclear, minor problems are often passed to the next shift.
Using compressed air as a substitute for the entire cleaning process
Compressed air can quickly clean surfaces but may also push dust into machine gaps. Areas such as the tension discs, looper, and cutter still require direct inspection.
Cleaning while changing machine settings at the same time
If the operator simultaneously cleans, changes the needle, adjusts thread tension, and adjusts the looper, it becomes difficult to determine which action changed the seam. Only one factor should be changed at a time and the change should be recorded.
14. Sample handover procedure between two shifts
A short handover procedure can be carried out in the following order:
- The previous shift stops the machine and cleans the entire area.
- Record the thread type, needle size, bag type, and current operating settings.
- Record the number of thread breakages, needle changes, and defects that occurred.
- Mark locations requiring technical inspection.
- The next shift observes the machine before accepting the handover.
- Run a test at low speed.
- Confirm seam quality before starting mass production.
The machine should not be handed over simply by saying, “The machine is running normally.” Quantitative information and minor signs from the previous shift are often very useful for preventing problems in the next shift.
15. Condensed checklist that can be posted directly at the machine
Start of shift
☐ Machine area is clean and free of obstructions.
☐ Thread spool is clean, dry, and correctly positioned.
☐ Thread guides and tension discs are free of lint.
☐ Needle is straight, sharp, and installed correctly.
☐ Looper is clean, unscratched, and free of loose thread.
☐ Presser foot, feed dog, and throat plate are clean.
☐ Cutter operates normally.
☐ Run a test and inspect both sides of the seam.
During shift
☐ Monitor thread unwinding stability.
☐ Check for thread lint at the tension assembly.
☐ Observe needle temperature and condition.
☐ Stop the machine if there are skipped stitches, contact noises, or frayed thread.
☐ Regularly collect loose thread and bag fragments.
End of shift
☐ Disconnect power and secure the thread end.
☐ Clean the entire thread path.
☐ Clean the needle, looper, feed dog, and cutter.
☐ Wipe the machine body and sweep the surrounding area.
☐ Record defects and needle replacement frequency.
☐ Clearly hand over the machine condition to the next shift.
Conclusion
Cleaning the thread guide, needle, looper, and sewing area is not merely a secondary task to be performed when the machine becomes excessively dirty. It is part of the quality-control process for bag seams.
A properly designed bag sewing machine cleaning checklist for each shift can help businesses:
- Reduce thread breakage and skipped stitches.
- Limit thread jams around the looper.
- Stabilize thread tension and stitch length.
- Reduce the number of resewing operations.
- Detect worn needles, loopers, and cutters early.
- Shorten unplanned machine downtime.
- Improve handover discipline between shifts.
The greatest benefit does not come from cleaning for a long time, but from cleaning the right areas at the right frequency and properly recording abnormalities that are detected. When this procedure is maintained consistently, seam quality becomes more stable and the bag sewing machine can operate more reliably and for longer.
Frequently asked questions about bag sewing machine cleaning
1. Is it necessary to remove the thread from the entire machine after every shift?
It is not necessarily required to remove all the thread if the next shift will continue using the same thread type and specifications. However, the thread end should be secured and areas prone to lint accumulation should be cleaned. When changing color, thread size, or when the thread path is found to be dirty, the thread should be removed for more thorough cleaning.
2. Should oil be applied to the needle to reduce heat?
Do not apply oil directly to the needle or thread without proper authorization if the product requires clean bags. First check the needle size, needle sharpness, machine speed, thread tension, and friction with the material.
3. How often should a bag sewing machine needle be replaced?
There is no fixed period that applies to every production line. The needle should be replaced based on operating hours, bag type, and actual signs of wear. When the needle becomes dull, bent, scratched, abnormally hot, or causes thread fraying, it should be replaced immediately.
4. If the looper is clean but the machine still skips stitches, what could be the cause?
Possible causes include incorrect needle installation, a bent needle, incorrect needle height, incorrect needle-to-looper clearance, unsuitable thread tension, or incorrect timing of the looper catching the thread loop.
5. Can a regular cloth be used to clean the looper?
A lint-free cloth should be used. Cloth containing many small fibers can leave lint in the looper area and cause problems after the machine resumes operation.
6. Why does the machine break thread more easily after cleaning?
The operator may have re-threaded the machine incorrectly, changed the thread tension, installed the needle in the wrong direction, or unintentionally affected the looper position. Each factor should be checked individually instead of randomly increasing or decreasing thread tension.
>>> See more:
- 0 Comment


