


 Phan Van Hoang
- 24/07/2026
- 149
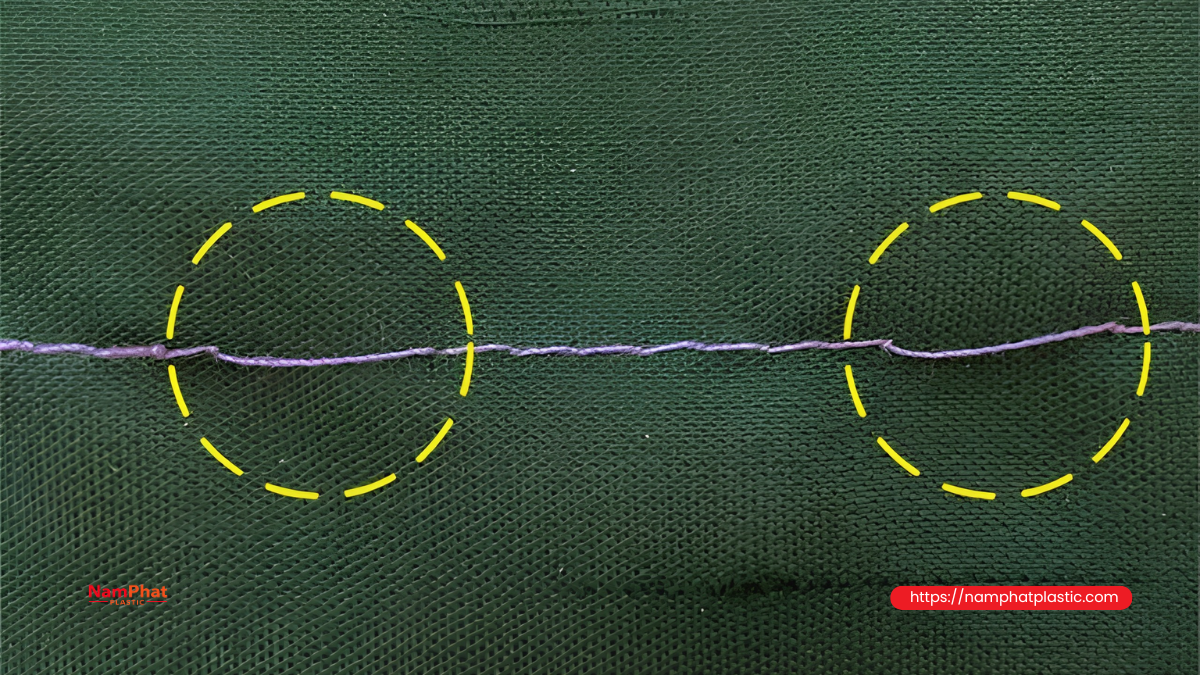
Thread tension is one of the parameters that directly affects the strength, stability, and appearance of a bag-mouth seam. When the tension is inappropriate, the seam may develop various defects such as loose thread loops, wrinkled bag edges, frequent thread breakage, skipped stitches, or chain slippage at the beginning of the seam.
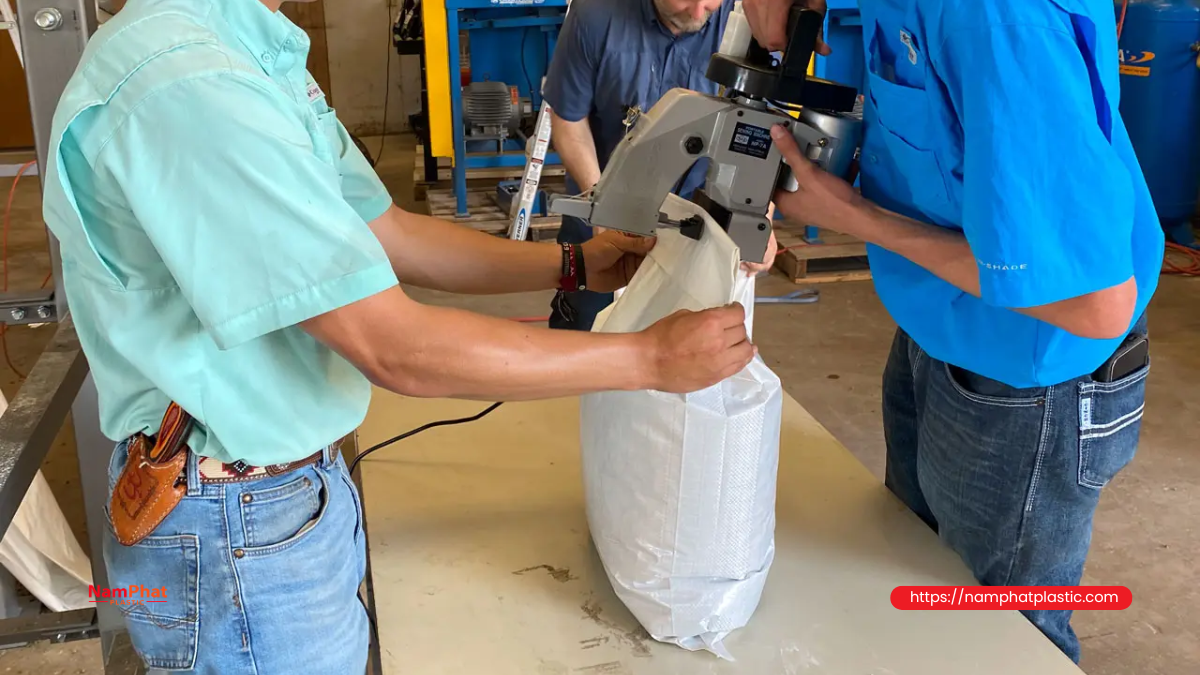
However, not every defect that looks like “loose thread” should be fixed by tightening the thread tension knob. An uneven seam can also result from incorrect threading, a bent needle, an improperly positioned looper, uneven thread delivery from the spool, excessive presser-foot pressure, or a bag feeding speed that is not synchronized with the machine.
Therefore, the most accurate way to adjust bag sewing thread tension is to simultaneously observe the top side, underside, and the condition of the material around the seam. Only then should you determine which thread is being pulled excessively or is not being controlled sufficiently.
Table of Contents [Hide]
1. Important principles when adjusting thread tension
The goal is not to tighten the thread as much as possible. The appropriate tension is the lowest level that still produces a stable seam, even chain loops, no unraveling, no bag wrinkling, and no excessive thread friction.
A seam that is too tight may still look straight and neat, but its actual strength can decrease because:
- The thread is pulled close to its load-bearing limit.
- The thread experiences strong friction through the needle eye and thread guides.
- Needle holes in the bag are stretched.
- PP tapes around the needle line may be cut or torn.
- The bag edge may contract, wrinkle, or curve after sewing.
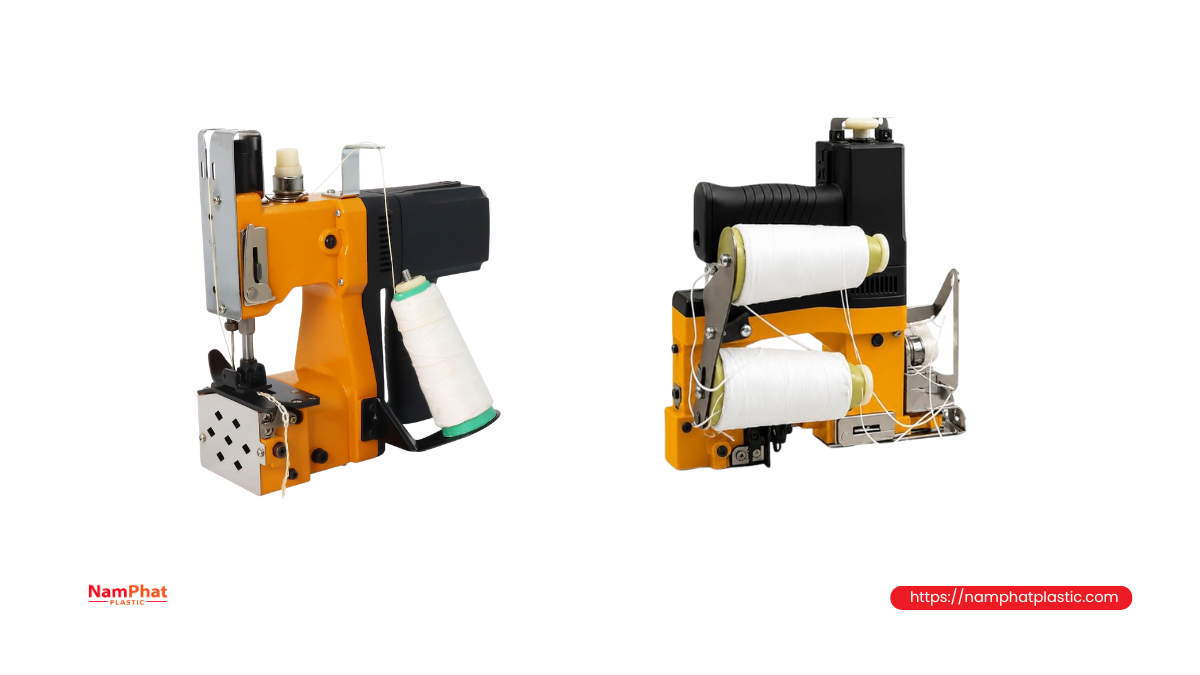
Before making adjustments, the operator needs to determine whether the machine uses a single-thread or two-thread chain stitch. Common industrial bag sewing machines may use stitch 101 or two-thread stitch 401 to sew paper bags, plastic bags, PP woven bags, and other materials.
2. Distinguishing single-thread and two-thread bag sewing machines
2.1. Single-thread bag sewing machine – stitch 101
The machine uses one thread passing through the needle to form a chain of interlocking loops underneath.
Identifying characteristics:
- The top side is usually a relatively straight thread line.
- The underside consists of a continuous chain of loops.
- There is no separate bobbin or looper thread.
- Adjustment is mainly performed at the needle-thread tension assembly.
When the tension is too low, the underside loops are usually large and sagging. When the tension is too high, the seam tends to draw the material together, while the thread may fray or break.
2.2. Two-thread bag sewing machine – stitch 401
The machine uses two threads:
- Needle thread: passes through the needle and is more visible on the top side.
- Looper thread: passes through the looper and is mainly visible on the underside.
The two tensions must work together. According to the technical instructions from Union Special, the looper thread on a two-thread machine should only be set to light tension; needle-thread tension is adjusted according to thread size and material thickness so that the machine sews and forms the chain consistently.
This means the looper thread should not be tightened to the same level as the needle thread. Excessive looper tension can pull the needle thread downward, make the chain rigid, and cause the bag edge to draw together.
>>> See also: What is the difference between single-thread and double-thread chain stitches in bag sewing?
3. What does an acceptable bag seam look like?
A properly adjusted seam generally has the following characteristics:
- The top thread lies close to the material without sinking deeply into or cutting the bag surface.
- The underside chain loops are relatively uniform in size.
- There are no sections with large loops alternating with tightly compressed sections.
- The bag edge remains flat after sewing and does not shrink, bunch up, or curve into an arc.
- The thread does not fray, become abnormally hot, or break during continuous machine operation.
- The machine forms an even chain after leaving the bag edge.
- The seam does not unravel when lightly pulled horizontally.
- Needle holes do not become elongated, cracked, or torn into a continuous line.
For two-thread machines, the interlocking position between the needle and looper threads must remain stable throughout the seam. The looper thread should not be pulled excessively onto the top side, while the needle thread should not form large loops underneath.
4. Quick diagnostic table by seam appearance
| Observed appearance | Tension-related cause | Initial adjustment direction |
| Underside chain loops are large, loose, and easily catch on other objects | Needle or looper thread is too loose; thread is not correctly positioned between the tension discs | Re-thread, then slightly increase the tension of the thread creating the large loops |
| Top thread stands away from the bag surface | Needle thread is too loose or has missed a thread guide | Check the threading path and slightly increase needle-thread tension |
| Looper thread is pulled onto the top side | Needle thread is too tight or looper thread is too loose | Slightly reduce needle-thread tension; if still unbalanced, increase looper tension very slightly |
| Needle thread is pulled too far to the underside | Needle thread is too loose or looper thread is too tight | Slightly increase needle tension or reduce looper tension |
| Bag edge wrinkles, shrinks, or curves | Total tension is too high; presser foot or feeding mechanism is unsuitable | Reduce needle tension first, then check looper tension and presser-foot pressure |
| Thread breaks continuously at high speed | Excessive tension, thread obstruction, hot needle, or unsuitable needle eye | Check the entire threading path, then reduce tension step by step |
| Seam is tight in some areas and loose in others | Uneven thread delivery from the spool, dirty tension discs, or vibrating adjustment knob | Clean the tension assembly, stabilize the spool, and lock the adjustment knob |
| Skipped stitches or lost chain | May be related to tension but is often caused by the needle, looper, or threading | Do not immediately tighten the thread; check the needle and looper first |
| Bag tears along the needle-hole line | Thread too tight, needle too large, stitch length too short, or bag pulled during sewing | Reduce tension, check the needle, stitch length, and bag-feed speed |
| Seam looks good but easily opens under load | Thread strength, stitch length, edge distance, or bag structure is unsuitable | Do not only increase tension; evaluate the entire seam structure |
| Beginning or end of seam unravels easily | Chain tail is too short or the seam end has not been secured correctly | Leave a thread tail and secure the seam end according to the procedure |
| No chain forms after leaving the bag | Thread too tight, incorrect threading, misaligned looper, or uneven thread delivery | Re-thread, slightly reduce tension, and check the looper |
5. How to adjust tension for each specific defect
5.1. Underside chain loops are too large and loose
This is the most common indication that thread tension is insufficient. The underside loops may protrude, sag in sections, or be easily pulled away from the bag surface with a finger.
For single-thread machines
First, check whether the thread passes correctly through all guides and is positioned between the two tension discs. In many cases, the operator has threaded the thread outside the tension discs, so turning the knob several times barely changes the actual tension.
If the threading path is correct:
- Mark the current position of the adjustment knob.
- Increase tension by approximately 1/8 turn.
- Test-sew on the same type of bag being produced.
- Check the chain on the underside.
- Continue increasing in small increments until the chain loops are neat and uniform.
Do not tighten by half a turn or a full turn at once because it can easily shift the setting from loose to excessively tight.
For two-thread machines
Determine which thread is creating the large loop. During machine adjustment, two different thread colors can temporarily be used for the needle and looper threads. This helps the operator identify exactly which thread is losing control.
- If the needle-thread loop is being pulled long on the underside, slightly increase needle-thread tension.
- If the looper loop is opening and not wrapping evenly around the chain, increase looper tension very slightly.
- If both threads are loose, re-thread the entire system before increasing tension.
5.2. Top thread stands away from the bag surface
If the top thread can be lifted away from the bag surface by hand, the needle thread is usually too loose or is not passing correctly through the take-up assembly.
The following points should be checked:
- Guide eye on the spool stand.
- Thread-tension discs.
- Spring or take-up lever.
- Guide near the needle bar.
- Threading direction through the needle eye.
After confirming that the threading path is correct, slightly increase needle-thread tension. If the knob has to be tightened considerably before any change is noticed, remove and clean the tension discs because thread dust, oil, or material fibers may prevent the discs from gripping the thread properly.
5.3. Looper thread is pulled up to the top side
This defect occurs only on two-thread bag sewing machines. On the top side, the looper thread may be clearly visible around the needle hole or create colored points different from the needle thread.
The usual cause is a relative imbalance:
- Needle thread is too tight.
- Looper thread is too loose.
- Looper thread is not correctly positioned in the tension assembly.
- Looper thread has missed a guide.
- Looper thread is leaving the spool too freely without sufficient control.
The adjustment should begin by slightly reducing needle-thread tension. Since the looper thread normally requires relatively light tension, it should not be tightened heavily from the start.
If the looper thread is still being pulled to the top after reducing needle tension, increase looper tension in small increments. After each adjustment, test-sew both on the material and by forming a chain section outside the bag edge.
5.4. Needle thread is pulled too far to the underside
This is the opposite condition of the looper thread being pulled to the top. The underside contains excessive needle thread, and the chain may become dense, stiff, or shifted to one side.
Adjustment:
- Slightly increase needle-thread tension.
- Or slightly reduce looper-thread tension if the looper thread is excessively tight.
- Check whether the needle thread is correctly positioned between the two tension discs.
- Check whether the looper tension discs are obstructed by dust, oil, or thread fibers.
After balancing, the chain should have moderate flexibility, stable loop shapes, and should not pull the material together.
5.5. Bag edge wrinkles or shrinks after sewing
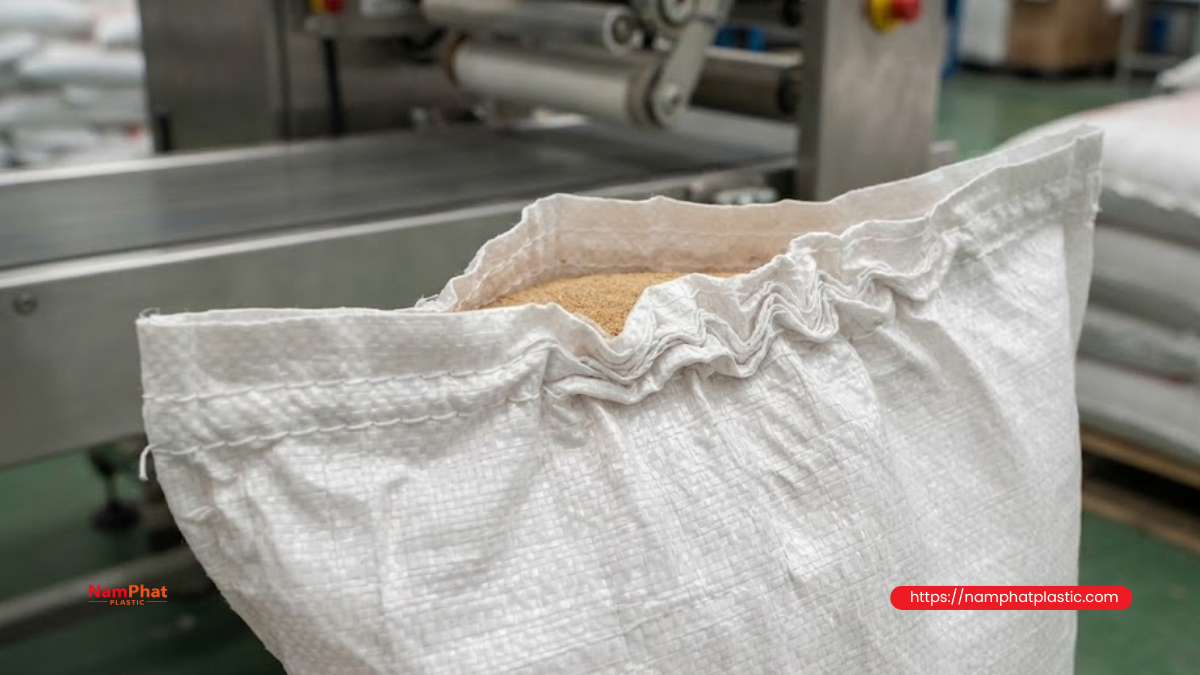
Seam wrinkling often leads operators to assume that the thread is too tight. This may be correct, but it is not sufficient as a diagnosis.
Factors to consider include:
- Excessive needle-thread tension.
- Excessive looper tension.
- Excessive presser-foot pressure.
- Stitch length that is too short.
- Operator pulling or holding the bag back while the machine is feeding it.
- Conveyor speed and sewing-machine speed not synchronized.
- Thin, soft, or highly stretchable material.
- Uneven folding of multiple layers at the bag mouth.
First, slightly reduce needle-thread tension. On a two-thread machine, reduce looper tension only if the underside chain is stiff or drawing the material together.
Next, check presser-foot pressure. The pressure should only be sufficient for the feed mechanism to move the bag evenly. Manufacturer guidance also warns against pulling the bag backward while sewing and emphasizes that the machine or conveyor movement speed should match the feed speed of the feed dog.
5.6. Thread breaks frequently
Thread breakage does not necessarily mean that tension must be reduced. The location and shape of the broken thread end should be observed.
Thread breaks or frays directly at the needle eye
Possible causes include:
- Excessive tension.
- Needle eye too small for the thread diameter.
- Needle is damaged or has a burr.
- Needle installed incorrectly.
- Needle becomes hot at high speed.
- Thread experiences strong friction against multiple material layers.
- Inconsistent thread surface quality.
Thread breaks near the tension assembly
Check:
- Whether the tension discs are scratched.
- Whether the thread guides have sharp edges.
- Whether the thread is trapped too deeply between the tension discs.
- Whether the tension spring is compressed excessively.
- Whether thread dust and oil have accumulated inside the tension assembly.
Thread breaks abnormally at multiple locations
The thread may not be leaving the spool evenly, may be catching on the spool edge, winding underneath the spool stand, or being pulled intermittently with each revolution. Thread joints, fibered sections, and spool consistency should also be checked.
Union Special troubleshooting documentation lists factors such as thread delivery from the spool, tension, fiber buildup on guiding components, and needle temperature among the causes to inspect when thread breaks occur.
Only reduce the tension knob after eliminating obstructions and sharp edges. Otherwise, reducing tension may stop the thread breakage but create a loose seam.
5.7. Seam has skipped stitches or loses the chain
Skipped stitches are often incorrectly addressed by tightening the thread. In reality, thread tension is only one of several possible causes.
More important causes include:
- Bent needle.
- Loose needle or needle not fully inserted.
- Needle installed in the wrong direction.
- Incorrect needle system or size.
- Worn chain-forming looper.
- Incorrect needle-to-looper clearance.
- Incorrect timing for the looper to catch the thread loop.
- Incorrect threading.
- Worn feed dog or throat plate.
- Bag not held stable while the needle rises.
Manufacturer troubleshooting instructions also require checking threading, thread delivery, feed-dog condition, needle position, and looper condition when the machine skips stitches or fails to form a chain.
Therefore, do not continue tightening the thread if the machine still skips stitches after a slight adjustment. Excessive tension can make the loop behind the needle smaller, making it even more difficult for the looper to catch the thread.
5.8. Seam is tight in some areas and loose in others
If the same seam contains good sections, loose sections, and drawn-together sections, the cause is usually not an average setting but fluctuating tension.
Check in this order:
- Whether the spool rotates or vibrates excessively.
- Whether the thread catches on the spool core edge or support.
- Whether the thread winds underneath the spool.
- Whether the first thread guide is aligned with the spool center.
- Whether the tension discs contain dust or fibers.
- Whether the tension spring is weak, misaligned, or stuck.
- Whether the adjustment knob is vibrating and rotating by itself.
- Whether the presser foot and feed dog feed the bag evenly.
On some machine models, the tension assembly has a separate locking screw. After adjustment, the locking screw must be tightened again; otherwise, the knob position may change and seam consistency will not be maintained.
5.9. Bag tears along the needle-hole line
When the bag tears along a straight line like a “tear-off strip,” do not automatically assume that the thread is too weak. Sometimes excessive tension itself turns the needle-hole line into a cutting line.
Factors to check:
- Whether the needle thread is excessively tight.
- Whether the needle is larger than necessary.
- Whether the needle point is blunt or damaged.
- Whether the stitch length is too short.
- Whether the seam is too close to the bag edge.
- Whether the bag is being pulled backward while the feed dog is feeding it.
- Whether presser-foot pressure is holding the material too tightly.
- Whether the number of layers at the bag mouth changes abruptly.
For PP woven bags, particular care should be taken to avoid pulling the material sideways while the needle is penetrating it. A dense line of needle holes combined with high tension can weaken the PP woven tapes around the seam.
The adjustment should be performed simultaneously: slightly reduce tension, check needle size, adjust stitch length, and ensure that the bag moves at the same speed as the feeding mechanism.
5.10. Beginning or end of seam unravels easily
A chain stitch can unravel from the beginning of the chain if the tail is not properly retained. Therefore, an unraveling seam end is not always caused by loose thread.
Check:
- Whether the chain tail has been cut too short.
- Whether the machine forms a sufficient chain section before and after the bag.
- Whether the cutter cuts at the correct position.
- Whether the thread tail is pulled in the direction of chain unraveling.
- Whether the procedure requires tying, securing, or applying adhesive to the thread end.
Instructions for some handheld bag sewing machines require leaving at least approximately 3 cm of thread tail after cutting to reduce the risk of spontaneous seam unraveling. The actual value should be applied according to the machine model and the factory's bag-closing procedure.
5.11. Seam looks good but easily opens under load
A seam with good appearance does not necessarily have sufficient load-bearing capacity. If the bag opens during transportation, stacking, or impact, several factors beyond thread tension need to be evaluated:
- Thread tensile strength and elongation.
- Thread consistency.
- Thread size relative to the needle.
- Stitch length.
- Distance from the seam to the bag edge.
- Number of material layers at the sewing location.
- Strength of the bag mouth.
- Weight and characteristics of the packaged product.
- Method of folding the bag mouth.
- Transportation and handling conditions.
Increasing thread tension generally does not make a seam stronger. On the contrary, an excessively tight thread loses its ability to absorb impact loads, while the needle holes in the material experience greater stress.
6. Bag sewing thread tension adjustment procedure at the factory
Step 1: Disconnect the power
Turn off the machine and disconnect the power before re-threading, cleaning, changing the needle, or placing hands near the needle–looper area. Manufacturers also require power to be disconnected when adjusting or replacing machine components.
Step 2: Record the current setting
Use paint or a marker to make a reference line on the adjustment knob. You can also take a photo or record the number of exposed thread turns.
This step allows the operator to return to the original setting if the test does not produce a better result.
Step 3: Clean and re-thread
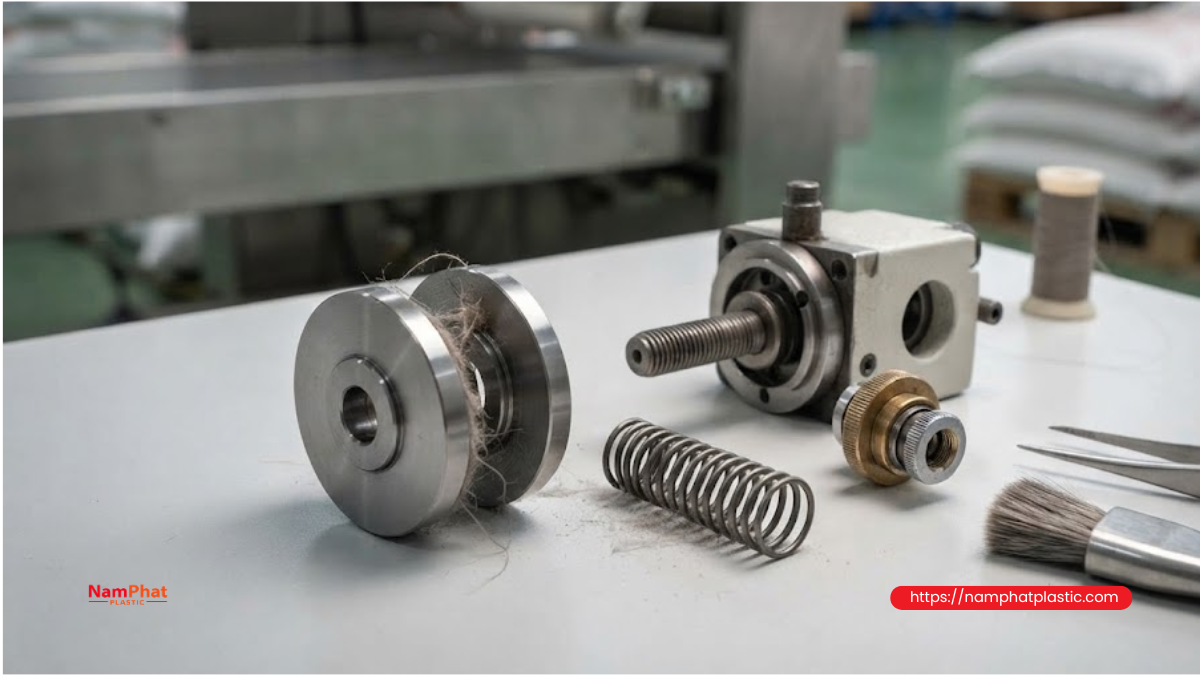
Before turning any knob:
- Clean the tension discs.
- Clean the thread guides.
- Remove dust around the looper and throat plate.
- Check the feed dog.
- Re-thread according to the machine diagram.
- Pull the thread by hand to feel whether its movement is smooth and even.
If the thread is catching or incorrectly threaded, adjusting the knob will not produce a stable result.
Step 4: Check the needle and chain-forming looper
Replace the needle if it is bent, blunt, damaged, or scratched around the eye. Check that the needle is fully inserted, correctly oriented, and securely tightened.
If the machine skips stitches, strikes the needle, or fails to form a chain, a technician should inspect the looper position and thread-loop timing.
Step 5: Check thread delivery from the spool
The spool should be positioned securely, in the correct direction, and without tilting. The first guide should be relatively aligned with the spool center so that the thread is pulled evenly.
If the thread jumps one loop at a time or rubs against the spool edge, needle tension will fluctuate even when the adjustment knob remains unchanged.
Step 6: Use the actual production material for testing
Do not adjust the machine using a thin piece of fabric and then use the setting for sewing a multi-layer bag. The test sample should match actual production in terms of:
- Bag type.
- Number of folded layers.
- Laminated film layer.
- Paper tape or reinforcing tape.
- Thread type and size.
- Machine speed.
- Bag feeding method.
On some models, the tension is preset for PP woven bags, but this setting should only be considered a starting point. When the material or thread size changes, the machine still needs to be tested and recalibrated.
Step 7: Adjust only one parameter at a time
Each adjustment should only change approximately 1/8 turn or one small increment. Then test-sew a sufficient length to observe the entry into the bag, middle of the seam, exit from the bag, and chain formation.
If needle tension, looper tension, presser foot, and stitch length are changed simultaneously, the operator will not know which parameter caused the difference.
Step 8: Check both sides of the seam
Do not evaluate only the top side. Check:
- Straightness of the top thread.
- Size of the underside chain loops.
- Position of the needle and looper threads.
- Flatness of the bag edge.
- Shape of the needle holes.
- Consistency at the beginning, middle, and end of the seam.
Step 9: Test actual seam strength
After the appearance meets requirements, perform a seam pull test appropriate to the actual conditions of use. A group of bags can be sewn continuously to evaluate stable operation rather than reaching a conclusion from a single sample.
Also monitor the machine after it has been running and warmed up because friction at the needle and thread-guiding system can change compared with the initial startup condition.
Step 10: Lock and record the settings
Tighten the locking screw or retaining nut for the adjustment knob if the machine is equipped with one. Then create a setting sheet for each bag type to reduce adjustment time when changing production orders.
7. Adjustment sequence for single-thread bag sewing machines
For stitch 101 machines, the following sequence can be applied:
- Re-thread according to the correct diagram.
- Set the tension to a medium level.
- Test-sew on the actual bag.
- If the underside loops are loose, slightly increase tension.
- If the bag wrinkles or the thread frays, slightly reduce tension.
- Check chain formation when the machine leaves the bag.
- Check whether the seam tail unravels.
- Lock the adjustment knob.
The balance point is reached when the top side is neat, the underside loops are even, and the machine forms the chain smoothly without requiring the thread to be pulled by hand.
8. Adjustment sequence for two-thread bag sewing machines
For stitch 401 machines, the following sequence is recommended:
- Correctly thread both the needle and looper threads.
- Set the looper thread to light tension.
- Adjust the needle thread according to thread size and bag thickness.
- Test-sew with two thread colors if it is difficult to identify which thread is misaligned.
- If the looper thread appears on the top side, reduce needle tension first.
- If the needle thread is pulled downward, increase needle tension or reduce looper tension.
- If the looper loops are too open, increase looper tension in very small increments.
- Check chain formation outside the bag edge.
- Check whether the bag edge is being drawn together.
- Lock all adjustment knobs.
Do not attempt to place the interlocking point exactly in the middle of the material layers according to the principle used for lockstitch machines. The chain-stitch structure of a bag sewing machine differs from a stitch that uses a bobbin.
9. Factors that need readjustment when changing thread or bags
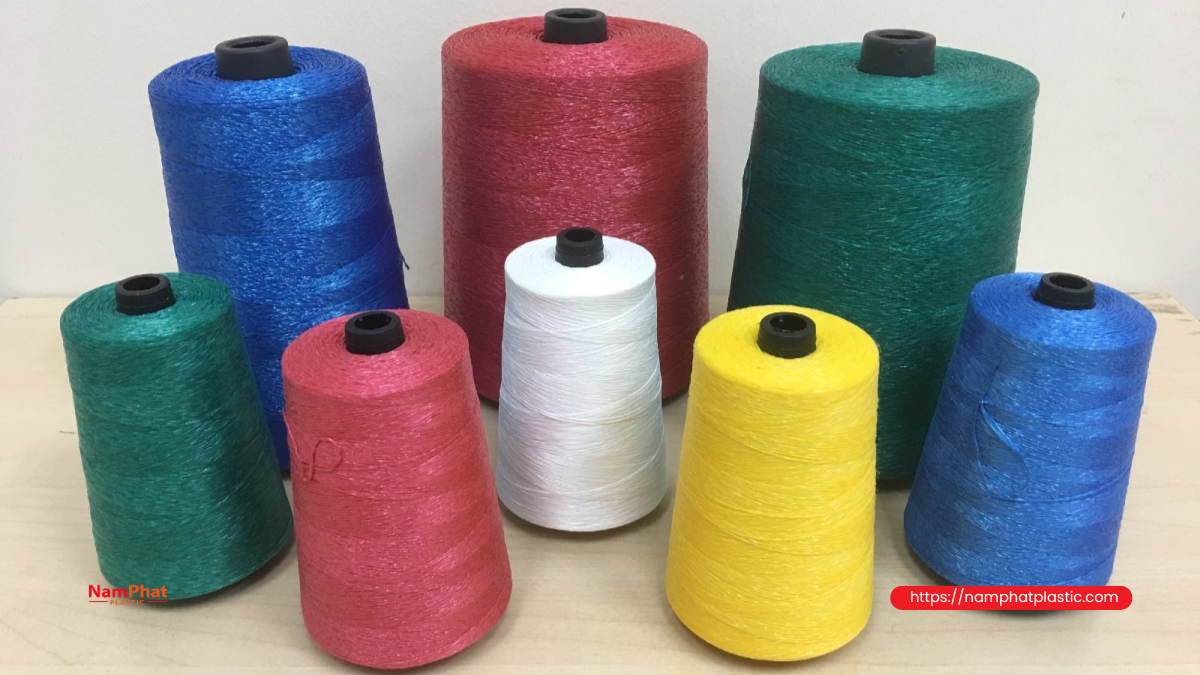
The previous tension setting is not always suitable after changing materials. The machine should be checked again when any of the following changes occur:
| Changed factor | Possible effect |
| Thread size or thickness | Changes friction at the tension discs, guides, and needle eye |
| Thread material | Elongation, surface characteristics, and heat resistance may differ |
| Thread twist | Affects loop stability and the level of fiber fuzz |
| Spool form or winding hardness | Affects thread delivery |
| PP woven bag changed to laminated bag | Friction and deformation around the needle hole change |
| Increased number of folded bag-mouth layers | Greater needle load and increased thread friction |
| Addition of paper tape or reinforcing cord | Total thickness and presser-foot pressure need to be checked |
| Change in needle size | Relationship among needle eye, thread diameter, and needle hole changes |
| Increased machine speed | Needle temperature and thread vibration may increase |
| Conveyor change | Bag-feed speed may no longer be synchronized with the sewing machine |
For factories using multiple bag codes, it is advisable to develop standard settings for each material group instead of relying entirely on operator experience.
10. Bag sewing machine setting sheet template
| Item | Information to record |
| Product code | Bag name or code |
| Bag structure | PP woven, laminated, paper-laminated, number of layers |
| Mouth-fold structure | Single fold, double fold, with reinforcing tape |
| Stitch type | 101, 401, or another type |
| Thread type | PP multifilament, polyester, or the type currently used |
| Thread specification | Size, denier, or internal specification |
| Needle size | Needle system and size |
| Stitch length | Current setting |
| Needle-thread tension | Number of turns or position relative to the reference mark |
| Looper-thread tension | Number of turns or position relative to the reference mark |
| Presser-foot pressure | Adjustment position or number of turns |
| Machine speed | Operating parameter |
| Test result | Appearance, thread breakage, skipped stitches, pull test |
| Confirmation date | Date and person responsible for setting |
This sheet helps reduce dependence on individual experience and prevents different shifts from adjusting the machine differently.
11. Common mistakes when adjusting bag sewing machine thread
Tightening heavily to make the seam “stronger”
High tension does not mean high strength. Excessive tension can weaken the thread and cause the material to tear around the needle holes.
Turning multiple knobs at the same time
This makes the diagnostic process uncontrolled. Only one parameter should be changed at a time.
Not re-threading before adjustment
Missing one guide or failing to position the thread between the tension discs makes all subsequent adjustments unstable.
Using tension to correct skipped stitches
If the cause is the needle or looper, tightening the thread can make the defect worse.
Adjusting on material that differs from production
A good setting on a single bag layer may not be suitable for a triple-fold bag mouth or one with reinforcing tape.
Not locking the knob after adjustment
Machine vibration can cause the knob to change position by itself, resulting in different seam conditions at the beginning and end of a shift.
Looking only at the top side
Many seams look good on top while the underside chain is too loose or misaligned.
Ignoring spool quality
An improperly wound spool, fibered section, or uneven thread delivery can force the operator to continually adjust the machine without actually solving the problem.
12. Acceptance criteria after adjustment
Before returning the machine to production, the following criteria should be confirmed:
- The machine is threaded according to the correct diagram.
- Thread leaves the spool evenly without catching or jerking.
- The top thread lies close to the surface without cutting into the bag.
- The underside chain is uniform.
- There are no abnormal shifts in the needle or looper thread.
- The bag edge does not wrinkle, shrink, or curve.
- No elongated needle holes appear.
- The machine does not skip stitches.
- The machine forms the chain consistently after leaving the bag.
- The thread does not fray or break during continuous operation.
- The beginning and end of the seam are securely retained.
- The seam meets the factory's seam pull-test requirements.
- Adjustment knobs and locking screws are secured.
- Settings have been recorded on the setting sheet.
Conclusion
Effective bag sewing thread tension adjustment does not begin by turning the knob; it begins by correctly interpreting the seam appearance. It is necessary to determine whether the machine is single-thread or two-thread, observe both sides, identify which thread is being pulled out of balance, and eliminate causes such as incorrect threading, a damaged needle, misaligned looper, worn feed dog, or uneven thread delivery from the spool.
The principle should be to make small adjustments, change only one parameter at a time, and always test on the actual bag structure. Once the seam is stable, the factory should record the settings for each product code to reduce machine downtime, limit thread breakage, and maintain bag-closing quality across production shifts.
For companies manufacturing or supplying bag sewing thread, properly advising on thread size, elongation, consistency, needle size, and bag structure will provide more practical value than simply specifying one common tension level for every machine.
Frequently asked questions
1. Which direction should the thread-tension knob be turned to increase tension?
On most tension assemblies using a spring, turning in the direction that compresses the spring further increases tension; this is usually clockwise. Turning in the opposite direction reduces tension. However, the specific machine structure and documentation should be checked before applying this rule.
2. Should the needle and looper threads be adjusted to the same tension?
No. On a two-thread machine, the looper thread is usually set to a lighter tension than the needle thread. The goal is to balance chain formation, not to make both knobs have the same number of turns.
3. Why are the thread loops still loose after increasing tension?
The thread may not be positioned between the tension discs, may have missed a guide, the tension discs may be dirty, or the thread may be catching elsewhere. If turning the knob produces almost no change in the feel of the thread, inspect the tension assembly instead of continuing to tighten it.
4. Are skipped stitches caused by thread being too loose?
They can be, but skipped stitches are more commonly associated with the needle, looper position, threading, or the ability to hold the material. Do not continuously increase tension to address skipped stitches.
5. Does the machine need to be readjusted when changing to a new type of thread?
Yes. Thread size, material, twist, surface, and spool winding all affect friction along the threading path. Even if two threads have the same nominal size, the machine should still be test-sewn and revalidated.
6. Why does the machine run well at first but start breaking thread after prolonged operation?
The needle may heat up, thread dust may accumulate in the guides, or the spool may begin delivering thread unevenly. Check needle temperature, needle-size suitability, thread quality, and machine cleaning.
7. Is a wrinkled seam definitely caused by excessive thread tension?
No. In addition to thread tension, the bag edge may wrinkle because of excessive presser-foot pressure, an overly short stitch length, the bag being pulled during sewing, or an unsynchronized conveyor speed.
>>> See also:
- 0 Comment


