


 Phan Van Hoang
- 27/07/2026
- 130
In the same packaging line, the machine may sew ordinary woven PP bags quite stably but repeatedly break the thread when switching to BOPP laminated bags. This phenomenon can easily lead operators to conclude that the thread quality is inadequate or that the thread has low strength.
In reality, the cause is often not a single factor. BOPP laminated bags change the surface slipperiness, bag-mouth stiffness, friction against the needle, heat dissipation, and the way the material passes through the presser foot. When the old settings remain unchanged, the forces acting on the thread can suddenly increase and cause thread breakage.
To handle the issue effectively, the company needs to adjust five groups of factors together:
- Needle and compatibility between the needle and thread size.
- Needle-thread and looper-thread tension.
- Sewing-machine speed and conveyor speed.
- Stitch length, presser-foot pressure, and bag-feeding mechanism.
- Bag-mouth folding, seam position, and quality consistency between bag lots.
Table of Contents [Hide]
1. How are BOPP laminated bags different from ordinary woven PP bags?
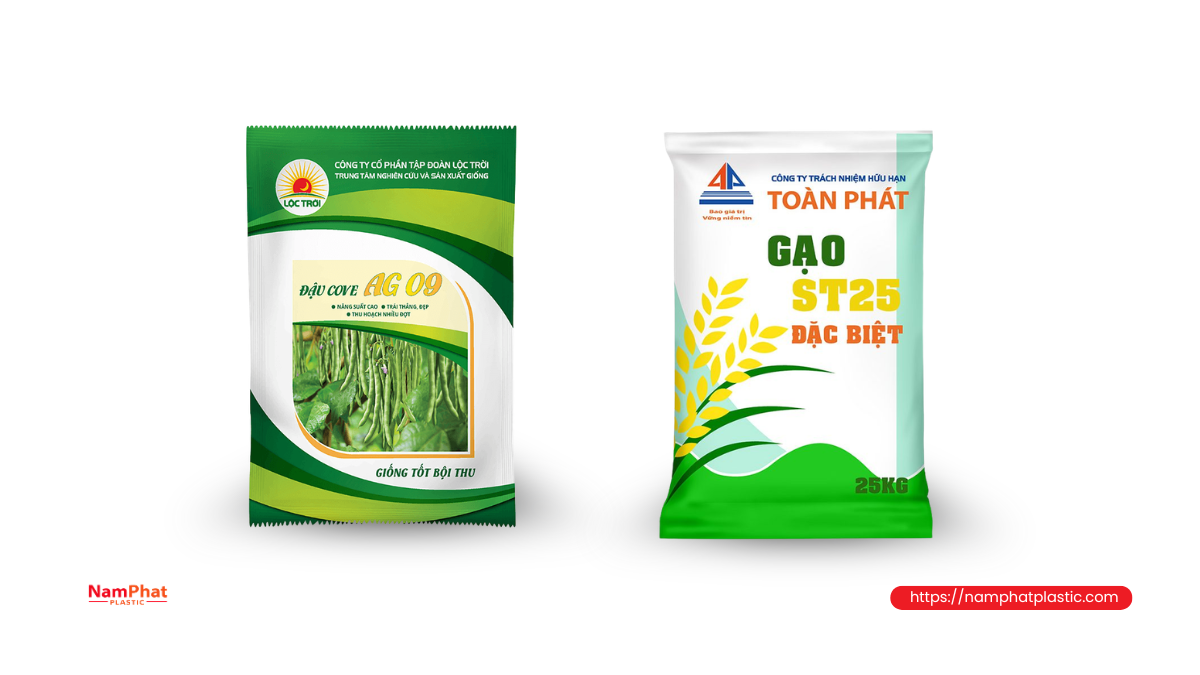
Ordinary woven PP bags are made from polypropylene tape yarns woven together. The material surface still has small gaps between the woven tapes, making it relatively flexible and easy to deform as it passes through the presser-foot assembly.
BOPP laminated bags generally consist of woven PP fabric laminated with reverse-printed BOPP film. The film gives the bag sharp graphics, an attractive surface, and better product protection. However, it also makes the bag structure stiffer, more sealed, and more slippery than unlaminated woven PP bags.
These differences create several changes during sewing:
1.1. Smoother bag surface
The BOPP layer changes the coefficient of friction between the bag, presser foot, and feed dog. The bag may slide quickly at one point but become held back at a folded edge or a multi-layer section.
When bag movement is uneven, stitch length fluctuates and the tension on the thread increases during each cycle. The thread may not break immediately but may gradually become frayed before eventually breaking at the needle or thread guide.
1.2. Stiffer bag mouth
The mouth of a BOPP laminated bag tends to be harder to bend, especially when folded into two layers, with an additional paper tape, easy-open tape, or PE liner inside.
The needle must penetrate a thicker and stiffer material assembly. If the needle is too small, it may deflect. If the needle is too large, the needle hole in the BOPP film becomes larger, reducing the strength of the seam area and affecting the bag's appearance.
1.3. Needle temperature can rise more quickly
When sewing synthetic materials at high speed, friction between the needle and material can cause the needle temperature to rise significantly. Excessive heat can soften, fray, or damage the surface of the synthetic thread before it actually breaks.
The BOPP film and coating can also leave deposits on the needle if the temperature becomes too high. These deposits make the needle groove and needle hole less smooth, causing friction with the thread to continue increasing.
1.4. Uneven thickness along the same seam
A seam may sequentially pass through:
- A single layer of the bag body.
- A double-layer folded mouth.
- The longitudinal joint of the bag body.
- A PE liner.
- Paper tape or easy-open tape.
- An area where the laminated film is thicker than normal.
A sewing machine adjusted for a thin section may suddenly experience increased load when passing through an overlapping section. This is why thread often breaks exactly at a joint or fold, even though the remaining sections look normal.
2. Why can keeping the same settings used for woven PP bags cause thread breakage?
When sewing unlaminated woven PP bags, the operator may be using:
- Relatively high thread tension.
- High machine speed.
- Strong presser-foot pressure.
- Short stitch length.
- A small needle to minimize needle holes.
- Conveyor speed slightly higher than the sewing machine's pulling speed.
These settings may not cause problems with soft materials that have good grip. However, when applied to BOPP laminated bags, the total load on the thread increases in several ways:
Static tension from the tension discs
- Friction force at the needle hole and thread guides
- Dynamic pulling force caused by uneven bag movement
- Heat effects at the needle
- Resistance when the needle penetrates multi-layer sections.
Therefore, a thread with sufficient tensile strength can still break during sewing. Tensile strength measured on a testing machine does not fully reflect its ability to withstand friction, heat, and repeated loading at high speed.
3. Signs that help identify the actual cause of thread breakage
Before adjusting the machine, observe the thread end at the location where it has just broken. The appearance of the thread end provides more information than simply looking at the seam.
| Observed symptom | Likely cause | First inspection direction |
| Seam continuously unravels from the cut end | Tail is too short or the end is not secured | Increase chain length before cutting |
| Thread slips when pulled in one direction | Pulled in the direction in which the chain stitch unravels | Improve operation and secure the thread tail |
| Thread end is frayed after cutting | Dull cutter or thread friction | Check cutter, needle, and thread path |
| Large thread loops appear underneath | Needle-thread or looper-thread tension is too low | Adjust tension gradually |
| Some bags unravel while others do not | Skipped stitches, unstable cutter, or vibrating bag edge | Check needle, looper, sensors, and conveyor |
| Problem increases at high speed | Incorrect looper timing, hot needle, or unsynchronized speed | Reduce speed for comparison, then check timing |
| Final stitch is longer than the others | Bag is being pulled away from the machine or cut too early | Check conveyor speed and cutting timing |
| Thread shows signs of melting or hardening | High needle temperature | Check needle, speed, and friction |
| Seam wrinkles but still unravels | Thread is too tight or tension is unbalanced | Reduce and rebalance tension |
| Thread-tail length varies | Cutter or sensor is unstable | Check cutting mechanism and sensor position |
Distinguishing thread breakage from chain-stitch unraveling is very important. If the thread itself remains intact but the seam unravels from the cut end, increasing thread size or changing the needle usually will not solve the problem.
4. Adjustments required when switching to BOPP laminated bags
4.1. Replace the needle before adjusting other settings
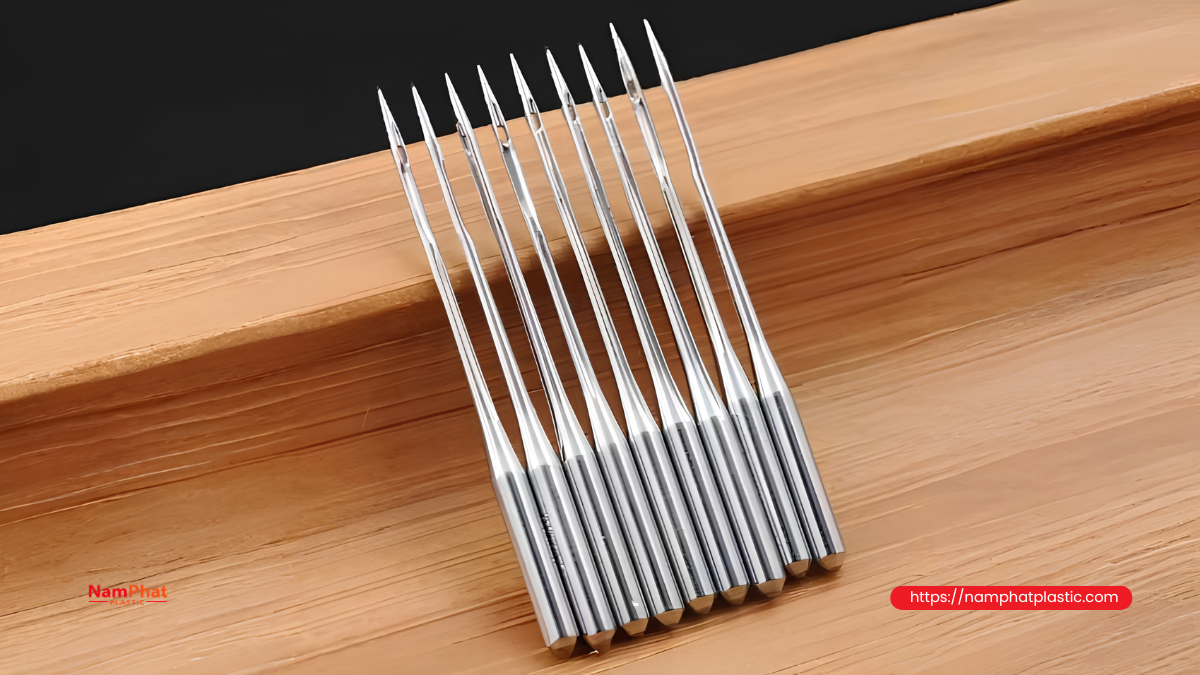
Do not use a needle that has been running for a long time on woven PP bags to test BOPP bags. An old needle may have:
- A worn tip.
- Scratches in the needle groove.
- Slight deformation.
- Burrs around the needle hole.
- Plastic or oil-and-dust deposits.
- A slight bend that is difficult to see with the naked eye.
A worn or damaged needle is one of the common causes of thread fraying and breakage. The needle system, needle size, needle-point type, and needle-hole size must be compatible with the machine and the thread size being used.
When installing a new needle, check:
- Correct needle system according to the machine manufacturer's instructions.
- Needle is fully inserted into the needle bar.
- Long groove and scarf are installed in the correct direction.
- Needle does not contact the looper, needle plate, or presser foot when the machine is turned manually.
- Needle hole is large enough for the thread to pass through without excessive rubbing.
Should the needle size be increased immediately?
It should not be assumed that a thicker BOPP bag always requires the largest possible needle.
A needle that is too small may cause:
- Strong thread friction against the needle hole.
- Needle deflection when penetrating multiple layers.
- Skipped stitches or contact with the looper.
- Thread breakage at the folded edge.
Conversely, a needle that is too large may:
- Create large holes in the BOPP film.
- Make the seam less attractive.
- Increase the risk of tearing along the row of needle holes.
- Reduce moisture resistance around the bag mouth.
The appropriate solution is to test needle sizes step by step, starting with the size recommended by the machine manufacturer for the thread being used.
4.2. Check compatibility between needle size and thread diameter
The thread passes through the needle hole thousands of times per minute. If the thread is too large for the needle hole, its surface is compressed and experiences strong friction during every cycle.
A common sign is that the thread becomes frayed immediately above the needle, while the thread on the spool remains normal. Schmetz also notes that thread that is too thick for the needle size can increase friction and lead to thread breakage.
A simple practical test:
- Thread a new piece of thread through the hole of a needle that has not yet been installed in the machine.
- Tilt the needle so the thread can slide by itself.
- Pull the thread back and forth by hand.
- Observe whether the thread is held back, frayed, or changes shape.
The thread should pass through the needle hole relatively freely, but an excessively large needle should not be used simply to create more clearance.
4.3. Reduce machine speed during the trial run
When changing materials, do not immediately run at the previous production speed. High speed increases:
- The number of times the needle penetrates the material per unit of time.
- Friction between the needle and bag.
- Heat accumulation at the needle.
- Frequency of thread bending and pulling.
- Severity of problems when the bag becomes misaligned or is held back.
During the first trial run, machine speed can be reduced by about 15–25% compared with the speed used for woven PP bags. This is a starting range for observation, not a fixed setting for every machine.
Once the seam is stable, increase speed gradually. At each speed level, sew continuously long enough to evaluate heat buildup rather than sewing only one or two bags.
Industrial bag-closing machines have different speeds and stitch-length ranges depending on the model. For example, some Union Special bag-closing machines allow stitch length and maximum speed to be adjusted according to the material, stitch length, and operating conditions.
4.4. Loosen needle-thread tension in small increments
Thread tension that is suitable for woven PP bags may be too high for BOPP laminated bags. When the bag is stiff or moves unevenly, high tension creates strong jerks on the thread when the stitch is formed.
Do not turn the tension knob several revolutions at once. A more suitable method is:
- Mark the original setting.
- Loosen it by approximately 1/8 turn at a time.
- Sew 10–20 bags.
- Observe both the top and bottom sides of the seam.
- Stop loosening when the thread runs smoothly while the chain stitch remains consistently tightened.
The goal is not to make the thread as loose as possible. Excessively loose thread can cause:
- Large thread loops.
- Skipped stitches.
- Uneven chain stitches.
- Seams that can catch on other objects.
- Seam unraveling after cutting.
Correct tension is the lowest level that still ensures the stitch is formed firmly and evenly without abnormal thread loops.
4.5. Rebalance tension between needle thread and looper thread
On a two-thread chain-stitch bag-sewing machine, the needle thread and looper thread must be adjusted as a system. Loosening only the needle thread while keeping the looper thread too tight can pull the stitch formation out of position.
Two-thread bag-closing machines commonly use type 401 double chain stitches. This stitch is formed through the interaction between the needle thread and looper thread, so the tension of both threads must be properly balanced.
After adjustment, check:
- Chain stitches are even along the seam.
- Thread is not pulled deeply into the film.
- No excessively large loops appear underneath.
- Bag edge does not wrinkle or curl.
- Seam does not unravel by itself when the thread tail is pulled lightly.
4.6. Adjust stitch length
An excessively short stitch creates many needle holes over the same seam length. This has two disadvantages:
- The needle penetrates the material more times, increasing heat.
- Needle holes are too close together, creating a weakened line similar to a serrated tear path in the film.
For BOPP laminated bags, the stitch should not be made excessively dense simply because a denser seam looks stronger. Seam strength does not increase linearly with the number of stitches.
A suitable test is to increase stitch length by one step from the current setting and then evaluate:
- Bag-mouth sealing.
- Tensile performance.
- Drop resistance.
- Tearing around needle holes.
- Thread consumption.
- Seam appearance.
Some bag-sewing machines have a stitch-length adjustment range of approximately 6.5–11 mm, but the company must select a value within the range permitted by the machine manufacturer and based on the actual bag structure.
A single fixed stitch length should not be applied to every type of BOPP bag.
4.7. Adjust presser-foot pressure based on actual conditions
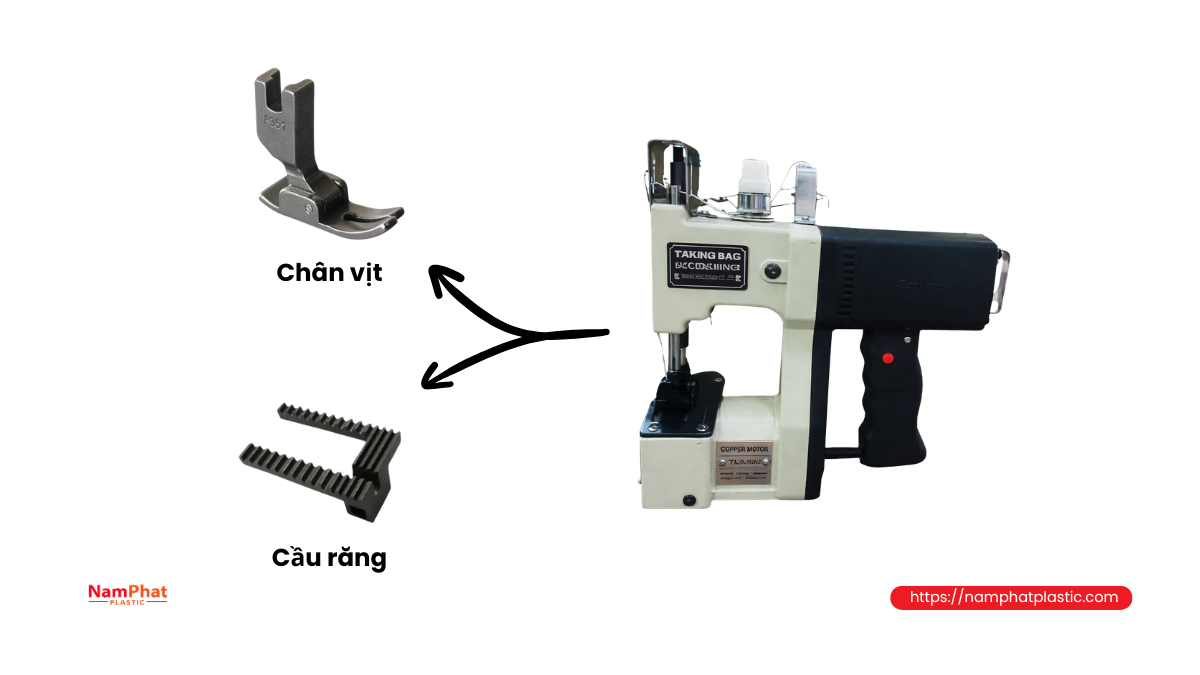
Excessive presser-foot pressure can:
- Hold the film against the feed dog.
- Make the bag difficult to move through multi-layer sections.
- Increase the pulling force acting on the thread.
- Leave marks on the printed surface.
- Cause the film to wrinkle or scratch.
However, reducing pressure too much can also cause the bag to slip, making stitch length unstable and the seam misaligned.
Adjustment can be based on two situations:
The bag is held back and the stitch becomes shorter at the folded edge
Try:
- Slightly reduce presser-foot pressure.
- Check feed-dog height.
- Clean deposits under the presser foot.
- Check whether the presser-foot edge is sharp or scratched.
- Reduce speed at overlapping sections.
The bag slips and stitch length varies
Try:
- Slightly increase presser-foot pressure.
- Check whether the feed dog is worn.
- Check whether the presser foot makes even contact.
- Keep the bag mouth flat before it enters the machine.
- Resynchronize conveyor speed.
Each adjustment should be small, and the original position should be marked so it can be restored if necessary.
4.8. Check the feed dog and needle plate
A feed dog used for woven PP bags may have been adjusted high or have relatively sharp teeth to grip the material. When sewing BOPP laminated bags, an excessively high feed dog can scratch, puncture, or wrinkle the film.
Check:
- Whether the teeth are chipped or abnormally sharp.
- Whether feed-dog height is uniform.
- Whether there are burrs around the needle-plate hole.
- Whether the bag is being pulled to one side.
- Whether the film shows excessively deep tooth marks.
A piece of thread can be lightly pulled over the edge of the needle-plate hole, presser foot, and thread guides. If the thread catches or becomes frayed, that location should be polished or replaced.
4.9. Synchronize sewing-machine speed with conveyor speed
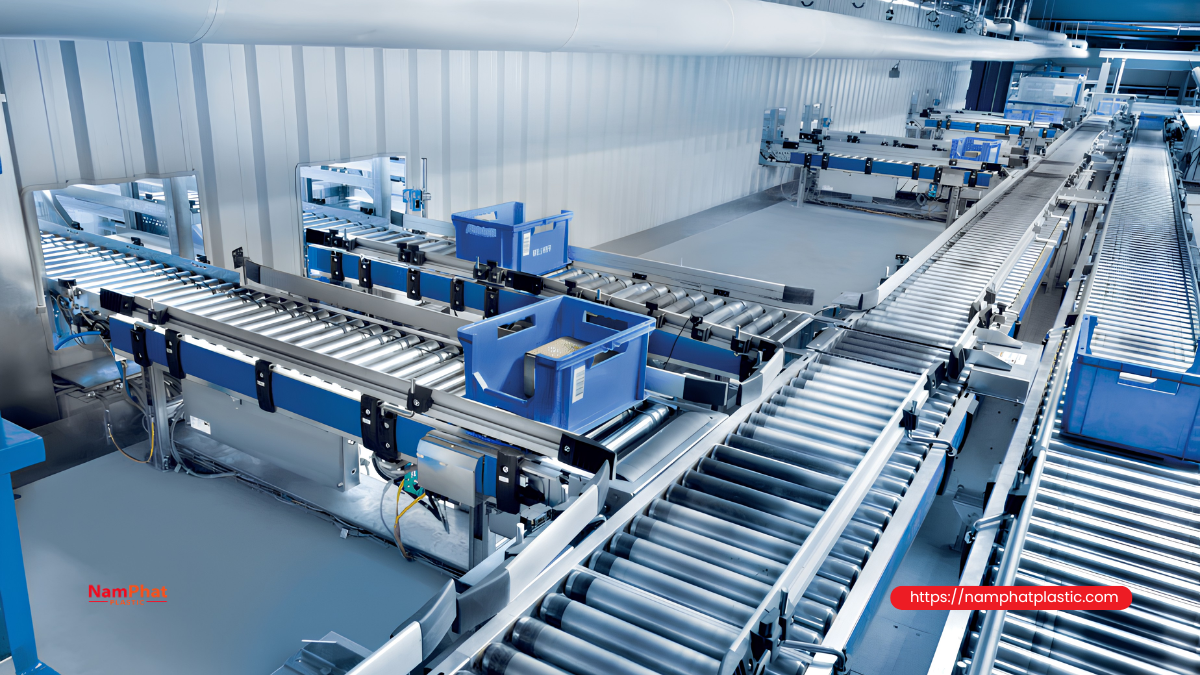
The conveyor is a commonly overlooked cause when thread continuously breaks.
If the conveyor runs faster than the sewing machine's pulling speed, the bag stretches the newly formed seam. This pulling force is transferred back to the needle and stitch-forming mechanism.
If the conveyor runs more slowly, bags accumulate in front of the presser foot, creating folds and causing the needle to penetrate an inconsistent number of layers.
BOPP bags have a slippery surface, so the amount of slipping between the bag and conveyor belt can differ significantly from woven PP bags. Therefore, conveyor speed should not be kept unchanged simply because the bag dimensions are the same.
Signs of good synchronization include:
- Bag moves straight without being stretched behind the presser foot.
- No section of the bag becomes slack before the machine head.
- Stitch spacing remains relatively uniform.
- Seam does not tilt as the bag exits the machine.
- Operator does not need to pull or hold the bag by hand.
In an automated line, speed should be adjusted based on the actual feeding speed of the machine head, not only the conveyor motor's rotational speed.
4.10. Check the thread path from the spool to the needle
When the bag type changes, machine vibration and load can change, making a small defect in the thread path more noticeable.
Check the entire thread path:
- Is the spool holder straight?
- Does the thread unwind evenly from the spool?
- Does the spool wobble or jump?
- Does the thread wrap around the post?
- Are the thread guides scratched?
- Do the tension discs contain dust, oil, or thread debris?
- Does the thread take-up spring operate through the correct range?
- Is the thread threaded in the correct order according to the machine diagram?
A misaligned spool can create fluctuating tension. When woven PP bags are still flexible, this fluctuation may not be enough to cause breakage. But when sewing stiffer BOPP material, the combined forces can exceed the thread's load capacity.
4.11. Deal with needle overheating
Signs of needle overheating include:
- Thread becomes frayed after continuous machine operation.
- Thread end becomes shiny or hardened.
- A hot-plastic smell appears.
- The needle develops clear or white deposits.
- The machine initially runs stably but thread breakage gradually increases.
- After stopping the machine, the thread sticks to the needle.
Measures should be taken in the following order:
- Reduce machine speed.
- Replace the needle with the correct size.
- Check needle straightness and smoothness.
- Adjust thread tension appropriately.
- Slightly increase stitch length.
- Clean deposits from the needle and needle plate.
- Check presser-foot pressure.
- Check the thickness of the folded-mouth area.
- Consider a needle-cooling system if the machine runs continuously at high speed.
Do not arbitrarily apply oil directly to the thread or bag. Unsuitable oil may:
- Contaminate the printed surface.
- Affect label adhesion.
- Cause odors in food packaging.
- Change thread tension.
- Create additional dust buildup in the tension discs.
Only use lubricants or cooling systems permitted by the machine manufacturer and product requirements.
4.12. Check looper timing and needle alignment
If the machine has already had its tension loosened, the needle replaced, and its speed reduced, but the thread still breaks or stitches are skipped, the stitch-forming mechanism should be inspected.
The stiffer BOPP bag may cause the needle to deflect more when penetrating the material. A machine with slightly incorrect looper timing may still sew soft woven PP bags but begin skipping stitches when switched to stiffer material.
Check:
- Distance between looper and needle.
- Needle height when the thread loop is caught.
- Whether the needle bends toward the looper when penetrating the bag.
- Whether the needle contacts the looper or needle plate.
- Whether the needle bar has excessive play.
- Whether bearings, connecting rods, and feeding mechanisms have excessive play.
Looper timing adjustment should be performed by a technician according to the documentation for the specific machine model.
4.13. Adjust the way the bag mouth is folded
Many cases of thread breakage originate not from the machine but from how the bag mouth is prepared.
When the bag mouth is folded unevenly, the needle may pass through:
- Two layers in one section.
- Three or four layers at a joint.
- A folded-over liner.
- Misaligned paper tape.
- Wrinkles in the BOPP film layer.
Sudden changes in thickness increase needle penetration force and create a jerk on the thread.
To minimize this:
- Flatten the bag mouth before feeding it into the machine.
- Standardize fold width.
- Prevent the PE liner from bunching up.
- Align the longitudinal joint so it does not coincide with a heavily layered fold where the design permits.
- Use appropriate guides.
- Check bag-mouth dimensions for each lot.
4.14. Adjust the seam position
A seam that is too close to the cut edge can cause the BOPP film to tear from the edge toward the needle holes. A seam that is too far from the edge leaves an excessive flap, making packaging more difficult and wasting material.
Seam position should be selected based on:
- Number of layers at the bag mouth.
- Folding style.
- Filled product weight.
- Properties of the product inside.
- Dust and moisture resistance requirements.
- How the user opens the bag.
- Whether an easy-open tape is used.
Do not evaluate strength only by pulling across the seam. Observe whether tearing starts from the thread, needle holes, film edge, or laminated-film area.
5. Adjustment sequence to avoid wasting time
When thread breaks, many people simultaneously replace the thread, change the needle, loosen tension, and reduce speed. This may temporarily make the machine run better but does not identify the actual cause.
Adjust in the following order:
Step 1: Check materials
- Correct bag type and production lot.
- Bag mouth has no lamination defects.
- Thread is not damp, frayed, or tangled.
- Thread spool has stable hardness and winding.
Step 2: Check mechanical components
- Replace the needle.
- Check for burrs.
- Clean tension discs and thread guides.
- Check presser foot and feed dog.
- Turn the machine manually to detect contact or interference.
Step 3: Reduce speed
- Run at low speed to eliminate heat and dynamic-load factors.
Step 4: Adjust tension
- Loosen in small increments and balance needle thread with looper thread.
Step 5: Adjust stitch length
- Increase by one step if needle-hole density is too high or needle temperature rises quickly.
Step 6: Adjust presser foot and feeding
- Observe whether the bag is being held back, slipping, or producing inconsistent stitch length.
Step 7: Synchronize the conveyor
- Eliminate pulling or bunching forces acting on the seam.
Step 8: Gradually increase speed
- Increase one level at a time and run continuously to check heat.
This method helps the company identify which parameter has the greatest effect and build a dedicated setting for each bag type.
6. Quick adjustment guide
| Symptom | Priority adjustment | Do not do immediately |
| Thread frays right at the needle | Replace needle, check needle size and hole, loosen tension | Increase thread size |
| Thread shows signs of melting | Reduce speed, slightly increase stitch length, clean needle | Arbitrarily apply oil to thread |
| Breakage at bag joint | Check material thickness, needle deflection, presser-foot pressure | Excessively loosen all tension |
| Breakage after prolonged operation | Check needle temperature and film deposits | Simply replace the thread spool and continue |
| Bag slips under presser foot | Slightly increase pressure, check feed dog and guides | Pull the bag by hand |
| Bag is held back and stitch becomes shorter | Slightly reduce pressure, check conveyor and overlapping area | Increase speed to force the bag through |
| Chain stitch is loose | Rebalance both thread paths | Tighten only the needle thread strongly |
| Seam unravels after cutting | Check chain tail and finishing operation | Switch to thicker thread |
7. Trial-run procedure for BOPP bags before mass production
Record the initial settings
Create a setting sheet including:
- Machine model.
- Needle system and size.
- Thread type and lot number.
- Thread-tension knob position.
- Stitch length.
- Machine speed.
- Conveyor speed.
- Presser-foot pressure.
- Bag-mouth structure.
- Number of material layers at the seam.
Do not rely entirely on the operator's memory.
Change only one parameter at a time
For example:
- Trial 1: Keep everything unchanged and only reduce speed.
- Trial 2: Keep the new speed and loosen tension by 1/8 turn.
- Trial 3: Keep the above settings and increase stitch length by one step.
- Trial 4: Adjust presser-foot pressure.
Changing one factor at a time helps identify the actual cause and prevents the creation of a difficult-to-control parameter set.
Run continuously instead of sewing individual bags
Needle heat often becomes apparent only after continuous operation. Therefore, sewing a few short seams is not enough to draw a conclusion.
Both types of tests should be performed:
- Sew individual bags to observe starting and thread-cutting performance.
- Sew continuously to evaluate heat, stability, and high-speed operation.
Inspect after filling
A seam that looks good on an empty bag may not be strong enough after the bag is filled. Check:
- Bag-mouth tension after filling.
- Ability to withstand lifting, pulling, and stacking.
- Durability after transportation.
- Drop resistance according to internal standards.
- Dust leakage through needle holes.
- Film tearing around the seam.
- Ease of opening by the customer.
Confirm with a sufficiently large trial lot
After finding suitable settings, run a confirmation test on at least 100–200 bags or a lot large enough to reflect actual production conditions.
Acceptance criteria may include:
- No abnormal thread breakage.
- No skipped stitches.
- Stable stitch length.
- No BOPP film tearing.
- No wrinkling of printed graphics.
- Chain tail meets the specified length.
- Seam does not unravel by itself.
- Defect rate remains within internal limits.
8. Is it necessary to change the thread type when switching to BOPP bags?
Not every case requires a different thread. If the thread being used has:
- Good diameter consistency.
- Stable twist.
- Low surface fuzz.
- Appropriate tensile strength.
- Good needle-running performance.
- Evenly wound spools.
- Few joints and no moisture,
the machine and process should be optimized first.
Consider changing the thread specification only when:
- Thread frequently frays even though the needle and thread guides are in good condition.
- Thread diameter is incompatible with the needle hole.
- Thread cannot withstand the required sewing speed.
- Joint strength is low.
- Quality varies between spools.
- The customer requires higher seam strength.
- The current thread is unsuitable for the stitch type or machine.
9. Should thicker thread be used to prevent breakage?
Do not automatically switch to thicker thread.
Thicker thread may increase nominal tensile strength but also increases friction through:
- Needle hole.
- Tension discs.
- Thread guides.
- Stitch-forming looper.
- Needle groove.
If the machine and needle are not changed accordingly, thicker thread may break more frequently than the original thread.
The correct choice should be based on compatibility between the thread, needle, stitch type, speed, and bag-mouth structure.
10. Common mistakes when sewing BOPP laminated bags
Focusing only on loosening thread tension
Loosening tension may temporarily reduce thread breakage but does not solve needle overheating, burrs, or conveyor pulling.
Increasing needle size too much
A larger needle allows the thread to pass more easily but can create larger holes in the film and increase tearing along the row of needle holes.
Pulling the bag by hand out of the machine
This increases tension on the newly formed stitch and can cause thread breakage or chain-stitch unraveling after cutting.
Running at high speed immediately
The machine may sew the first 5–10 bags successfully but begin breaking thread as needle heat accumulates.
Continuously changing thread without checking the machine
A new spool may run better temporarily, but the problem will return if the actual cause is a scratched needle plate, overheated needle, or burrs in the thread guide.
Using the same settings for every BOPP bag
Single-side laminated bags, double-side laminated bags, bags with PE liners, folded-mouth bags, and bags with easy-open tape require different parameter sets.
11. Which parameter sets should be managed separately?
The company should create setting codes for each product group, such as:
- Unlaminated woven PP bags.
- Single-side laminated PP bags.
- Double-side BOPP laminated bags.
- BOPP bags with PE liners.
- Bags with paper tape.
- Bags with easy-open tape.
- Folded-mouth bags.
- Bags with multiple layers at the seam.
Each setting code should record:
| Parameter group | Information to record |
| Material | Basis weight, number of layers, lamination type, and mouth style |
| Thread | Material, specification, color, and supplier |
| Needle | Needle system, size, and needle-point type |
| Seam | Stitch type, stitch length, and seam position |
| Machine | Speed, tension, and presser-foot pressure |
| Line | Conveyor speed and sensor position |
| Inspection | Thread-breakage rate, skipped stitches, film tearing, and chain unraveling |
Keeping parameter sets helps reduce changeover time and prevents each shift from adjusting the machine differently.
Conclusion
When switching from woven PP bags to BOPP laminated bags, the company should not simply replace the thread or loosen the tension knob based on guesswork. The new material simultaneously changes slipperiness, stiffness, needle friction, feeding behavior, and the load acting on the thread.
The most effective troubleshooting sequence is:
- Check the actual structure of the bag mouth.
- Install a new needle of the correct system and size.
- Eliminate burrs along the thread path.
- Reduce speed during the trial run.
- Loosen and balance tension in small increments.
- Adjust stitch length.
- Recalibrate presser-foot pressure and feed dog.
- Synchronize sewing-machine speed with conveyor speed.
- Control needle temperature.
- Conduct a confirmation run on a sufficiently large lot before mass production.
A properly established parameter set not only reduces thread breakage but also limits film tearing, skipped stitches, chain unraveling, printed-image wrinkling, and line stoppages. This is important for maintaining stable productivity when a company expands from ordinary woven PP bags to higher-value BOPP bag products.
Frequently asked questions
1. Why does the same sewing thread work well on woven PP bags but break when sewing BOPP bags?
Because thread runnability depends on the entire system. BOPP bags are stiffer and more slippery, which can increase needle heat, material penetration resistance, and tension fluctuations. The thread itself is not necessarily defective; the working conditions have changed.
2. How much should thread tension be loosened?
There is no fixed number of turns for every machine. Loosen the tension by approximately 1/8 turn at a time, run a trial, and inspect both sides of the seam. Stop adjusting when the thread runs smoothly while the chain stitch remains firmly formed.
3. Should the bag-sewing machine speed be reduced for BOPP bags?
Speed should be reduced during the trial stage. Once needle temperature, tension, feeding, and stitch stability are under control, speed can gradually be increased to a suitable production level.
4. How should thread breakage at the bag joint be handled?
Check the number of material layers, needle alignment, needle size, presser-foot pressure, and the presser foot's ability to rise when passing through the thick section. Also check whether the conveyor is pulling the bag at that location.
5. Can a hot needle cause PP or PE thread to break?
Yes. Excessive heat can soften, fray, or reduce the strength of synthetic thread. The problem often appears after the machine has been running continuously for some time rather than immediately after startup.
6. Does a shorter stitch always make the seam stronger?
Not necessarily. A stitch that is too short increases the number of needle holes, generates more heat, and can create a tear line in the BOPP film. Stitch length must balance strength, sealing, thread consumption, and material protection.
7. Does seam unraveling after cutting mean the thread is too weak?
Not necessarily. With a chain stitch, a thread tail that is too short or an improper cutting/finishing operation can cause the seam to unravel by itself. Check the cutting mechanism and seam-ending method before changing the thread.
>>> See more:
- 0 Comment


