


 Phan Van Hoang
- 25/07/2026
- 153
In an automatic or semi-automatic packaging line, the bag sewing machine and conveyor must operate as a unified system. Even a small difference between the conveyor speed and the sewing machine's feed rate can cause the bag mouth to stretch, bunch up, shift the seam, skip stitches, or tear where the needle penetrates.
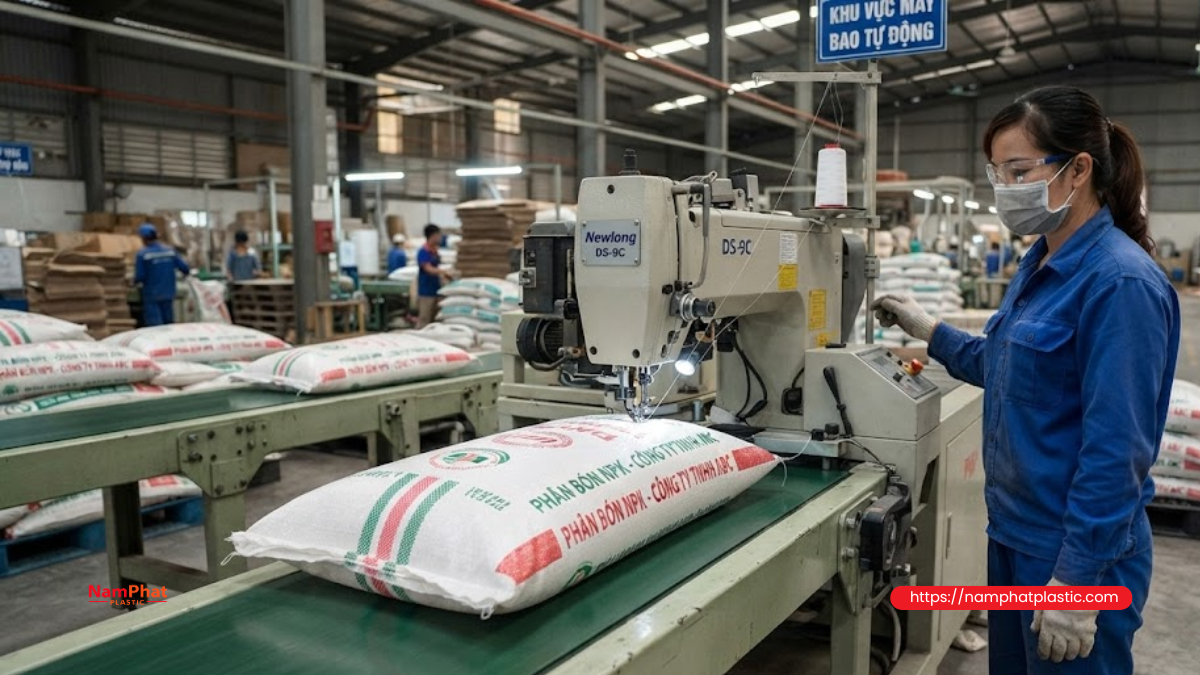
For this reason, synchronizing the bag sewing machine speed with the conveyor is not simply a matter of setting both inverters to the same frequency. The operator must consider the actual bag travel speed, stitch length, machine shaft speed, roller diameter, transmission ratio, and conveyor belt slippage.
The article below explains the operating principle, calculation formulas, warning signs, and practical adjustment procedure to help minimize seam tearing during bag-closing operations.
Table of Contents [Hide]
1. Why must the bag sewing machine and conveyor speeds be synchronized?
When a bag passes through the sewing head, it is simultaneously affected by two mechanisms:
- The feed dog and presser foot of the sewing machine move the bag mouth through the needle.
- The conveyor underneath pushes the entire bag body forward.
If these two mechanisms operate at different speeds, relative pulling forces occur directly in the seam-forming area.
1.1. When the conveyor runs faster than the sewing machine
The conveyor pulls the bag body forward while the presser foot and feed dog cannot feed the bag mouth quickly enough. The bag mouth is stretched backward, which can cause:
- Needle holes to elongate.
- PP woven material around the needle holes to separate or tear.
- The seam to become excessively tight.
- The bag mouth to tear along the needle-hole line.
- Sewing thread to break due to a sudden increase in tensile load.
- The needle to bend backward.
- The end stitches to come loose more easily.
This problem is especially noticeable when sewing bags containing heavy loads. The weight of the bag adds inertia and transfers the pulling force from the conveyor directly to the newly formed seam.
1.2. When the conveyor runs slower than the sewing machine
The sewing machine pulls the bag mouth forward faster than the lower part of the bag can move. The material is not released quickly enough and begins to bunch up in front of the presser foot.
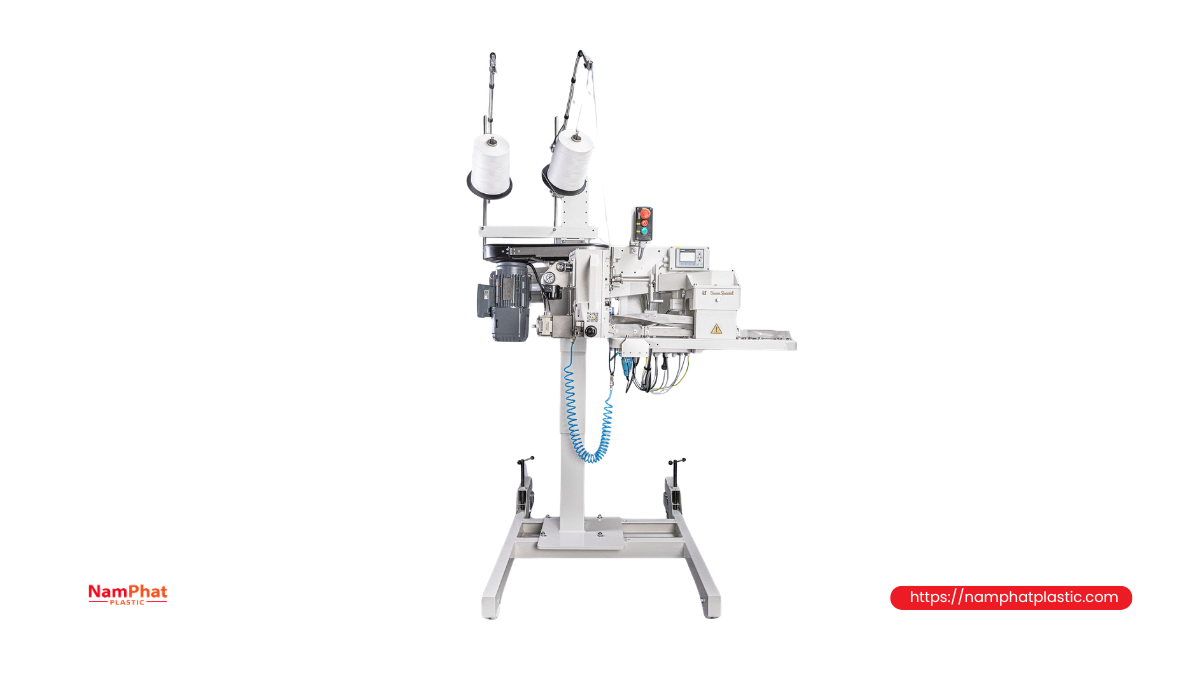
Common signs include:
- The bag mouth becomes wrinkled or folded.
- The seam is not straight.
- Stitch length becomes inconsistent.
- The thread becomes loose or forms large loops.
- The machine skips stitches.
- The bag rotates sideways as it passes through the sewing head.
- The needle penetrates a folded section of the bag, causing localized punctures or tearing.
- The bag becomes caught in the guide or thread-cutting mechanism.
Therefore, both excessive conveyor speed and insufficient conveyor speed can cause tearing. The difference lies in the mechanism: one stretches the seam, while the other causes material to bunch up and fold.
2. Why synchronization should not rely on inverter frequency alone
A common mistake is setting both the sewing machine inverter and conveyor inverter to 30 Hz, 40 Hz, or 50 Hz and assuming that the two machines are running at the same speed.
In reality, the same frequency does not necessarily produce the same linear speed because each system may differ in:
- Rated motor speed.
- Gearbox ratio.
- Pulley diameter.
- Drive roller diameter.
- Belt tension.
- Conveyor surface slippage.
- Bag load.
- Internal transmission mechanism of the sewing machine.
- Stitch length setting.
What needs to be synchronized is not the number of Hz displayed on the inverter but the actual bag travel speed at the sewing needle area.
3. Three speeds that need to be controlled in a bag sewing line
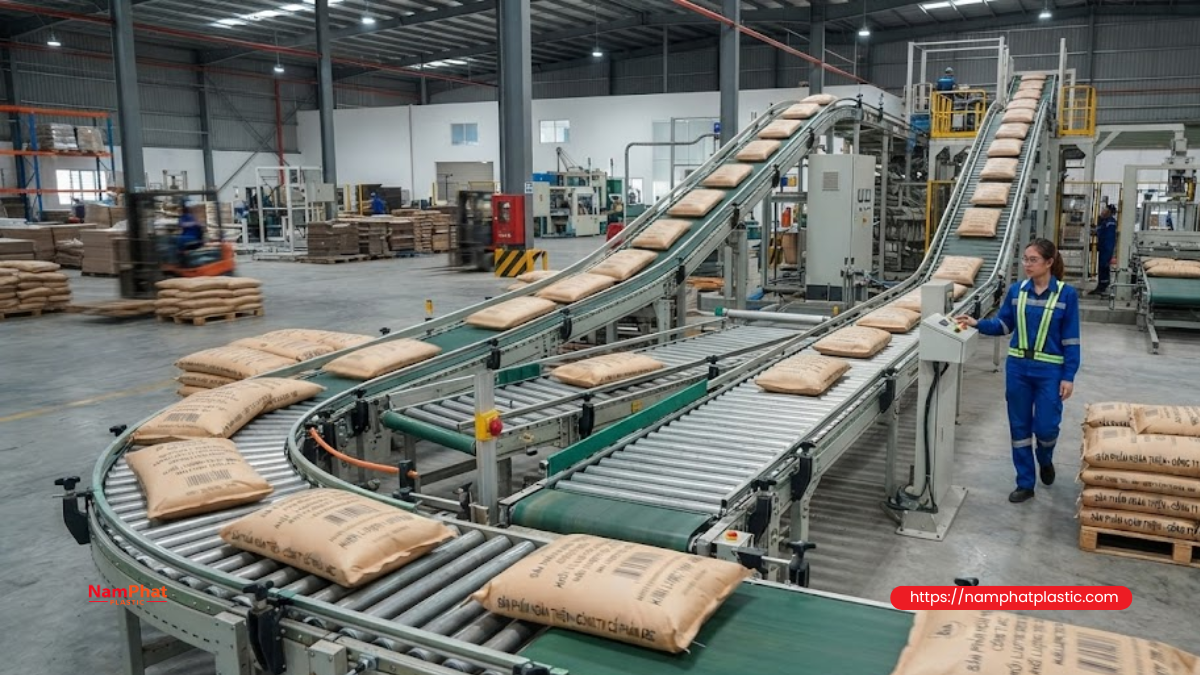
For accurate adjustment, three different values need to be distinguished.
3.1. Sewing machine feed speed
This is the speed at which the feed dog and presser foot move the bag mouth through the needle. It depends on:
- Number of stitches per minute.
- Stitch length.
- Feed dog condition.
- Presser foot pressure.
- Slippage between the feed dog and material.
- Thickness of the bag mouth.
3.2. Conveyor linear speed
This is the distance the conveyor moves per minute, usually expressed in meters per minute.
Conveyor speed depends on:
- Drive roller rotational speed.
- Roller diameter.
- Transmission ratio.
- Inverter frequency.
- Slippage between the bag and conveyor surface.
- Bag weight.
3.3. Actual bag travel speed
The actual bag speed may not be exactly the same as the conveyor speed. A heavy bag, uneven bottom, or excessively smooth conveyor surface can cause the bag to slip.
Therefore, during acceptance testing, the speed of the bag itself should be measured rather than measuring only the conveyor surface speed.
4. Formula for calculating the theoretical sewing machine feed speed
When one machine revolution corresponds to one stitch, the theoretical feed speed can be estimated using:
- Vmachine = N × L ÷ 1,000
Where:
- Vmachine: sewing machine feed speed, in m/min.
- N: number of stitches per minute.
- L: stitch length, in mm/stitch.
Example
The machine operates at 1,600 stitches/min, with a stitch length of 8 mm.
The theoretical feed speed is:
- Vmachine = 1,600 × 8 ÷ 1,000 = 12.8 m/min
Therefore, the conveyor can initially be set close to 12.8 m/min, then adjusted based on the actual bag travel speed.
Formula note
The above result is only a reference starting value. Actual speed may be lower due to:
- Worn feed dogs.
- Insufficient presser foot pressure.
- Excessively slippery bag mouth.
- Multi-layer or folded bag mouths.
- Play in the feed mechanism.
- Sewing machine belt slippage.
- Actual stitch length differing from the dial setting.
Therefore, the calculated value must still be verified through testing and direct measurement.
5. Formula for calculating conveyor linear speed
When the drive roller diameter and rotational speed are known, conveyor speed can be calculated using:
- Vconveyor = π × D × n ÷ 1,000
Where:
- Vconveyor: conveyor speed, in m/min.
- D: drive roller diameter, in mm.
- n: roller rotational speed, in rpm.
- π: approximately 3.14.
Example
The drive roller has a diameter of 100 mm and rotates at 40 rpm.
- Vconveyor = 3.14 × 100 × 40 ÷ 1,000 = 12.56 m/min
If the sewing machine feed speed is 12.8 m/min, the initial difference is relatively small. However, bag slippage under load still needs to be checked.
When a gearbox is used
If the motor speed and transmission ratio are known, roller speed can be calculated as:
- Roller speed = Motor speed ÷ Transmission ratio
For example, with a motor speed of 1,400 rpm and a 1:35 gearbox:
- Roller speed = 1,400 ÷ 35 = 40 rpm
6. How to calculate the speed difference between the conveyor and sewing machine
The speed difference can be calculated using:
- Speed difference (%) = (Vconveyor − Vmachine) ÷ Vmachine × 100
A positive result means the conveyor is running faster than the sewing machine. A negative result means the conveyor is running slower.
In actual operation, the goal should not be to make the two theoretical values exactly identical. The objective is to make the bag pass through the sewing area without stretching or bunching.
After setting the two speeds close to each other, the operator should make small adjustments while observing the bag movement.
7. How to identify whether the conveyor is running too fast or too slow
| Observed condition | Likely cause | Initial adjustment |
| Bag mouth is stretched backward | Conveyor faster than sewing machine | Slightly reduce conveyor speed |
| Needle holes elongate in the travel direction | Conveyor pulls the bag body too strongly | Reduce conveyor speed, check presser foot |
| Bag tears immediately after the presser foot | Speed difference or excessive thread tension | Reduce pulling force, check thread tension |
| Bag bunches up before the sewing head | Conveyor slower than sewing machine | Slightly increase conveyor speed |
| Seam becomes wrinkled | Bag is not being released quickly enough | Increase conveyor speed, check guide |
| Stitch length varies | Bag slippage or speed fluctuation | Check conveyor and feed mechanism |
| Needle bends backward | Conveyor pulls the bag too strongly | Reduce conveyor speed and check alignment |
| Needle bends forward | Bag mouth is bunching up | Increase conveyor speed or reduce machine speed |
| Front of bag runs straight but the end shifts | Bag rotates on the conveyor or guide is unstable | Adjust guide and conveyor centerline |
| Thread breaks only with heavy bags | Excessive pulling load on the seam | Synchronize speeds and add bag support |
8. Procedure for synchronizing the bag sewing machine and conveyor
Step 1: Check the mechanical system before adjusting speed
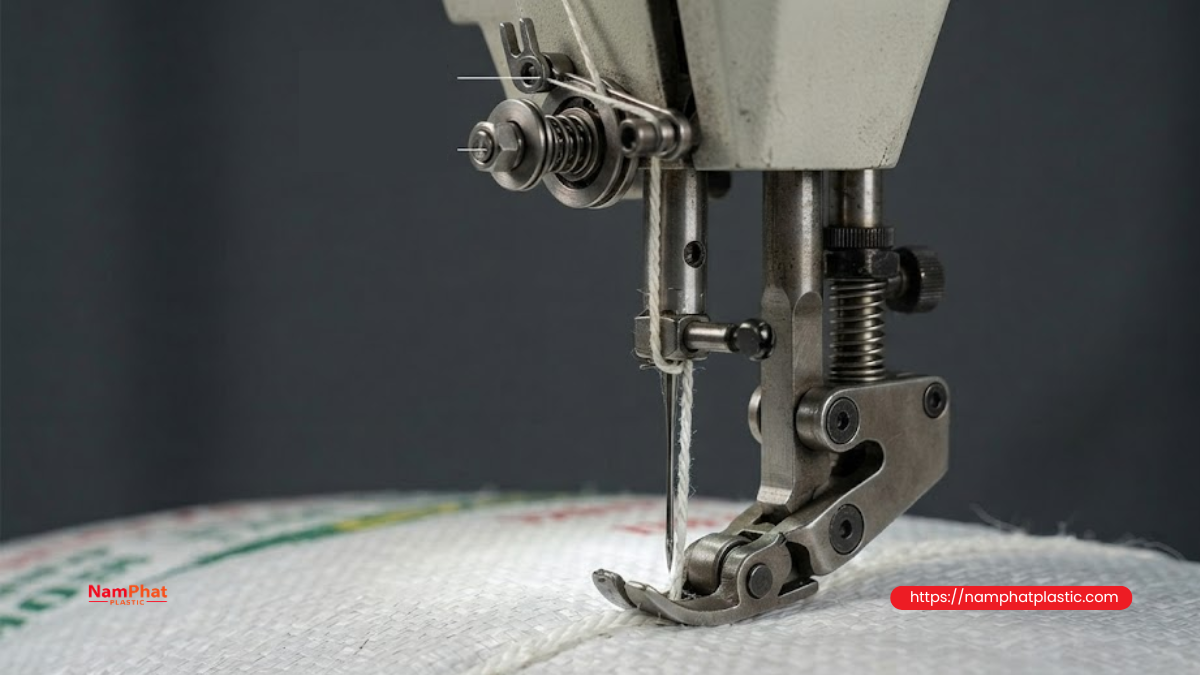
Do not use the inverter to compensate for mechanical faults. Before making adjustments, check:
- Whether the conveyor runs along the correct centerline.
- Whether the two belt edges are properly aligned with the rollers.
- Whether the conveyor surface is too smooth or excessively worn.
- Whether the drive belt is slipping.
- Whether the gearbox produces abnormal noise.
- Whether the roller is seized or has bearing play.
- Whether the sewing machine feed dog is worn.
- Whether the presser foot applies even pressure to the bag mouth.
- Whether the needle is bent, dull, or incorrectly installed.
- Whether the bag-mouth guide is rubbing against the material.
- Whether the sewing head height is appropriate for the bag mouth.
If the conveyor jerks or the feed dog does not feed consistently, the seam can still tear periodically even when the average speed is correct.
Step 2: Standardize the sewing machine settings
Before adjusting the conveyor, determine and keep constant:
- Sewing machine speed.
- Stitch length.
- Presser foot pressure.
- Upper and lower thread tension.
- Needle type.
- Bag sewing thread.
- Number of material layers at the bag mouth.
Do not simultaneously change machine speed, stitch length, and thread tension. Changing several parameters at once makes it difficult to identify the actual cause.
Step 3: Calculate the reference speed
Use machine speed and stitch length to calculate the theoretical feed speed.
Example:
- Sewing machine: 1,500 stitches/min.
- Stitch length: 8 mm.
Reference speed:
- 1,500 × 8 ÷ 1,000 = 12 m/min
This becomes the initial reference value for setting the conveyor.
Step 4: Measure the actual conveyor speed
Three methods can be used.
Conveyor marking method
Mark one point on the conveyor surface, run the machine for a defined period, and measure the distance traveled by the marked point.
Formula:
- Speed = Distance ÷ Time
If the conveyor travels 6 m in 30 seconds:
- V = 6 ÷ 0.5 = 12 m/min
Measurements should be repeated several times to eliminate errors during acceleration.
Using a tachometer
Use a contact or non-contact tachometer to measure the drive roller speed, then convert it to linear speed.
Direct measurement on the bag
Mark two fixed points on the machine frame, for example 2 m apart. Run the bag through the line and measure the time required for the bag to travel from the first point to the second.
This method better reflects the effects of load and slippage.
Step 5: Set the conveyor close to the sewing machine feed speed
Set the conveyor speed close to the calculated machine speed, then test using the actual bag type.
Do not use extremely light empty bags to adjust a line intended for heavy-duty bags. Empty and loaded bags behave differently in terms of slippage, inertia, and stability.
Step 6: Observe the bag immediately before and after the presser foot
A short straight reference mark can be drawn on the bag mouth before sewing.
During operation, observe:
- Whether the reference mark becomes stretched.
- Whether the bag mouth sags or bunches.
- Whether the bag jerks as the needle penetrates.
- Whether the bag moves away from the machine centerline.
- Whether the newly formed seam becomes stretched.
This is a practical way to detect relative pulling forces between the sewing machine and conveyor.
Step 7: Make small incremental adjustments
If the bag mouth is being stretched, slightly reduce conveyor speed.
If the bag bunches up in front of the presser foot, slightly increase conveyor speed.
Only make small changes at a time, then run multiple bags continuously. Large adjustments can simply shift the problem from stretching to bunching.
Step 8: Check during acceleration and deceleration
Many production lines run well at constant speed but tear seams during:
- Start-up.
- Shutdown.
- Speed changes.
- Bag entry at the sensor.
- Thread cutting.
- Short spacing between bags.
The cause is often different acceleration and deceleration times between the two inverters.
The following should be synchronized:
- Acceleration time.
- Deceleration time.
- Start signal.
- Stop signal.
- Sewing machine start timing.
- Thread cutter operating timing.
Step 9: Test under different load conditions
At minimum, test:
- Empty bags.
- Bags with normal load.
- Bags at maximum load.
- Thickest bags.
- Most slippery bags.
- Bags with heavily folded mouths.
- Bags at the beginning of a shift while the machine is still cold.
- Continuous operation after the machine has warmed up.
A setting should only be considered stable when the line performs consistently under actual production conditions.
Step 10: Record the settings for each product code
A single conveyor speed should not necessarily be used for every bag type.
Each product code should have a parameter sheet including:
- Bag type.
- Bag dimensions.
- Filled product weight.
- Number of layers at the bag mouth.
- Thread type.
- Needle type.
- Stitch length.
- Sewing machine speed.
- Conveyor inverter frequency.
- Measured conveyor speed.
- Acceleration and deceleration times.
- Seam inspection results.
Recording the operating parameters by product code reduces setup time when changing products.
9. Should the sewing machine or conveyor be the primary control device?
The control method depends on the line configuration.
Sewing machine as the primary device
This approach is suitable when:
- The sewing machine operates at a nearly fixed speed.
- The sewing head has limited speed adjustment capability.
- A conveyor has been added to an existing bag sewing machine.
- The line produces only a few bag types.
The conveyor is then adjusted to follow the actual feed speed of the sewing machine.
Conveyor as the primary device
This approach is suitable when:
- Overall line output is determined by bag conveying speed.
- The sewing machine has variable-speed control.
- A bag detection sensor is installed.
- A PLC or centralized control system is available.
In this case, when conveyor speed changes, the sewing machine must also change according to a calibrated ratio.
Using a common speed signal
A more stable solution is to use a common speed command and then apply an individual ratio correction for each motor.
For example:
- The conveyor inverter receives the primary speed signal.
- The sewing machine inverter receives the same signal with a scaling factor.
- A fine adjustment allows compensation for actual deviations.
- Parameters are locked to prevent operators from independently changing each device.
This reduces differences between settings used on different shifts.
Using an encoder
For high-speed lines, multiple product codes, or applications requiring consistent seam quality, an encoder can be installed to provide actual speed feedback.
An encoder can help detect:
- Conveyor slippage.
- Roller speed reduction under heavy loads.
- Motor speed falling below the commanded value.
- Speed mismatch between the sewing machine and conveyor during acceleration.
The PLC can automatically adjust speed or stop the line when the deviation exceeds the permitted limit.
10. Synchronizing the start-up and shutdown sequence
In addition to steady-state speed, the operating sequence also has a major effect on seam quality.
During start-up
The sewing machine should reach a stable speed before, or at the correct moment when, the bag mouth reaches the needle. If the conveyor pulls the bag before the sewing machine has reached operating speed, the bag may:
- Be pulled away from the presser foot.
- Skip stitches at the beginning of the seam.
- Tear around the first needle holes.
- Fail to form a stable initial chain stitch.
A sensor positioned before the sewing head can be used to start the machine slightly earlier.
At the end of the seam
The sewing machine should not stop immediately when the end of the bag leaves the needle. A sufficient thread chain should be formed before the thread cutter operates.
If the conveyor pulls the bag too quickly at the end:
- The final stitches may pull loose.
- The seam may not be properly secured.
- The thread may break close to the bag edge.
- The bag may tear at the end corner of the seam.
During an emergency stop
If the sewing head stops while the conveyor continues moving, the seam can be torn immediately. The system should therefore include interlocks:
- If the sewing machine faults, the conveyor stops.
- If the conveyor faults, the sewing machine stops feeding bags.
- Opening a safety cover stops the entire system.
- If a bag jams, the next bag is prevented from entering.
11. Factors that can cause tearing even when speeds are synchronized
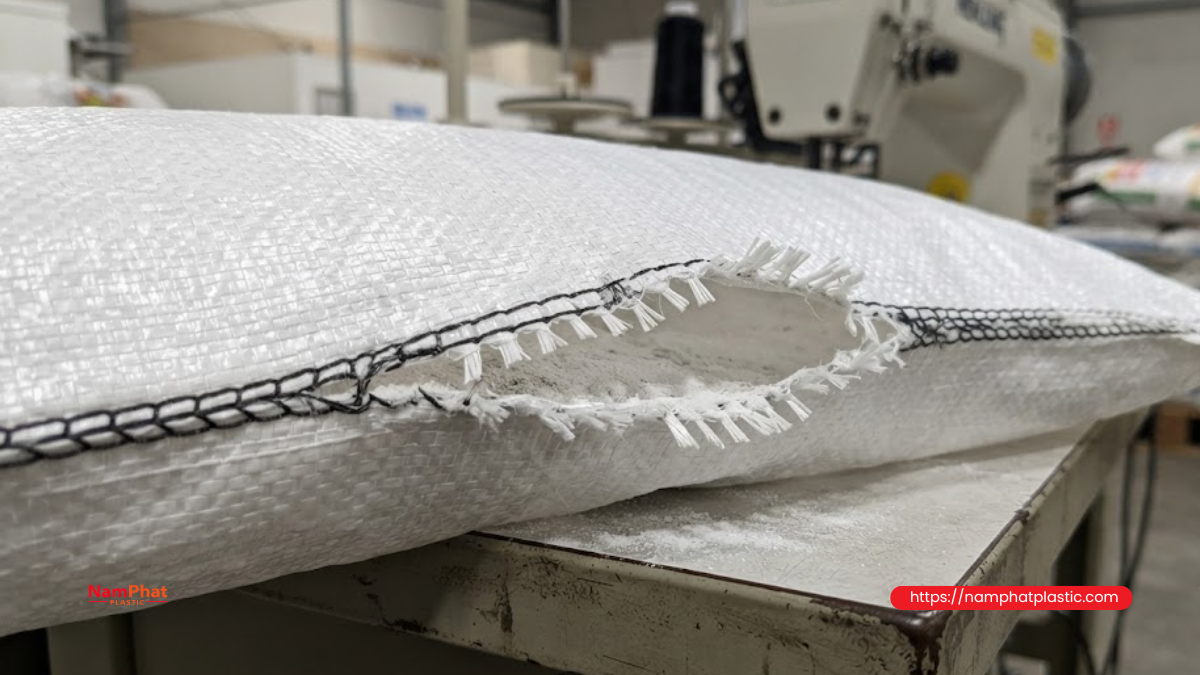
Speed is not the only possible cause. When the two systems are properly synchronized but the seam still tears, check the following factors.
Seam positioned too close to the bag edge
If the distance between the needle line and bag edge is too small, there is insufficient material remaining to withstand the load. The needle holes form a continuous weak line that can separate from the edge.
The appropriate seam distance depends on:
- Material type.
- Weave density.
- Filled load.
- Bag-mouth folding method.
- Customer requirements.
Stitch length is too short
Excessively short stitches create too many needle holes within the same length. In PP woven bags, closely spaced needle holes can create a tear line similar to perforation.
Increasing stitch density does not always make the seam stronger. A balance is needed between:
- Thread holding force.
- Material damage.
- Thread consumption.
- Operating speed.
- Bag opening requirements.
Thread tension is too high
Excessive thread tension can make a seam look straight and neat immediately after sewing but cause the bag mouth to contract. When the bag is loaded, the thread pulls strongly against the needle holes and cuts into the material.
Thread tension should be sufficient for stable stitch formation without being so tight that it constricts the bag mouth.
Incorrect needle
A needle that is too large creates large needle holes. A needle that is too small can overheat, bend, or fail to form the thread loop properly.
A dull or burred needle can:
- Push woven strands aside.
- Scratch the PP tape.
- Fray the needle-hole edges.
- Increase needle penetration force.
- Heat the sewing thread.
Incorrect presser foot pressure
Insufficient presser foot pressure allows the bag mouth to slip over the feed dog. Excessive pressure increases friction and restricts movement.
If the presser foot applies uneven pressure, the bag mouth may rotate as it passes through the sewing head, creating a diagonal seam and uneven load distribution.
Conveyor does not adequately support the bag weight
For heavy bags, the entire bag weight should be supported by the conveyor and guide system. The seam or presser foot should not carry the pulling force of the bag body.
When the bag passes between two conveyor sections, the gap should be minimized so that the bag does not drop and pull on the bag mouth.
Bag-mouth guide creates excessive friction
A guide that is too tight can hold the bag mouth back while the bag body continues moving. This produces an effect similar to an excessively fast conveyor.
Check:
- Guide clearance.
- Sharp edges.
- Folded-mouth position.
- Bag-mouth flatness.
- Dust or fibers attached to the guide.
12. Adjustment methods for different bag types
12.1. PP woven bags
PP woven bags are made from interwoven plastic tapes. When the needle penetrates the material, it can separate or cut some of the woven tapes.
When sewing PP woven bags, pay particular attention to:
- Preventing the conveyor from stretching the needle-hole line.
- Avoiding excessively dense stitching.
- Using a needle that is not unnecessarily large.
- Maintaining a consistent seam-to-edge distance.
- Avoiding diagonal seams across the weave.
- Ensuring that the bag mouth is folded evenly.
12.2. Multi-layer paper bags
Paper bags have less elasticity and can tear easily when pulled suddenly. Acceleration and deceleration should be smooth, and acceleration time should not be set too short.
Also avoid:
- Oversized needles.
- Excessively short stitches.
- Damp bag mouths.
- Conveyor vibration.
- Sharp edges on the guide.
12.3. Bags with a PE liner
A PE liner can slide independently from the outer bag layer. If the bag mouth is not kept flat, the liner may bunch up or shift.
Check whether:
- The needle catches all required layers.
- The liner is being pulled out of the bag.
- The bag-mouth guide holds both layers evenly.
- Thread tension is cutting into the PE layer.
12.4. Bags containing heavy loads
For heavy bags, the speed may be correct while bag inertia still places excessive force on the seam during changes in direction or sudden stops.
The system should:
- Increase the supported area under the bag.
- Minimize gaps between conveyors.
- Reduce acceleration and deceleration.
- Keep the bag centered.
- Prevent the bag from striking a stop after sewing.
13. Common mistakes when adjusting a bag sewing line
Adjusting thread tension to compensate for a speed problem
When the seam is loose or wrinkled, operators often increase thread tension. This may make the seam look better temporarily but can increase the risk of tearing the bag mouth.
The bag movement should be checked before changing thread tension.
Testing only with empty bags
Empty bags have low inertia and easily follow the conveyor. When filled bags are introduced, slippage and pulling forces change significantly.
Speed should be validated using actual production loads.
Changing multiple parameters at the same time
Changing conveyor speed, machine speed, thread tension, and presser foot pressure simultaneously makes the test process difficult to control.
The preferred principle is to change only one parameter at a time.
Synchronizing by Hz
Two inverters operating at 40 Hz can still produce different bag speeds because their gearboxes and roller diameters may differ.
Actual linear speed must be measured.
Failing to check bag slippage
The conveyor surface speed may be correct while the bag itself slips. This is common when:
- The belt surface is dusty.
- The bag bottom is slippery.
- The bag is too light.
- The conveyor is inclined.
- There is vibration.
- The load inside the bag is uneven.
Failing to synchronize acceleration time
A line may run normally at rated speed but produce a large number of torn seams during the first few seconds after start-up.
The cause is that one device reaches operating speed before the other.
14. Quick inspection procedure at the factory
The following procedure can be used after changing the bag type, changing thread, or servicing the machine:
- Check the needle, presser foot, feed dog, and guide.
- Determine the stitch length.
- Determine the sewing machine speed.
- Calculate the reference feed speed.
- Measure the actual conveyor speed.
- Set the two speeds close to each other.
- Run a small group of empty bags to check guiding.
- Test with bags carrying the actual production load.
- Observe the bag mouth before and after the presser foot.
- Adjust the conveyor in small increments.
- Check the beginning, middle, and end of the seam.
- Run multiple bags continuously to verify stability.
- Perform tensile or drop testing according to internal requirements.
- Record all parameters after the required performance is achieved.
15. Acceptance criteria after synchronization
The line can be considered stable when it meets the following criteria:
- The bag travels straight through the sewing head.
- The bag mouth is not stretched.
- No bunching occurs before the presser foot.
- Stitch length is consistent.
- The seam does not pucker.
- Needle holes do not elongate.
- No skipped stitches occur.
- Thread does not break abnormally.
- The needle does not bend during sewing.
- The beginning and end of the seam are stable.
- No mass defects occur during start-up or shutdown.
- Bag-mouth holding performance meets requirements after load testing.
The seam should not be judged by appearance alone. A seam that looks straight but is under excessive tension can still tear during transportation.
16. Troubleshooting table by symptom
| Symptom | First check | Corrective action |
| Tear along the needle-hole line | Conveyor speed and thread tension | Reduce pulling force and adjust thread tension appropriately |
| Bag bunches up before the presser foot | Check whether the conveyor is too slow | Slightly increase conveyor speed |
| Bag is pulled away from the presser foot | Conveyor too fast or insufficient presser foot pressure | Reduce conveyor speed and increase pressure appropriately |
| Uneven stitch length | Bag slippage or worn feed dog | Check conveyor surface and feed dog |
| Thread breaks at the end of the bag | Thread-cutting sequence and pulling speed | Increase chain-stitch length and adjust cutting timing |
| Seam tears only on heavy bags | Load transferred to sewing head | Add bag support and reduce acceleration |
| Diagonal seam | Guide and sewing head position | Realign conveyor centerline and guide |
| Fault occurs only during start-up | Acceleration times are not synchronized | Reconfigure acceleration timing |
| Repetitive cyclic fault | Uneven roller, belt, or gearbox | Inspect the transmission mechanism |
| Bag does not tear during sewing but tears during transportation | Seam too tight or too close to edge | Reduce thread tension and adjust seam position |
Conclusion
To prevent seam tearing, the bag sewing machine and conveyor must be synchronized according to the actual travel speed of the bag, rather than simply relying on inverter frequency or displayed rpm.
An effective adjustment process should begin with a mechanical inspection, standardize stitch length, calculate the reference speed, measure the actual conveyor speed, test using loaded bags, and make small incremental adjustments. The start-up and shutdown sequence, presser foot pressure, thread tension, guiding position, and bag support capacity must also be controlled.
When operating parameters are recorded for each product code, the line becomes more stable, machine setup time is reduced, defective bags are minimized, and the service life of the needle, sewing thread, and sewing head can be improved.
Frequently asked questions
1. Should the conveyor run faster or slower than the bag sewing machine?
In principle, the actual bag travel speed on the conveyor should be close to the sewing machine feed speed. The conveyor should not intentionally run faster simply to pull the seam straight, because this can elongate the needle holes and tear the bag mouth.
A small compensation may be required to account for slippage, but it should be determined based on actual bag movement and load-test results.
2. Why does the bag still tear when both inverters are set to the same frequency?
Because output speed also depends on motor speed, gearbox ratio, pulley size, roller diameter, and the transmission mechanism. The same frequency does not necessarily mean the same linear speed.
3. How should the system be adjusted when the bag sewing machine has a fixed speed?
When the sewing machine operates at a fixed speed, measure or calculate its feed speed and then adjust the conveyor accordingly. The sewing machine acts as the primary device, while the conveyor follows its speed.
4. Should an inverter be used for the bag sewing conveyor?
An inverter allows speed adjustment, acceleration and deceleration control, and parameter storage for different products. It is suitable for lines that frequently change bag sizes or load conditions.
5. When is an encoder needed?
An encoder should be considered for high-speed lines, large variations in load, multiple bag types, or applications requiring a low defect rate. It provides more accurate actual-speed feedback than relying only on inverter frequency.
6. How can a speed problem be distinguished from a thread-tension problem?
If the bag mouth is visibly stretched or bunched as it passes through the sewing head, the cause is usually related to speed or guiding. If the bag moves steadily but the seam still puckers or the thread cuts deeply into the material, thread tension should be checked.
In some cases, both causes can occur simultaneously.
7. Why do only heavy bags develop seam tearing?
Heavy bags have greater inertia and transfer higher pulling forces to the sewing area. In addition to speed synchronization, check bag support, gaps between conveyors, and acceleration and deceleration times.
>>> See also:
- 0 Comment


