


 Phan Van Hoang
- 27/07/2026
- 135
The seam may look even, firm, and free of skipped stitches immediately after sewing. However, as soon as the operator cuts the excess thread, the chain stitch tail may begin to loosen, causing the thread loops to gradually unravel from the edge of the bag. If the problem is not detected in time, the unraveling section can extend into the seam, causing the bag mouth to open during transportation, stacking, or handling.
The phenomenon of a chain stitch tail slipping only after cutting is not simply a thread problem. The cause may come from the structure of the chain stitch, the length of the remaining thread tail, thread tension, the thread-cutting mechanism, cutting timing, the needle, looper, or synchronization between the sewing machine and conveyor.
To solve the problem thoroughly, the operator needs to identify the actual mechanism causing the slippage rather than simply increasing thread tension or switching to a larger thread.
Table of Contents [Hide]
1. How does a chain stitch work?
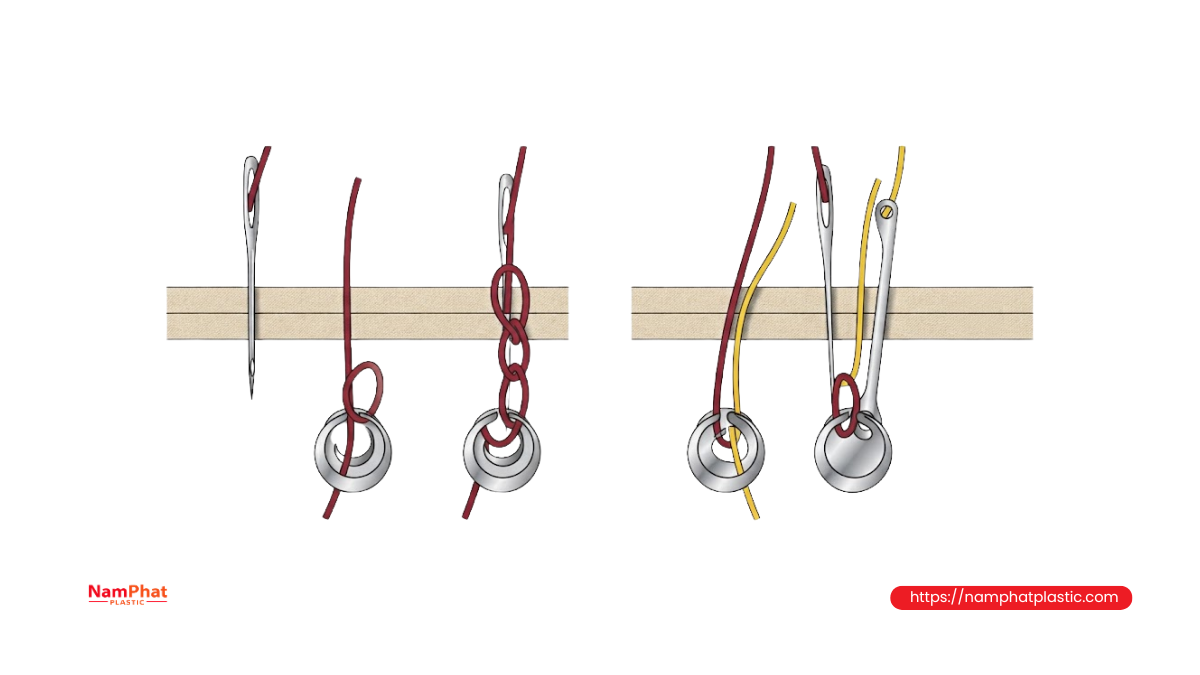
Unlike a lockstitch, a chain stitch is formed by a series of interconnected thread loops. Each new loop holds the loop formed immediately before it. Thanks to this structure, bag sewing machines can operate at high speed, the seam has good elasticity, and no lower bobbin is required as in some conventional sewing machines.
However, this interconnected structure also creates a disadvantage: if the end of the seam is not secured properly, the final loop can be pulled backward, causing the preceding loops to unravel one after another.
A chain stitch can be imagined as a chain of interconnected links. When the final link is properly secured, the entire chain remains stable. But if it is cut at the wrong position or the thread is pulled in the direction that allows the loops to unravel, the seam can quickly come apart even though the rest of the seam was sewn correctly.
1.1. Single-thread chain stitch
A single-thread chain stitch generally uses one thread to form loops that interlock with themselves. This stitch has a relatively simple structure, allows high-speed sewing, and is widely used on handheld bag sewing machines.
Because only one thread participates in forming the stitch, the end of a single-thread seam is often more sensitive to cutting and pulling. When the thread tail is pulled in the unraveling direction, the seam can continue to unravel.
1.2. Two-thread chain stitch
A two-thread chain stitch uses a needle thread and a looper thread to form the interlocking structure. The seam is generally more stable and can provide better bag-mouth retention under many production conditions.
However, a two-thread chain stitch can still slip if:
-
One of the two threads is cut too close.
-
The looper thread is not tensioned correctly.
-
A skipped stitch occurs at the end of the seam.
-
The cutter pulls the thread before cutting it.
-
The tension between the needle thread and looper thread is unbalanced.
Therefore, using a two-thread chain stitch does not automatically guarantee that the seam end will never unravel.
2. Three defects commonly confused with chain stitch slippage
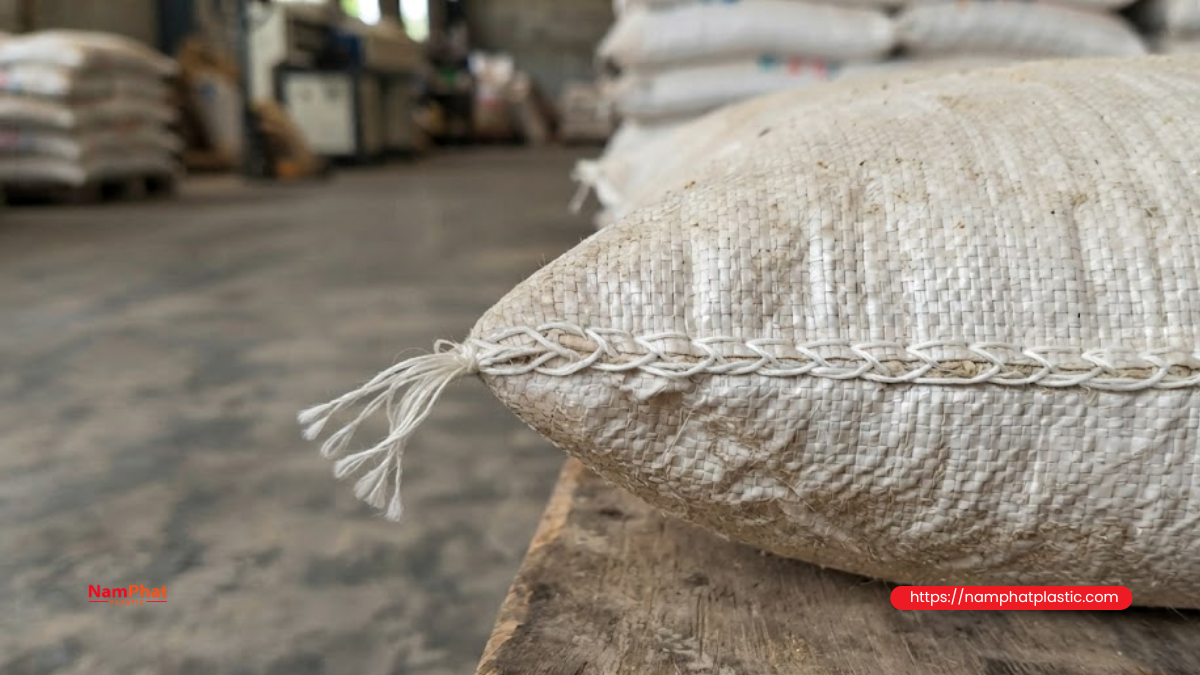
Before adjusting the machine, it is necessary to distinguish between three defects that can have relatively similar symptoms.
2.1. Thread slipping according to the chain-stitch structure
In this case, the thread itself has not broken. The loops are pulled out one after another from the seam end after the excess thread is pulled.
Typical signs include:
-
The thread unravels as a relatively continuous section.
-
The stitches unravel continuously in sequence.
-
There is no obvious fraying or melting at the thread end.
-
When pulled in one direction, the seam unravels easily; pulling in the opposite direction may not cause the same effect.
This is a defect directly related to how the seam end is formed and secured.
2.2. Thread breaking at the final stitch and creating a similar appearance
In this case, the thread has already been weakened before or during cutting. When the bag is subjected to tension, the thread breaks at the final stitch, after which the chain loops begin to unravel.
Common signs include:
-
The thread end is frayed, flattened, or hardened.
-
The damaged point is concentrated near the needle hole.
-
The thread break is irregular.
-
Needle overheating, excessive friction, or the cutter crushing the thread may be involved.
The solution is therefore not limited to securing the seam end; the cause of the loss of thread strength must also be addressed.
2.3. Skipped or false stitches at the end of the seam
The machine may create a shape that looks like a stitch, but the thread loop has not been properly engaged. When the thread is cut, the false stitch loses its connection and the seam end begins to unravel.
Typical signs include:
-
The spacing between stitches is uneven.
-
An abnormal section of thread appears on the underside of the bag.
-
The seam slips only on some bags rather than consistently.
-
The problem becomes more frequent when the machine runs at high speed or the bag edge vibrates.
This condition requires inspection of the needle, looper, loop timing, and material feeding movement.
3. Causes of chain stitch tail slippage after cutting
3.1. The remaining thread tail is too short
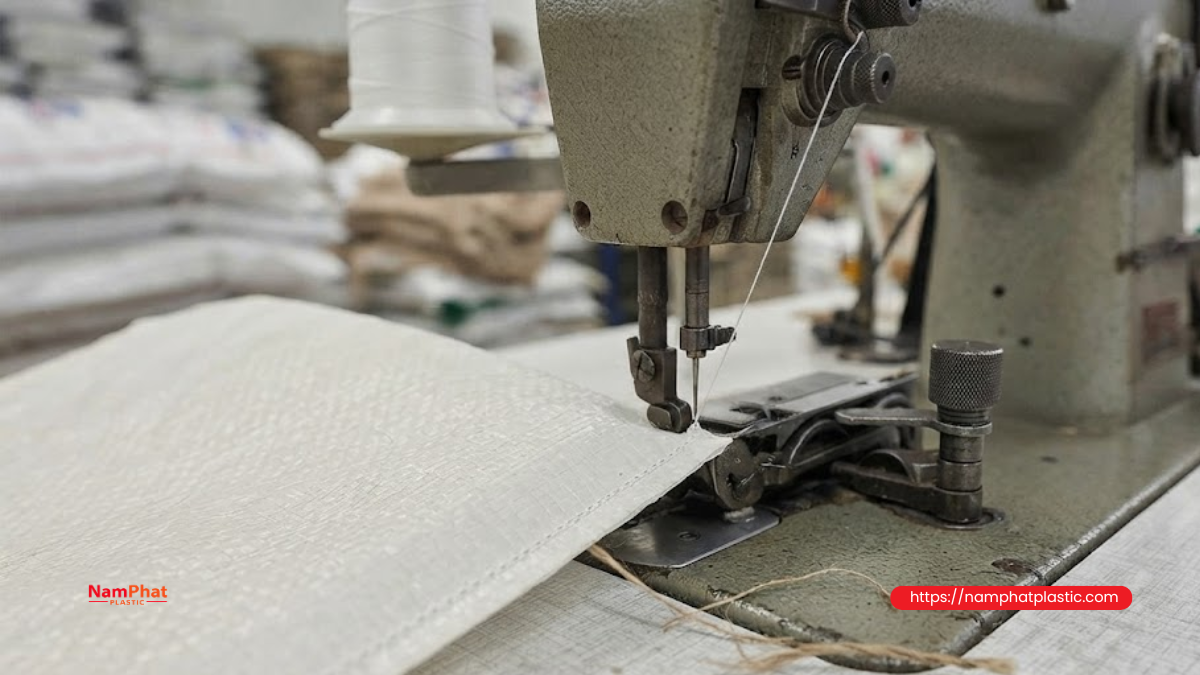
This is one of the most common causes. When the cutter cuts immediately after the final stitch, there may not be enough thread length to maintain sufficient friction and keep the end of the chain stable.
During:
-
Manual handling.
-
Transfer onto a conveyor.
-
Folding of the bag mouth.
-
Contact with other bags.
-
Pulling of the excess thread during handling.
A short thread tail can easily be pulled back into the final chain loop and cause the seam to unravel.
The tail length should not be determined only by feel. The factory should establish a standard range and test it on the actual bags being produced. For many bag-sewing applications, testing may begin at around 50–80 mm, then be adjusted according to stitch type, thread, bag weight, and handling conditions.
Heavy bags, smooth surfaces, or bags frequently subjected to pulling at the mouth may require a longer thread tail or an additional securing method.
3.2. The thread is cut directly at the bag edge
If the final stitch is located exactly at the material edge and the cutter cuts immediately, the final loop may not have enough time to stabilize. The bag edge may also contract, flare, or move away from the presser foot, changing the force acting on the thread.
A more suitable approach is to allow the machine to continue forming a short chain section after the needle leaves the material edge, and then cut the thread.
The chain section extending beyond the bag edge provides three main benefits:
-
It helps the final loop on the bag stabilize.
-
It creates a safe distance between the final stitch and the cutting point.
-
It gives the operator enough thread length to tie, tuck, or otherwise secure the tail.
If the automatic line cuts too early, the sensor or cutter delay may need to be adjusted.
3.3. The operator accidentally pulls the thread tail in the unraveling direction
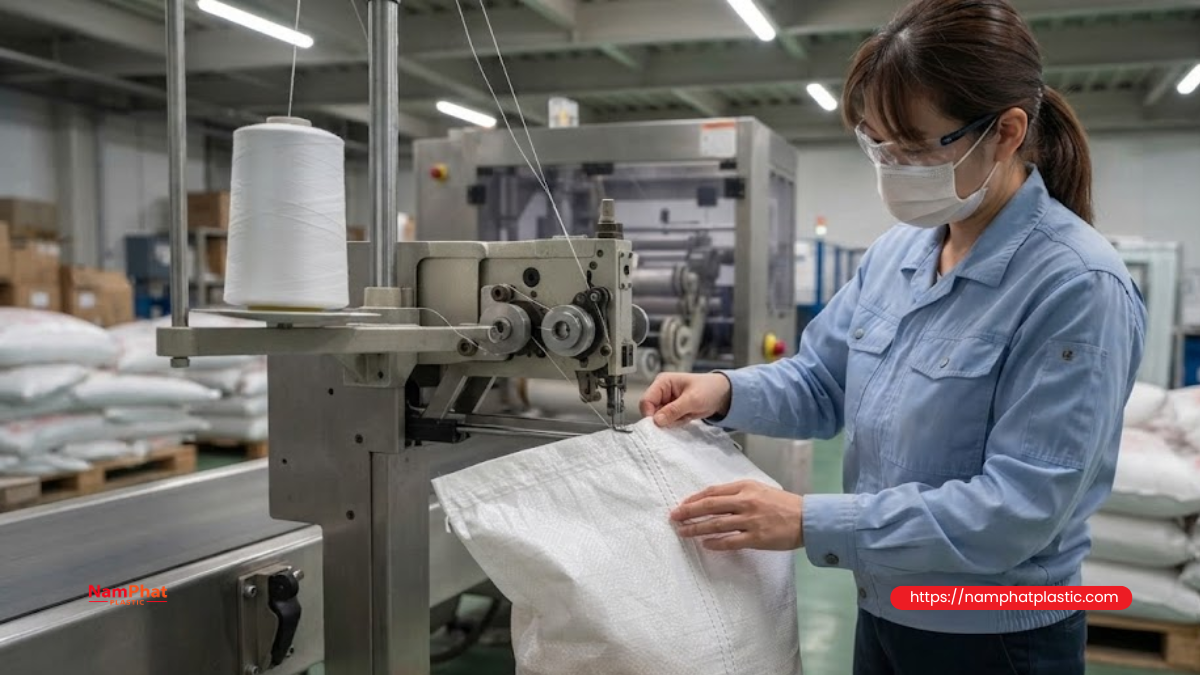
A chain stitch may be strong in one direction but relatively easy to unravel in the other. If the operator grabs the thread tail and pulls the strand that releases the loops, the seam can unravel even when the machine itself is operating correctly.
This can happen when:
-
The operator pulls the thread to separate two bags.
-
The thread tail catches on gloves or a conveyor.
-
The bag is lifted using the thread tail.
-
The operator pulls the thread sharply to check seam strength.
-
An excessively long thread tail becomes caught in moving equipment.
Workers should therefore be instructed to inspect seam strength by applying force to the two bag edges rather than directly pulling one thread strand.
3.4. Needle thread tension is too loose
When the needle thread is too loose, the resulting loop becomes larger and does not grip the material tightly. Loose chain loops can shift after cutting, especially when the bag vibrates or is handled.
Common signs include:
-
Large loops on the underside.
-
A soft seam that stretches easily.
-
Uneven thread loops between stitches.
-
The chain tail unravels with relatively little force.
-
The loops visibly change position when the two bag edges are pulled.
Thread tension should be increased gradually in small increments, with a test run after each adjustment. Do not tighten the tension sharply because excessive tension can wrinkle the bag edge, break the thread, or increase heat around the needle.
3.5. Looper thread tension is unbalanced
In a two-thread chain stitch, needle-thread and looper-thread tension must work together. If the looper thread is too loose, the looper loop may not hold the needle thread securely. If the looper thread is too tight, the loop may be pulled out of position, preventing the final stitch from forming correctly.
Signs of imbalance include:
-
One thread lies almost straight while the other forms a large loop.
-
The seam leans toward one side.
-
The top surface looks good but the underside is loose.
-
The final stitch has a different shape from the stitches in the middle.
-
The problem occurs more frequently after changing the thread cone or rethreading the machine.
When adjusting a two-thread machine, do not focus only on the needle-thread tension knob. Check the entire path of both threads, including tension springs, thread guides, tension discs, and the looper.
3.6. Stitch length is too long
A longer stitch reduces thread consumption and can increase the speed at which each bag is completed. However, when the stitch spacing becomes too large, the number of connection points per unit length decreases.
Near the end of the seam, this can result in:
-
Fewer loops securing the thread tail.
-
Higher load on each stitch.
-
Greater sensitivity when one loop becomes loose.
-
Faster propagation of unraveling.
If chain-tail slippage occurs frequently, the current stitch length should be checked against the bag type and load weight.
Instead of making a large adjustment, the stitch length can be reduced gradually, for example by around 0.5–1 mm from the current setting, and then tested again.
Do not arbitrarily make the stitch too short. Excessively dense stitches can create a perforation effect and weaken the edge of woven PP bags, kraft paper, or laminated materials.
3.7. The final stitch is not formed completely
The end of the seam is often the point where the machine transitions from sewing on the material to forming a free chain outside the edge. If the bag edge leaves the presser foot too quickly, the needle and looper may fail to form the final loop completely.
Possible causes include:
-
The bag edge is pulled downward.
-
The operator pulls the bag away from the machine.
-
The conveyor runs faster than the sewing feed.
-
The presser foot no longer holds the material with sufficient pressure.
-
The bag is loose or tilted as it leaves the sewing head.
-
The cutting sensor activates too early.
When observed at low speed, the final loop may appear larger, more offset, or different from the preceding stitches.
3.8. The needle is bent, blunt, or incorrect
The needle directly affects the loop-formation process that allows the looper to catch the thread. A slightly bent needle may still penetrate the material but alter the position where the loop is formed. A blunt needle increases penetration force, pulls the thread more strongly, and can make the final stitch unstable.
Check:
-
Whether the needle is the correct system for the machine.
-
Whether the needle size matches the thread.
-
Whether the needle groove is facing the correct direction.
-
Whether the needle is fully inserted.
-
Whether the needle tip is worn, bent, or damaged.
-
Whether the needle eye has a sharp edge that can damage the thread.
If the problem begins after a needle change, incorrect needle orientation or incorrect insertion depth should be considered.
3.9. The looper does not pick up the thread loop consistently
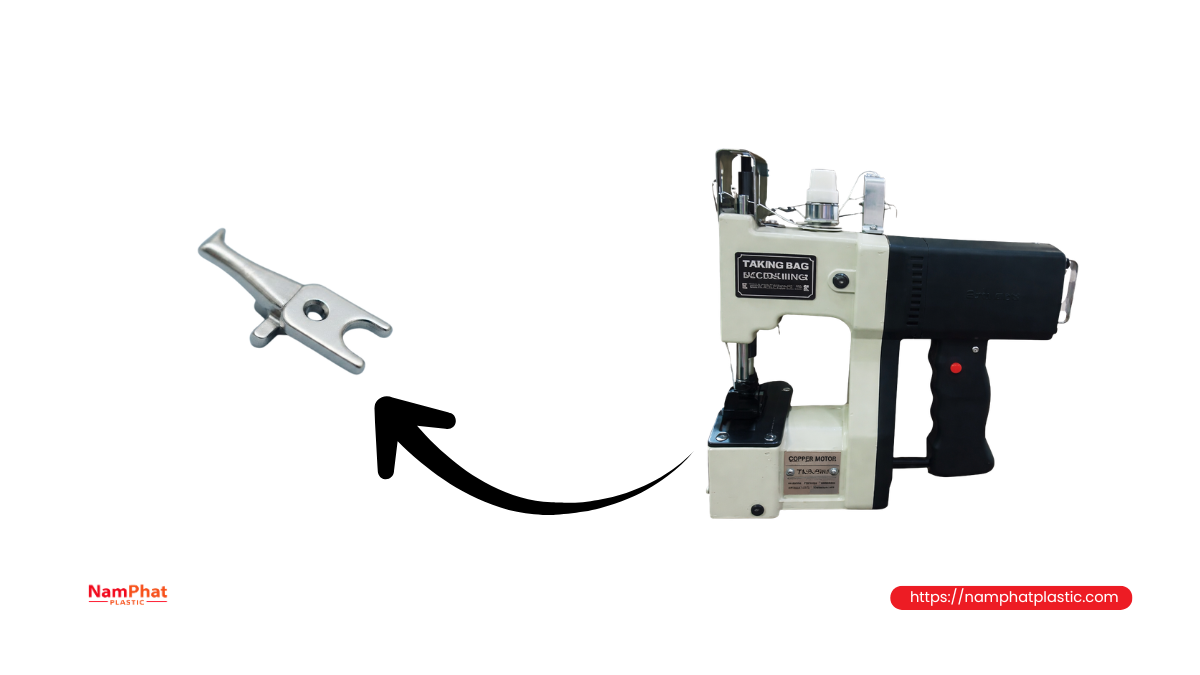
The position and timing relationship between the needle and looper determines whether the chain loop is formed correctly.
When the looper:
-
Passes too far from the needle.
-
Arrives too early or too late.
-
Has a worn tip.
-
Has burrs.
-
Contains thread dust, contaminated oil, or material debris.
The machine may form normal stitches at low speed but begin skipping stitches at high speed. Defective stitches near the cutting point make the seam end especially vulnerable to unraveling.
Needle-looper timing should be adjusted according to the technical documentation for the specific machine. Do not bend the looper or force it closer to the needle because this can cause collisions, needle breakage, and damage to the mechanism.
3.10. The thread cutter is blunt or pulls the thread before cutting
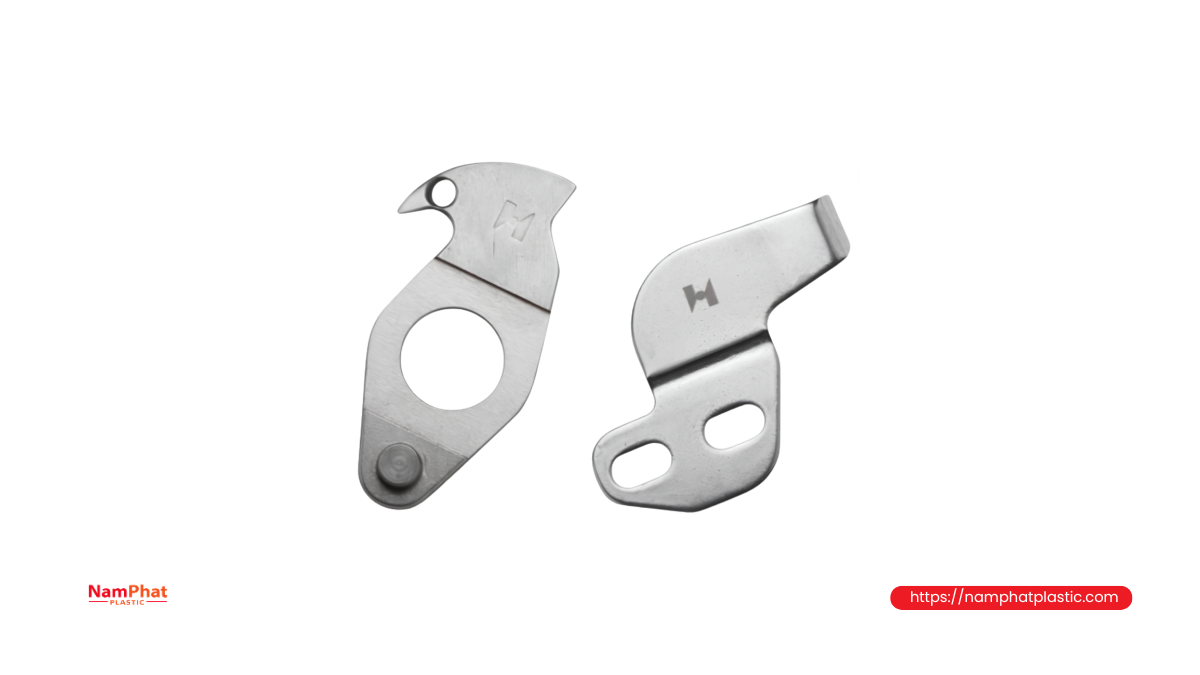
A properly functioning cutter should cut decisively. If the blade is blunt, the blade gap is incorrect, or the cutting mechanism moves too slowly, the thread may be pulled tight before it is actually severed.
This pulling force is transferred back into the final chain stitch and can loosen the loop before the bag leaves the machine.
Signs of a cutter problem include:
-
The thread end is frayed.
-
Tail length is inconsistent.
-
The cutter occasionally fails to cut the thread completely.
-
The thread stretches before breaking.
-
The cutter produces a heavy or irregular cutting sound.
-
The cutting position varies between bags.
The cutter should be cleaned, its sharpness checked, the pressure between the blades inspected, and the movement of the cutting mechanism verified. After replacing or sharpening the blade, check the cutting position again to prevent the cutter from cutting too close to the final stitch.
3.11. The thread is too smooth or the oil level on the thread is unsuitable
Some threads have a very smooth surface or contain a relatively high level of finishing oil. This characteristic can help the thread pass more easily through the thread guides and needle, but it may also reduce the friction that helps hold the chain loops together.
The tail may be more likely to slip when several factors occur together:
-
The thread tail is short.
-
The loops are loose.
-
The stitch length is long.
-
The bag surface is smooth.
-
The cutter is positioned close to the edge.
-
The operator pulls the thread tail directly.
A smooth thread should not automatically be considered a poor-quality thread. The appropriate thread must balance machine running performance, tensile strength, loop stability, and the friction needed to maintain the chain structure.
When changing supplier or thread lot, test the thread using the same machine settings and compare:
-
Tension stability.
-
Thread-break frequency.
-
Loop shape.
-
Chain-tail unraveling.
-
Fraying after passing through the needle.
-
Consistency from the beginning to the end of the cone.
3.12. The thread twist is unstable or the thread is fraying
Thread with an unsuitable twist level may untwist while passing through the thread-guiding system. By the time it reaches the needle and looper, the thread structure may no longer be stable, causing the chain loop to deform or reducing thread strength.
After cutting, the thread tail may:
-
Separate into several smaller strands.
-
Spread out.
-
Become caught in the chain loop.
-
Break partially.
-
Be pulled out of the final stitch more easily.
For plied or twisted thread, consistency of twist, tension of the individual component strands, and the quality of splices should be controlled.
3.13. The needle becomes too hot and weakens the thread
When the machine runs continuously at high speed, friction between the needle, thread, and material causes the needle temperature to rise. For thread with limited heat resistance, the thread surface may soften, shrink, partially melt, or lose strength.
If the weakened section is located near the final stitch, the thread may break immediately after cutting, creating an appearance similar to chain-tail slippage.
Signs include:
-
The thread end is hard or flattened.
-
Small plastic-like particles appear at the broken end.
-
Slight discoloration occurs.
-
The problem is less frequent at low speed and increases at high speed.
-
After the machine is stopped for a while, seam quality temporarily improves.
Possible measures include reducing needle heat, checking needle size, reducing friction along the thread path, using thread suitable for the machine speed, and avoiding excessive thread tension.
3.14. The sewing machine and conveyor speeds are not synchronized
In an automatic bag-mouth sewing line, the conveyor must move the bag at a speed compatible with the feed rate of the sewing head.
If the conveyor runs faster:
-
The bag stretches the seam.
-
The stitches may become elongated.
-
The bag edge is pulled away from the presser foot.
-
The final stitch may not form completely.
-
The thread tail is pulled immediately after cutting.
If the conveyor runs slower:
-
The bag becomes bunched or slack.
-
Stitch spacing becomes uneven.
-
The bag edge may rotate out of alignment.
-
The sewing head may form unstable thread loops.
-
The cutting sensor may activate at the wrong time.
Do not compare only the motor rotation speeds. Check the actual movement speed of the bag edge through the sewing head and conveyor under loaded conditions.
3.15. The bag edge is too soft, wrinkled, or not held straight
An unstable bag edge causes the needle to penetrate at inconsistent positions, changes the effective material thickness, and prevents the presser foot from applying uniform pressure.
Common problems occur when:
-
The bag mouth is not flattened properly.
-
The bag is overfilled.
-
The material area above the seam is too narrow.
-
The bag edge is folded into uneven layers.
-
Woven PP material is frayed at the edge.
-
Paper or laminated film is damaged along the edge.
-
The operator feeds the bag at an angle.
A good-looking seam depends not only on the machine and thread. How the bag mouth is prepared before sewing has a significant effect on the strength of both the first and final stitches.
4. How to prevent chain stitch tails from slipping after cutting
Leave a sufficiently long chain section before cutting
This is the first measure to try because it is easy to implement and has little impact on the machine structure.
Suggested procedure:
-
Allow the machine to sew beyond the bag edge.
-
Form an additional free chain section.
-
Cut at a safe distance from the final stitch.
-
Check whether the thread tail still unravels on its own under vibration or light pulling.
-
Test several tail lengths to determine the appropriate range.
The optimal length is not necessarily the longest possible. An excessively long tail may become caught in the conveyor, snag on another bag, or reduce appearance quality. The goal is to find a length that provides sufficient safety without causing interference.
Secure the seam end
Depending on the equipment and product requirements, one of the following methods may be used:
-
Tie the final chain section into a knot.
-
Tuck the thread tail into the chain loop using the correct technique.
-
Fold the chain tail back toward the bag edge.
-
Sew back over a short section if the machine and process permit.
-
Use tape or a label to secure the thread tail.
-
Install an automatic thread-locking or securing mechanism.
-
Use a dedicated thread-cutting and retaining device.
For high-volume production lines, manual knotting may reduce productivity. In such cases, priority should be given to adjusting the cutting mechanism, chain-forming time, and an automatic tail-retention solution.
Adjust thread tension gradually
Do not turn multiple adjustment knobs at the same time. A suitable approach is:
-
Record the current settings.
-
Select one factor to adjust.
-
Make a small change.
-
Sew a test batch of at least 10–20 bags.
-
Compare the stitch shape on both sides.
-
Check the chain tail immediately after sewing and after shaking the bag.
-
Only move to another factor after confirming the result.
The seam is acceptable when the loops are even, not excessively loose, the material is not wrinkled, and the thread is not stretched to a point where it can easily break.
Recheck stitch length
When the chain tail frequently slips, check whether the current stitch length is too long for the bag type and filled-product weight.
Instead of making a large reduction, decrease the stitch length gradually and monitor:
-
Chain-tail slippage.
-
Bag-edge tearing.
-
Thread consumption.
-
Production speed.
-
Needle temperature.
-
Seam appearance.
The goal is not to create as many stitches as possible, but to create enough connection points without weakening the material.
Adjust the thread-cutting timing
On an automatic line, the cutter should operate after:
-
The final stitch on the material has been completed.
-
The bag has moved an appropriate distance beyond the sewing head.
-
The machine has formed enough chain outside the edge.
-
Conveyor tension is not pulling strongly on the thread tail.
It may be necessary to adjust:
-
The position of the bag-edge detection sensor.
-
The delay before cutting.
-
Cutter travel.
-
Cutter position relative to the presser foot.
-
Cutter closing speed.
-
The thread-retaining mechanism during cutting.
If the cutter pulls the thread while cutting, address the cutter before changing thread tension.
Synchronize the sewing head with the conveyor
To check synchronization, mark a point on the bag edge and observe its movement through the sewing area.
Signs of poor synchronization include:
-
The bag is stretched after passing the presser foot.
-
The bag bunches before the sewing head.
-
Stitch length changes according to load.
-
The seam becomes angled.
-
The final stitch is unusually long.
-
The chain tail is pulled strongly immediately after cutting.
Speed adjustments should be carried out with actual production bags under load. Running the machine without a load may not accurately reflect material slippage and conveyor pulling forces.
Replace the needle and inspect the looper regularly
A replacement schedule should be based on operating hours or the number of bags sewn rather than waiting until the needle breaks.
The needle should be replaced early when there are:
-
Skipped stitches.
-
Abnormal thread fraying.
-
Heavy needle penetration noise.
-
Oversized needle holes in the bag.
-
Misaligned seams.
-
Increased thread-break frequency.
-
Unstable chain tails.
After replacing the needle, check the needle orientation and its position relative to the looper.
Clean the thread path and stitch-forming mechanism
Thread dust, contaminated oil, plastic fragments, or paper fibers can cause tension to fluctuate continuously. One bag may have a good seam while the next has a loose one.
Areas that should be cleaned include:
-
Thread tension discs.
-
Take-up springs.
-
Thread guides.
-
Needle bar.
-
Looper.
-
Needle plate.
-
Feed dogs.
-
Presser foot.
-
Thread cutter.
-
Sensor area.
After cleaning, rethread the machine according to the correct threading diagram. Skipping one thread guide can significantly change thread tension.
Control the quality of bag-sewing thread
When selecting thread, do not rely only on cone weight or nominal size. Consider:
-
Tensile strength.
-
Elongation.
-
Diameter consistency.
-
Twist.
-
Fraying level.
-
Heat resistance.
-
Tension stability.
-
Splice quality.
-
Finishing oil level.
-
Loop-forming performance on the machine being used.
A thread that performs well on a low-speed machine may not necessarily be suitable for a high-speed automatic line. The thread should be tested under actual production conditions before making a large-scale change.
Troubleshooting table based on observed symptoms
| Observed symptom | Most likely cause | First inspection point |
| Seam continuously unravels from the cut end | Thread tail is too short or the seam end is not secured | Increase the chain section before cutting |
| Thread unravels only when pulled on one strand | Thread is being pulled in the chain-release direction | Review operator handling and secure the tail |
| Thread end is frayed after cutting | Blunt cutter or excessive thread friction | Check cutter, needle, and thread path |
| Large thread loops appear on the underside | Needle or looper thread tension is too low | Adjust tension gradually |
| Some bags unravel while others do not | Skipped stitches, unstable cutter, or vibrating bag edge | Check needle, looper, sensor, and conveyor |
| Problem increases at high speed | Incorrect timing, needle overheating, or speed mismatch | Reduce speed for comparison, then check timing |
| Final stitch is longer than the others | Bag is pulled away from the machine or cutting occurs too early | Check conveyor speed and cutting timing |
| Thread end shows signs of melting or hardening | Excessive needle temperature | Check needle, speed, and friction |
| Seam wrinkles and still unravels | Excessive tension or unbalanced tension | Reduce and rebalance thread tension |
| Thread-tail length varies | Cutter or sensor operates inconsistently | Check cutter mechanism and sensor position |
5. Quick troubleshooting procedure at the factory
When chain stitch tail slippage is detected after cutting, inspect the machine in the following order:
Step 1: Identify how the seam is unraveling
Gently pull the thread tail and observe:
-
Does the thread unravel as complete loops or break?
-
Does it unravel in one direction or both directions?
-
Does the final stitch differ from the others?
-
Is the thread end frayed, melted, or crushed?
Step 2: Increase the chain-tail length
Allow the machine to continue sewing beyond the bag edge for longer and cut farther away from the final stitch. If the problem decreases significantly, the primary cause is likely the cutting position or end-securing method.
Step 3: Check the cutter
Perform several cuts and compare thread-tail lengths. If the lengths are inconsistent or the thread ends are frayed, the cutter needs attention.
Step 4: Check stitch shape
Inspect both the top and underside. If there are loose loops, tilted stitches, or skipped stitches, adjust the tension, needle, and looper.
Step 5: Reduce speed for comparison
Run the machine at a lower speed. If the problem decreases significantly, focus on:
-
Needle-looper timing.
-
Needle heat.
-
Cutter.
-
Vibration.
-
Conveyor synchronization.
-
Thread feeding.
Step 6: Install a new needle
Replacing the needle with the correct system and size is a quick, low-cost diagnostic step that can eliminate several difficult-to-detect causes.
Step 7: Test another thread cone
Use a thread cone that has already been verified to run properly. If the problem disappears, inspect the thread lot, twist, surface smoothness, or splice quality.
Step 8: Test multiple bags
Do not draw a conclusion after one or two products. Sew a small batch and inspect the seam after:
-
Shaking the bag.
-
Folding the bag mouth.
-
Stacking the bags.
-
Pulling the two edges.
-
Allowing the seam to stabilize for a period of time.
-
Simulating actual handling conditions.
6. How to establish inspection standards for the beginning of the seam
To prevent the problem from recurring, the factory should convert operator experience into measurable standards.
An inspection form may include:
-
Minimum thread-tail length.
-
Distance between the final stitch and bag edge.
-
Number of stitches per unit length.
-
Stitch appearance on the top and underside.
-
Condition of the thread end after cutting.
-
Slippage under light pulling.
-
Cutter condition.
-
Thread lot number.
-
Needle code and replacement time.
-
Sewing-head speed and conveyor speed.
-
Defect rate per number of bags inspected.
Samples should be checked at three points:
-
At the beginning of the shift.
-
After changing the thread cone or needle.
-
After the machine has been running hot for a period of time.
This method helps identify defects that occur only after the machine temperature rises or tension changes as the thread cone diameter decreases.
7. Should you increase thread size to prevent chain stitch tail slippage?
Increasing thread size can improve seam tensile strength in some cases, but it is not a direct solution for every type of chain-tail slippage.
If the cause is cutting too close, a skipped final stitch, or pulling the thread in the unraveling direction, a larger thread can still unravel.
In addition, increasing thread size without changing the needle and machine settings may cause:
-
Higher friction.
-
Higher needle temperature.
-
Difficulty forming loops.
-
Skipped stitches.
-
Increased thread tension.
-
Bag-edge tearing.
-
Higher thread consumption.
Thread size should only be increased when the existing tensile strength is insufficient for the load, while also checking compatibility with the needle, looper, and machine speed.
8. Common mistakes when dealing with thread slippage
Tightening the thread tension to the maximum
Excessive tension does not guarantee a more secure seam end. Instead, it can weaken the thread, wrinkle the seam, and increase the risk of breakage when the bag is subjected to impact.
Cutting the thread tail extremely short to make the seam look cleaner
A short thread tail provides a smaller safety margin. Appearance needs to be balanced against seam security.
Replacing the thread without checking the machine
A good-quality thread cannot compensate for a bent needle, incorrect looper timing, or a blunt cutter.
Inspecting only the top side of the seam
Many chain-stitch problems are more visible on the underside. Inspecting only one side can cause loose loops or incomplete looper engagement to be overlooked.
Adjusting multiple parameters at the same time
If thread tension, speed, stitch length, and cutter position are all changed simultaneously, it becomes difficult to determine which factor actually solved the problem.
Evaluating the seam immediately after sewing
Some seams only unravel after the bag is shaken, folded, or stacked. Inspection should therefore simulate actual use and handling conditions.
Conclusion
Chain stitch tail slippage after cutting is often caused by a combination of factors, including chain-stitch structure, thread-tail length, cutting position, tension, final-stitch quality, cutter condition, needle, looper, and conveyor speed.
In practice, inspection should be prioritized in the following order:
-
Identify whether the problem is actual unraveling or thread breakage.
-
Increase the chain section beyond the bag edge.
-
Check cutter sharpness and cutting timing.
-
Balance thread tension.
-
Inspect the needle, looper, and final stitch.
-
Synchronize sewing-head speed with conveyor speed.
-
Test with a stable thread lot.
-
Inspect the seam under actual handling and transportation conditions.
Correctly addressing the root cause not only helps prevent thread unraveling but also reduces defective bags, rework, product leakage, and improves the stability of the entire bagging and packaging line.
Frequently asked questions
1. Why does the seam look strong but unravel as soon as the thread tail is pulled?
This can occur because of the structure of the chain stitch. If the thread tail is pulled in the direction that releases the loops and the seam end has not been secured, the loops can unravel continuously. The thread tail should be left long enough and an appropriate securing method should be used.
2. How long should the thread tail be?
There is no single length suitable for every machine. Testing can begin at around 50–80 mm and then be adjusted according to stitch type, bag material, product weight, and handling conditions.
3. Does a longer thread tail always make the seam harder to unravel?
A longer tail generally provides a larger safety margin, but an excessively long tail may become caught in the conveyor or another bag. More important than length alone is that the final stitch is formed correctly and the thread tail is not pulled in the unraveling direction.
4. Can adhesive be used to secure the seam end?
Tape or another additional securing method can be used for certain applications. However, it should not replace proper adjustment of the machine, cutter, and thread tension.
5. Is a single-thread chain stitch more likely to unravel than a two-thread chain stitch?
A single-thread chain stitch is generally more sensitive to thread-tail pulling because of its loop structure. A two-thread chain stitch may be more stable, but it can still unravel if the final stitch is defective or one of the two threads is cut too close.
6. Why does the problem only appear after the machine has been running for a long time?
Long periods of operation can increase needle temperature, cause tension to change, allow thread dust to accumulate, or affect cutter performance. The machine should be inspected both immediately after startup and after it has reached operating temperature.
7. Can switching to a larger thread solve the problem?
Not necessarily. A larger thread can improve tensile strength in some cases. If the actual cause is a skipped stitch, incorrect cutter operation, or an excessively short thread tail, the problem may continue.
>>> See also:
- 0 Comment


